Fraud Detector
Extension Installation
For Magento Marketplace Customers
-
Find the Composer name and version of the extension in the extension's composer.json file.
-
Login to your SSH and run:
- composer require mavenbird/module-fraud-detector
- Wait for Composer to finish updating your project dependencies and make sure there aren't any errors.
-
To verify that the extension installed properly, run the command:
- php bin/magento module:status Mavenbird_FraudDetector
- By default, the extension is probably disabled.
- Enable the extension and clear static view files:
- php bin/magento module:enable Mavenbird_FraudDetector --clear-static-content
- php bin/magento setup:upgrade
- For Magento version 2.0.x to 2.1.x - php bin/magento setup:static-content:deploy
- For Magento version 2.2.x & above - php bin/magento setup:static-content:deploy --f
- php bin/magento cache:flush
For Mavenbird Customers
- Extract the zip folder and upload our extension to the root of your Magento 2 directory via FTP.
- Login to your SSH and run below commands step by step:
- php bin/magento setup:upgrade
- For Magento version 2.0.x to 2.1.x - php bin/magento setup:static-content:deploy
- For Magento version 2.2.x & above - php bin/magento setup:static-content:deploy --force
- php bin/magento cache:flush
The Fraud Detector Extension for Magento 2 helps prevent fraud by calculating a risk score for every order. Using a score-based algorithm, it evaluates potential threats on a scale of 1 to 100, allowing merchants to take proactive action against high-risk transactions.
- Automatically calculate a risk score for each order (1 to 100).
- Set risk score limits to automatically flag or cancel orders.
- Assess orders in real-time during checkout.
- Auto-cancel or hold high-risk orders.
- Receive alerts for suspicious transactions.
- View comprehensive risk analysis in the admin panel.
Configuration
Configure the Fraud Detector extension in Magento 2 under Stores > Configuration > Mavenbird Extensions > Fraud Detection.
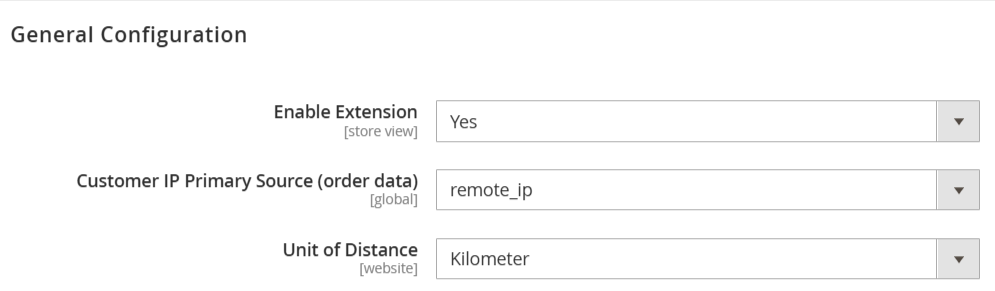
Enable Extension: A toggle to enable or disable the fraud detection extension for the store view.
Customer IP Primary Source (order data): Setting to define the primary source for obtaining the customer's IP address.
Unit of Distance: Option to select the unit of measurement for distance.
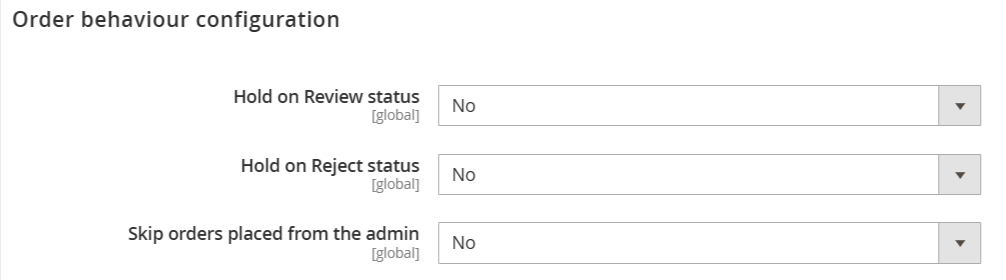
Hold on Review Status: Setting to determine if orders should be held for review.
Hold on Reject Status: Option to specify whether to hold orders marked as rejected.
Skip Orders Placed from the Admin: Option to skip fraud checks for orders placed via the admin panel.
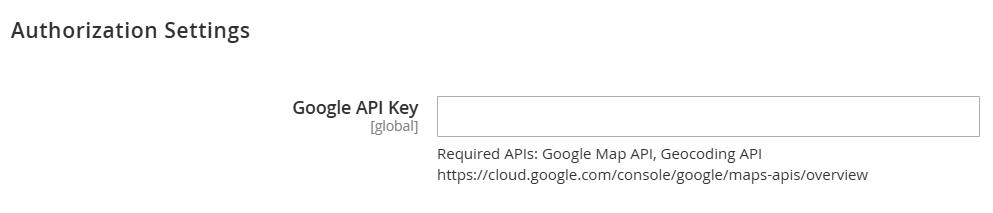
Google API Key: Input field for the Google API key needed for functionality. Indicates the need for required APIs: Google Map API and Geocoding API.
Managing Fraud Risk Ratings
The Fraud Detection extension evaluates all incoming orders in your store, assigning them a Risk Score based on a multi-factor assessment defined by specific indicators and rules.
This score will be displayed in the Sales -> Orders grid, represented by a colored marker in the Fraud Score column alongside the numerical rating.
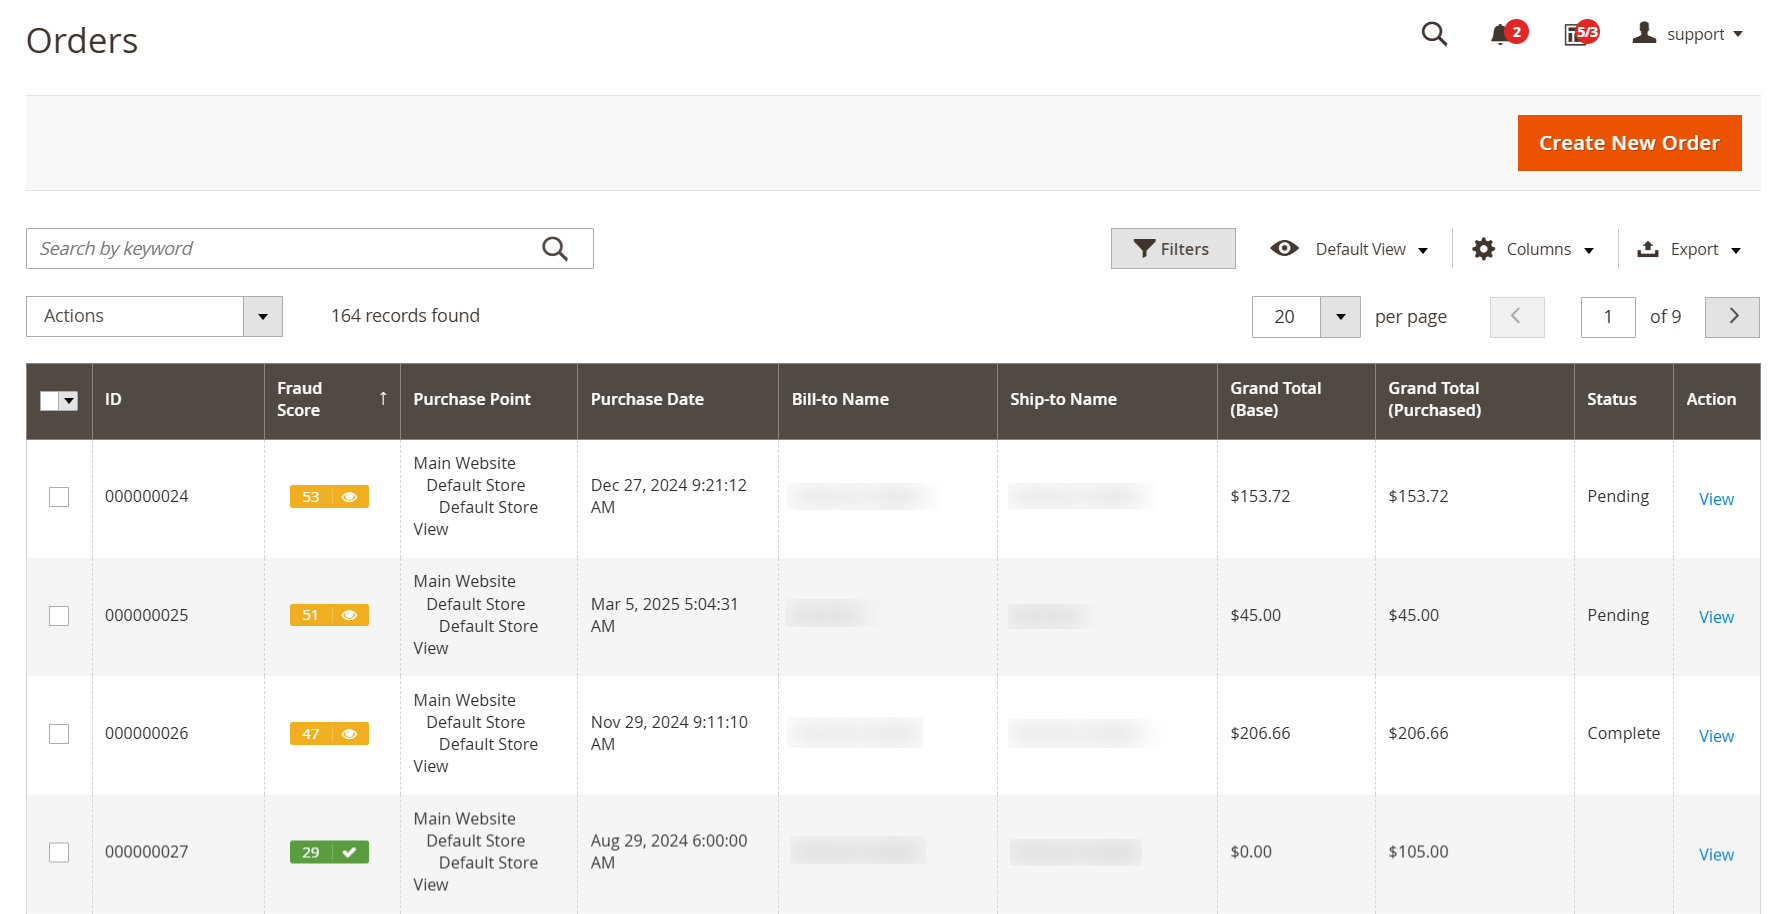
The color of the indicator represents three distinct Fraud Risk levels:
- Green: Accept level, indicating that orders are safe to process. This corresponds to a score ranging from 0 to 20 by default.
- Yellow: Review level, alerting you to inconsistencies in the order's details. This level corresponds to a score between 30 and 80 by default.
- Red: Reject level, the highest risk category, representing a score of 80 to 100, marking the order as potentially dangerous.
The lowest possible score is 0, indicating that all checks have been passed and there is no indication of fraud. The highest score of 100 signifies a complete failure of all checks, indicative of fraudulent activity.
This numerical score is derived from a collection of built-in indicators that are aggregated and evaluated against the defined levels. You have the option to adjust these score boundaries as needed.
Setting Up Fraud Scores
Our extension generates Fraud Scores based on a series of indicators and rules. Each indicator represents an individual check, and the results are presented in a dedicated tab on the Order Edit page.
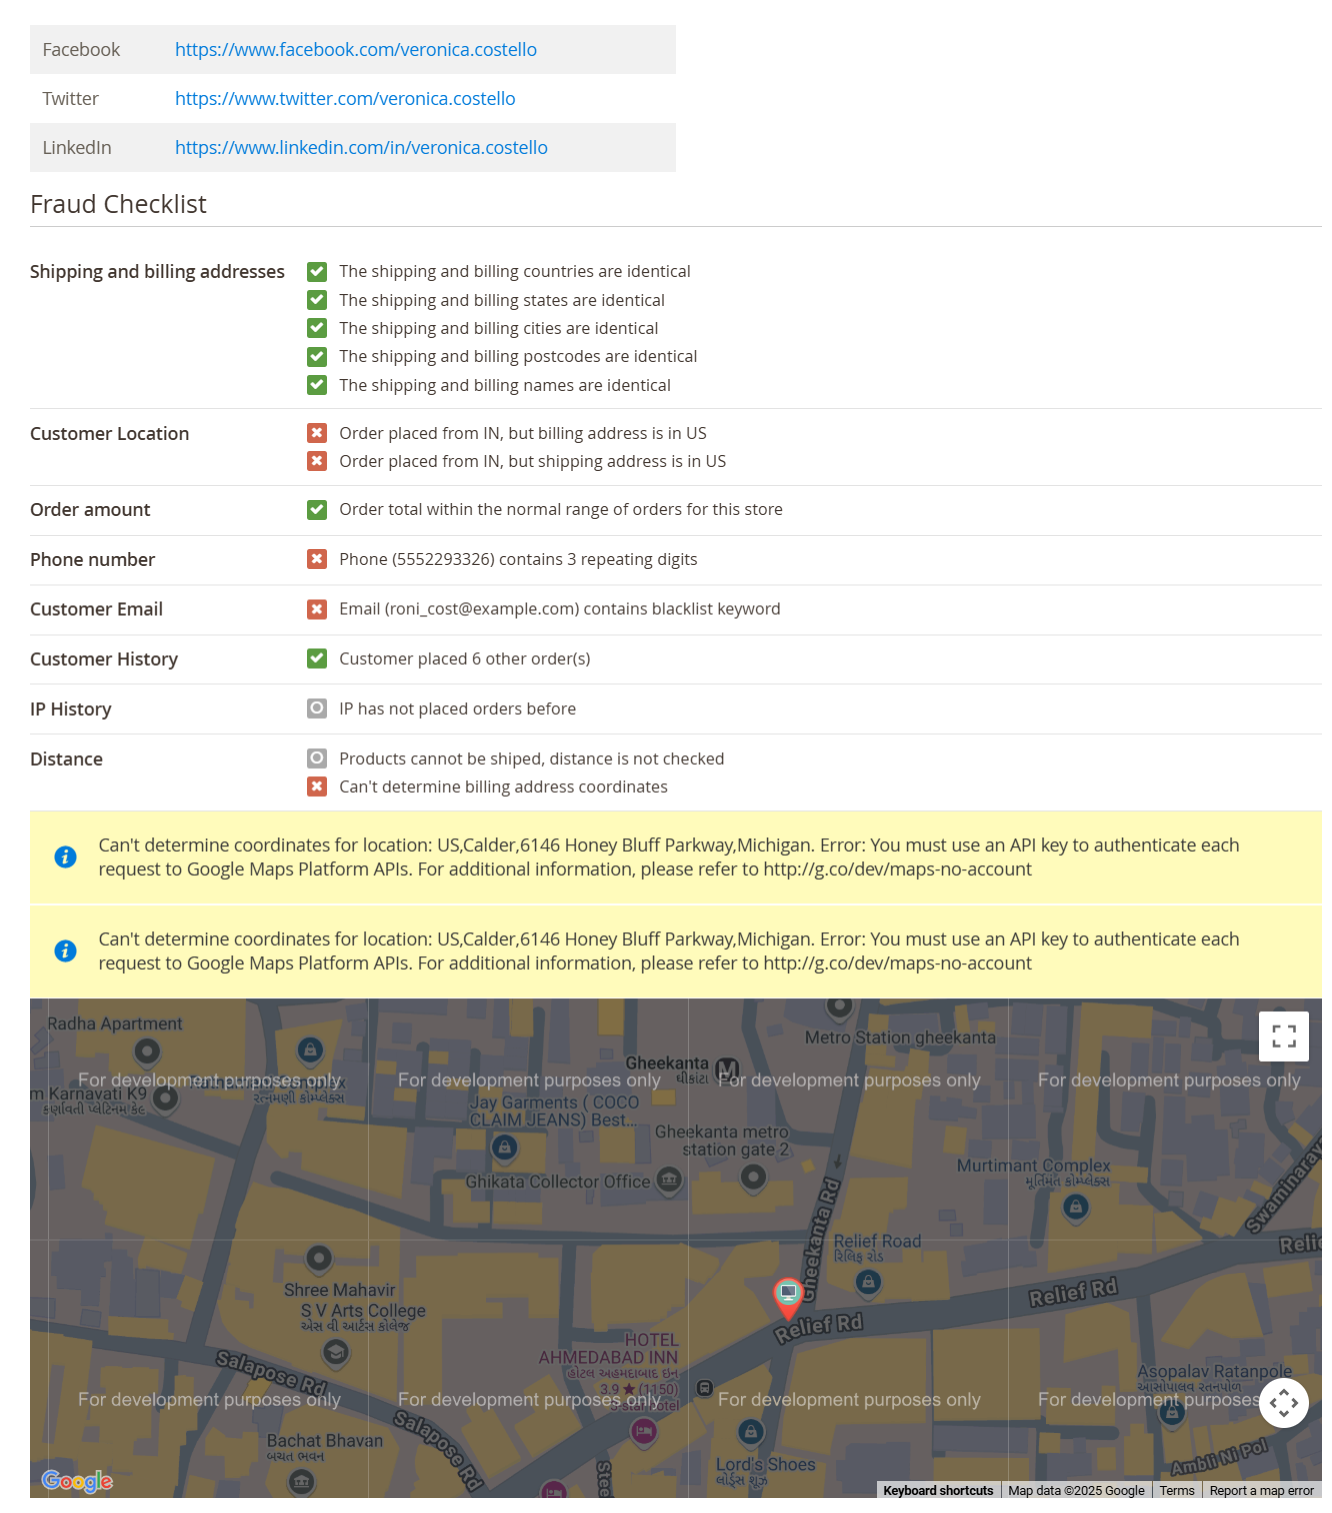
Social Network Verification: The Social Network Check is displayed first, above the Fraud Checklist section, and includes links to social media profiles that may belong to the customer:
- Facebook: Links to a personal Facebook profile.
- Twitter: Links to a Twitter account.
- LinkedIn: Links to a LinkedIn profile.
The remaining indicators are listed in the Fraud Checklist section, each with its own significance for fraud detection. While our extension provides effective weights for each indicator, you can adjust them to suit your specific needs.
Indicator Descriptions:
Shipping and Billing Addresses: Compares shipping and billing addresses; they must match to pass.
Customer Location: Compares the country in the addresses with the country indicated by the IP address; they must match to pass.
Order Amount: Measures the average order total for the store and compares it to the current order's total; significant deviations may cause the check to fail.
Phone Number: Analyzes phone numbers for patterns indicating potential fraud, such as repetitive sequences or unusual lengths.
Customer Email: Examines emails for risky patterns; emails should not contain parts of the customer’s name or blacklisted terms.
Customer History: Provides statistics on the customer's sales history, including:
- Quantity of Completed Orders: Total orders fulfilled.
- Quantity of Refunded Orders: Total refunds issued.
- Quantity of Cancelled Orders: Total orders canceled.
IP History: Similar to Customer History but focuses on the IP address; most orders should come from the same IP to pass.
Distance: A geo-based check measuring the distance between the customer’s actual location (based on IP) and the billing/shipping address; they must match to pass.
Location: An additional check that visually highlights the actual customer location, complementing the Distance check.
High-Risk Countries: This indicator appears at the top of the checklist and is added by the Fraud Detection Rule. It holds high priority and can flag an order as Fraud based solely on matching conditions. For more details, refer to the Fraud Detection Rules section.
Modifying Indicator Importance
To modify the importance of indicators, navigate to System -> Fraud Detection -> Fraud Risk Score and follow these steps:
- Click the Configure button to access the Risk Configuration Page.
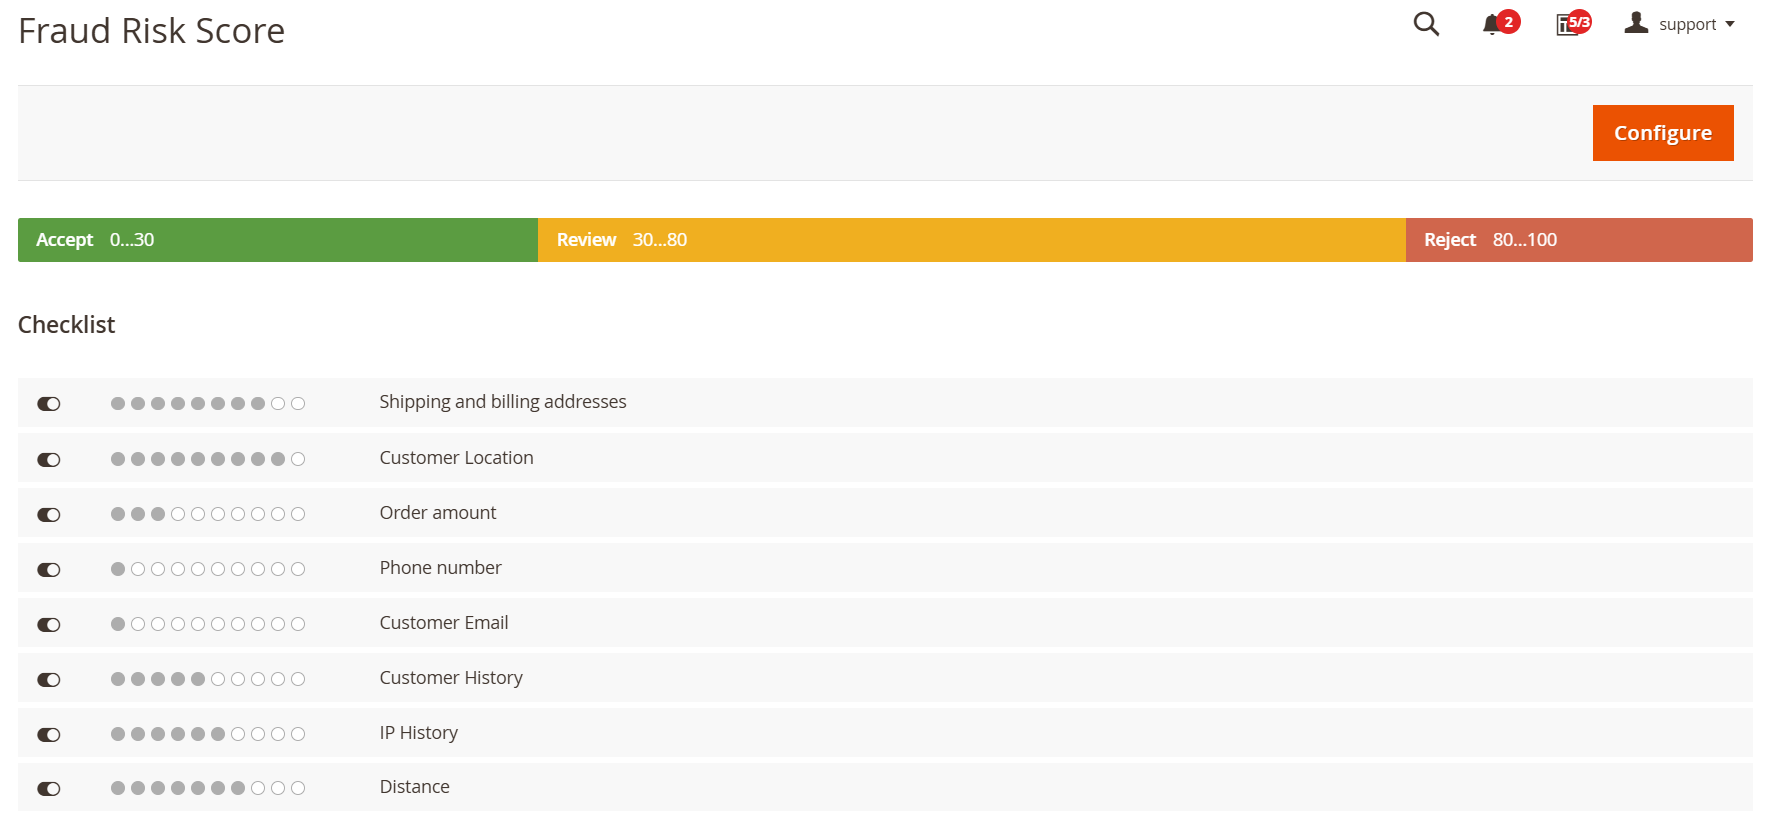
You can customize the properties of the indicators using the following columns:
- Status: Enables you to activate or deactivate the indicator.
- Importance: This column appears only when the Status is enabled. You can assign a weight to the indicator ranging from 0 (not important) to 10 (critical).
- Rule: Displays the name of the indicator. This is predefined and cannot be altered.
Once you make adjustments to the properties, the fraud levels for the last 10 orders will be recalculated and shown on the right side of the pane. This feature helps you verify if the importance levels are set correctly.
After making your changes, click Save Configuration.
From this point forward, our extension will evaluate orders and assign scores based on these indicators.
However, keep in mind that these scores can be overridden by Fraud Score Rules, allowing for a more flexible approach to assessing orders for fraud.
Custom Fraud Detection Rules
Custom rules enable you to tailor indicators for assessing orders for fraudulent activity. These rules take precedence over predefined indicators, offering enhanced flexibility and control.
You can find all custom rules in the dedicated grid under System -> Fraud Detection -> Custom Rules.
We recommend reviewing the examples provided before creating your own rules.
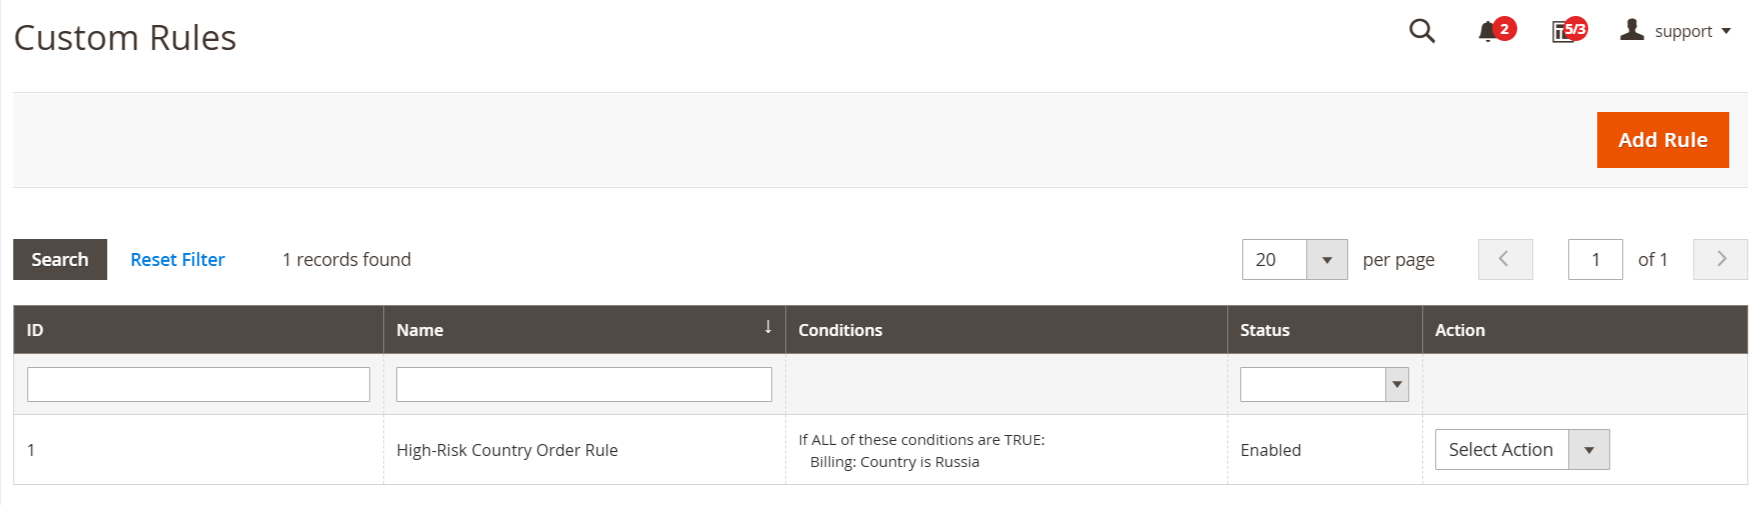
Creating a New Fraud Score Rule:
To create a new Fraud Score Rule, navigate to System -> Fraud Detection -> Custom Rules and click the Add Rule button. This will take you to the Rule creation page, which consists of two main sections:
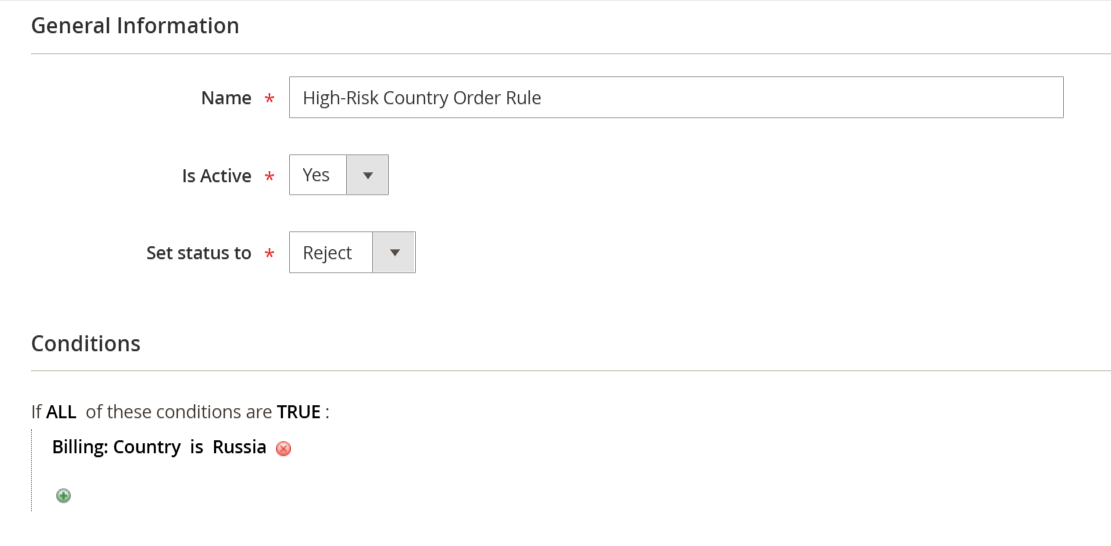
General Information: This section defines the properties and actions to be assigned to the order when conditions are met:
- Name: Provide a descriptive name for the Rule that will be displayed as an indicator in the Fraud Risk Score for the order.
- Is Active: Indicates whether the rule is currently active and applicable to orders.
- Set Status to: Allows you to assign a Risk Level to the order, overriding the predefined indicators.
Conditions: This section specifies the conditions that, once met, will trigger the rule.