Admin Actions Log
Extension Installation
For Magento Marketplace Customers
-
Find the Composer name and version of the extension in the extension's composer.json file.
-
Login to your SSH and run:
- composer require mavenbird/magento2-admin-action-log
- Wait for Composer to finish updating your project dependencies and make sure there aren't any errors.
-
To verify that the extension installed properly, run the command:
- php bin/magento module:status Mavenbird_AdminActionLog
- By default, the extension is probably disabled.
- Enable the extension and clear static view files:
- php bin/magento module:enable Mavenbird_AdminActionLog --clear-static-content
- php bin/magento setup:upgrade
- For Magento version 2.0.x to 2.1.x - php bin/magento setup:static-content:deploy
- For Magento version 2.2.x & above - php bin/magento setup:static-content:deploy --f
- php bin/magento cache:flush
For Mavenbird Customers
- Extract the zip folder and upload our extension to the root of your Magento 2 directory via FTP.
- Login to your SSH and run below commands step by step:
- php bin/magento setup:upgrade
- For Magento version 2.0.x to 2.1.x - php bin/magento setup:static-content:deploy
- For Magento version 2.2.x & above - php bin/magento setup:static-content:deploy --force
- php bin/magento cache:flush
Admin Actions Log Extension for Magento 2 is used to increase your store security and protect data from malware. You can have a watch on the admin panel to see what changes are made.
Key Features
- Tracking all logged actions automatically
- Manage log details for a certain time period
- Recent changes of items can be restored
- Notify every time when logging in
- All activity of sessions can be managed smoothly
- History of admin can be monitored
General Settings
To configure general extension settings, please go to Stores → Configuration → MAVENBIRD EXTENSIONS → Admin Actions Log.
Log Settings
Expand the Log Settings section
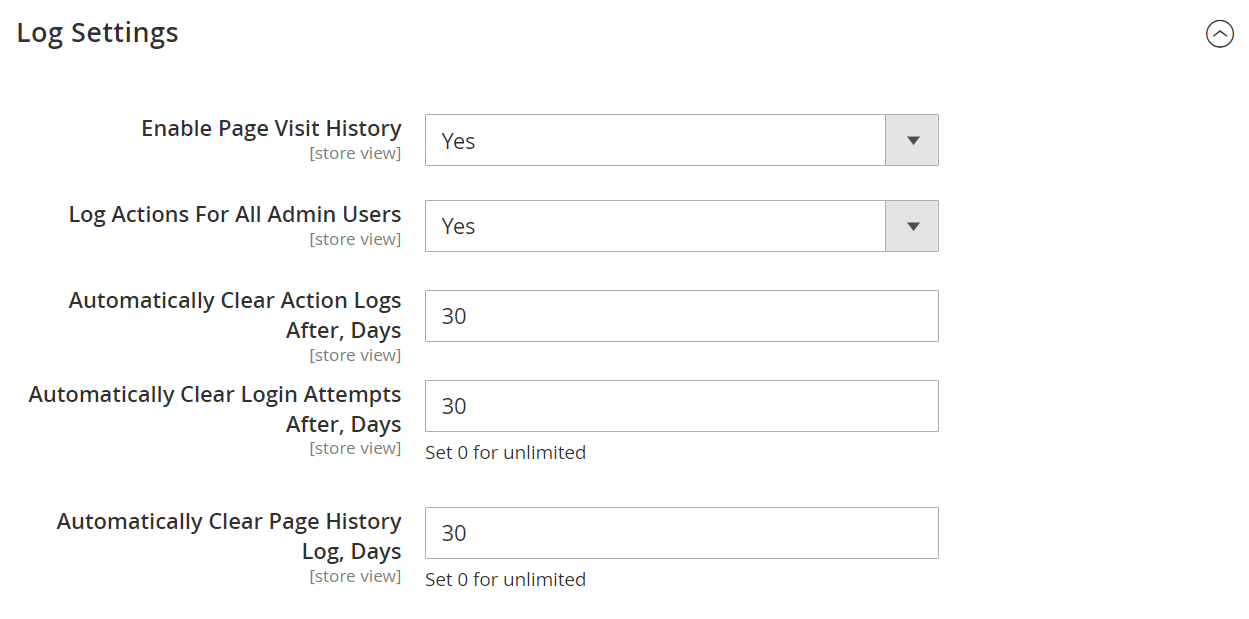
- Enable Page Visit History: If you wish to collect all page history visited by the administrators, set this option to Yes.
- Log Actions For All Admin Users: To keep track of all admin behavior, set this option to Yes. If you just want to log actions for specific administrators, choose No.
- Admin Users To Log Actions For: Enter the specific users whose actions will be logged.
- Automatically Clear Action Logs After, Days: Specify the number of days after which action logs will be automatically erased.
- Automatically Clear Page History Log, Days: Enter the number of days after which all page history will be automatically erased. Set it to 0 for unlimited retention.
Database Installation
To install the Admin Actions Log database, go to the configuration settings. You can get the databases or import your own.
To download a modified CSV dump file and import it into your database, press the Download and Import button.
Use the Import option to import files from your own source. The file path should be as follows:
var/mavenbird/geoip/GeoLite2-City-Blocks-IPv4.csv var/mavenbird/geoip/GeoLite2-City-Blocks-IPv6.csv var/mavenbird/geoip/GeoLite2-City-Locations-en.csv
Geo Location

- Use Geo IP: This dropdown option enables or disables the use of Geo IP technology to log the location of admin users based on their IP address. The options are Yes or No. This setting applies globally across all store views.
Restore Settings
Please go to System → Actions Log to see the Action Log of all administrators. The actions are logged only for the users you’ve specified on the Settings page.
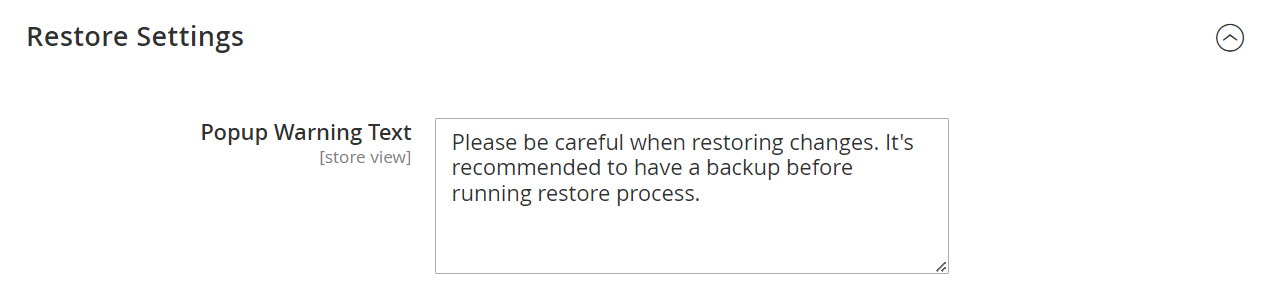
- Popup Warning Text: A warning message will be displayed to alert users about the importance of caution when restoring changes. It emphasizes the necessity of having a backup before proceeding with the restore process.
Email Successful Logins To Admin
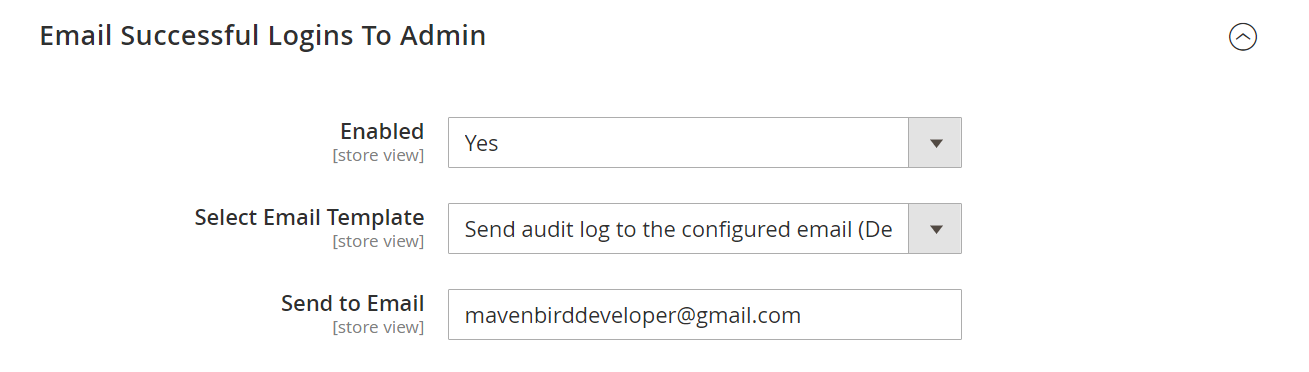
- Enabled: This option is set to "Yes," indicating that email notifications for successful admin logins are active.
- Select Email Template: Administrators can choose an email template for the notification. The current selection is set to send an audit log to the configured email.
- Send to Email: The designated email address for receiving these notifications is provided.
Email Unsuccessful Logins To Admin
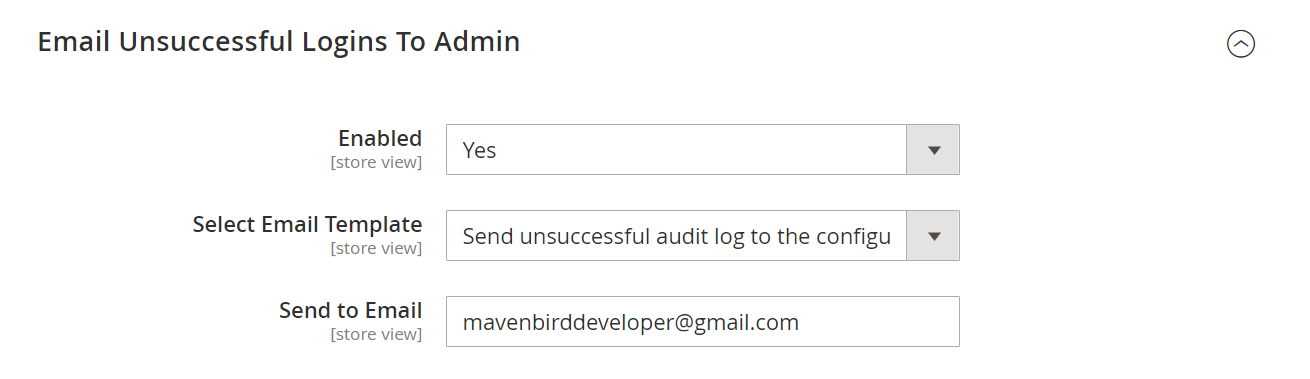
- Enabled: This feature is activated ("Yes"), ensuring that the system notifies the admin of unsuccessful login attempts.
- Select Email Template: The email template for these notifications is configured to send an unsuccessful audit log to the designated email.
- Send to Email: Notifications will be sent to the specified email address.
Email Suspicious Logins To Admin
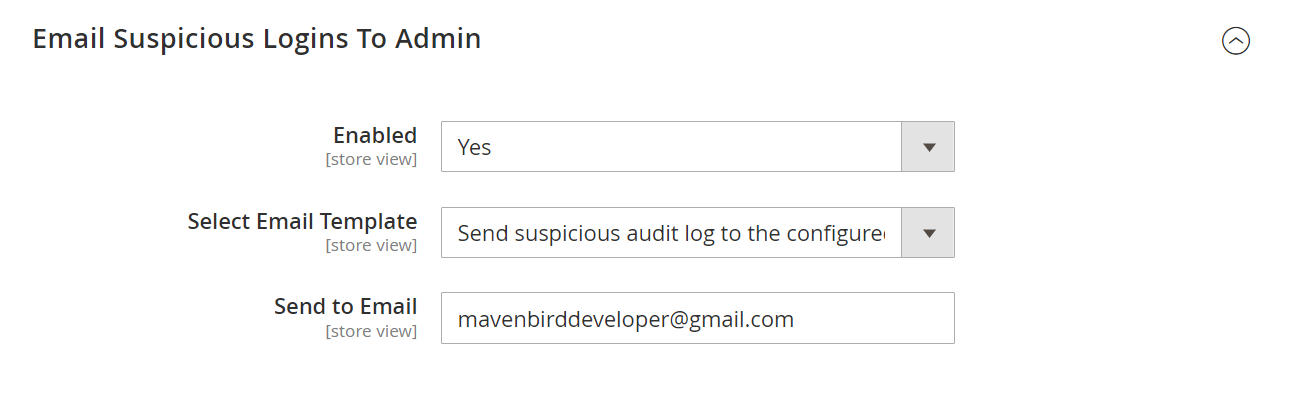
- Enabled: This setting is activated ("Yes"), allowing the system to send notifications for suspicious login attempts.
- Select Email Template: The template for the email notification is set to send a suspicious audit log to the configured email.
- Send to Email: Notifications will be sent to the specified email address.
Action Log
Go to System → Admin Actions Log → Actions Log to see the Action Log of all administrators. The actions are only logged for the users on the Settings page that you have entered.
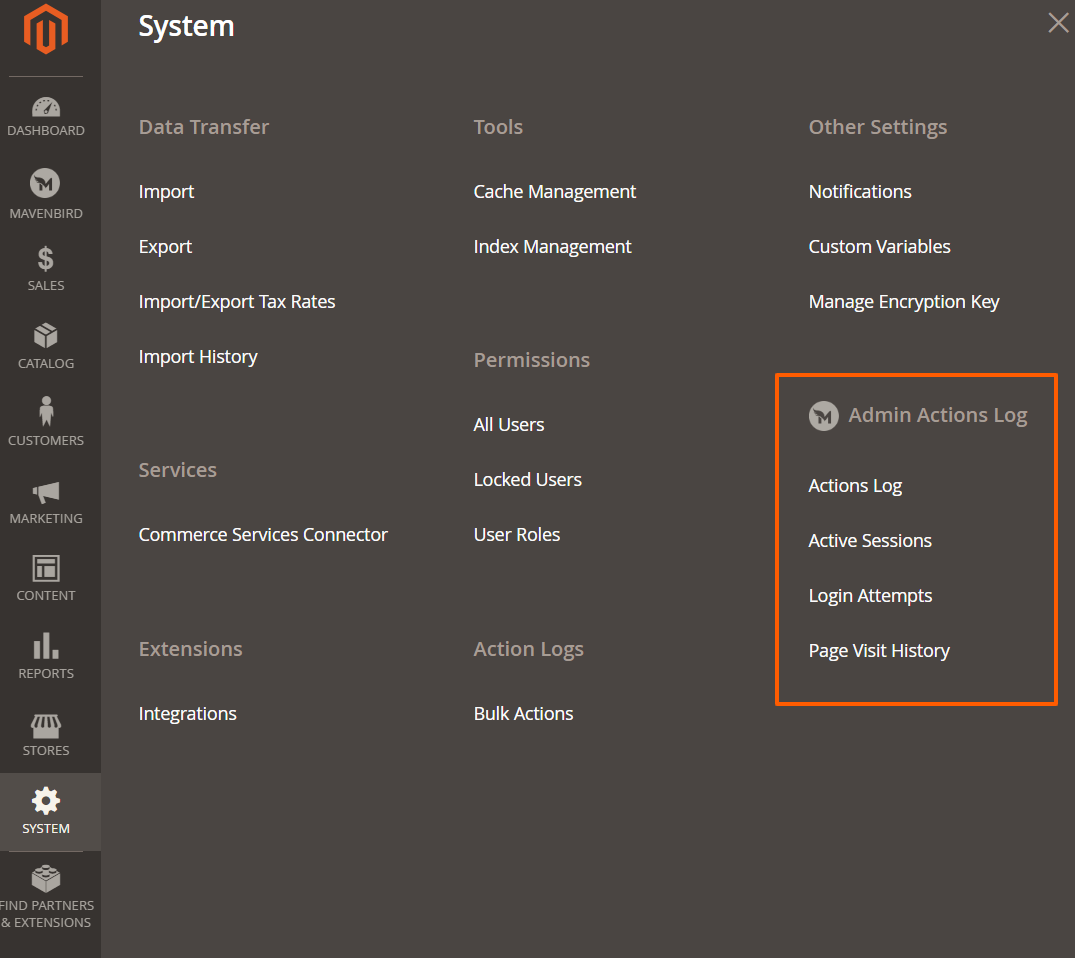
- Clear Log: This button allows administrators to remove log entries.
Action Log Table Details:
- Date: The timestamp of when the action occurred.
- Item ID: A unique identifier for the item affected by the action.
- Username: The username of the administrator who performed the action.
- Full Name: The full name of the administrator.
- Action Type: The type of action performed (e.g., flushSystem, New).
- Object: The specific object or feature that was affected (e.g., Cache, Cart Price Rule, Product).
- Store View: Indicates the store view context for the action.
- Item: The name of the item involved in the action.
- Action: A link to view more details about the action.
Active Sessions
Go to System → Admin Actions Log → Active Sessions to see the Active Sessions interface for an administrator.
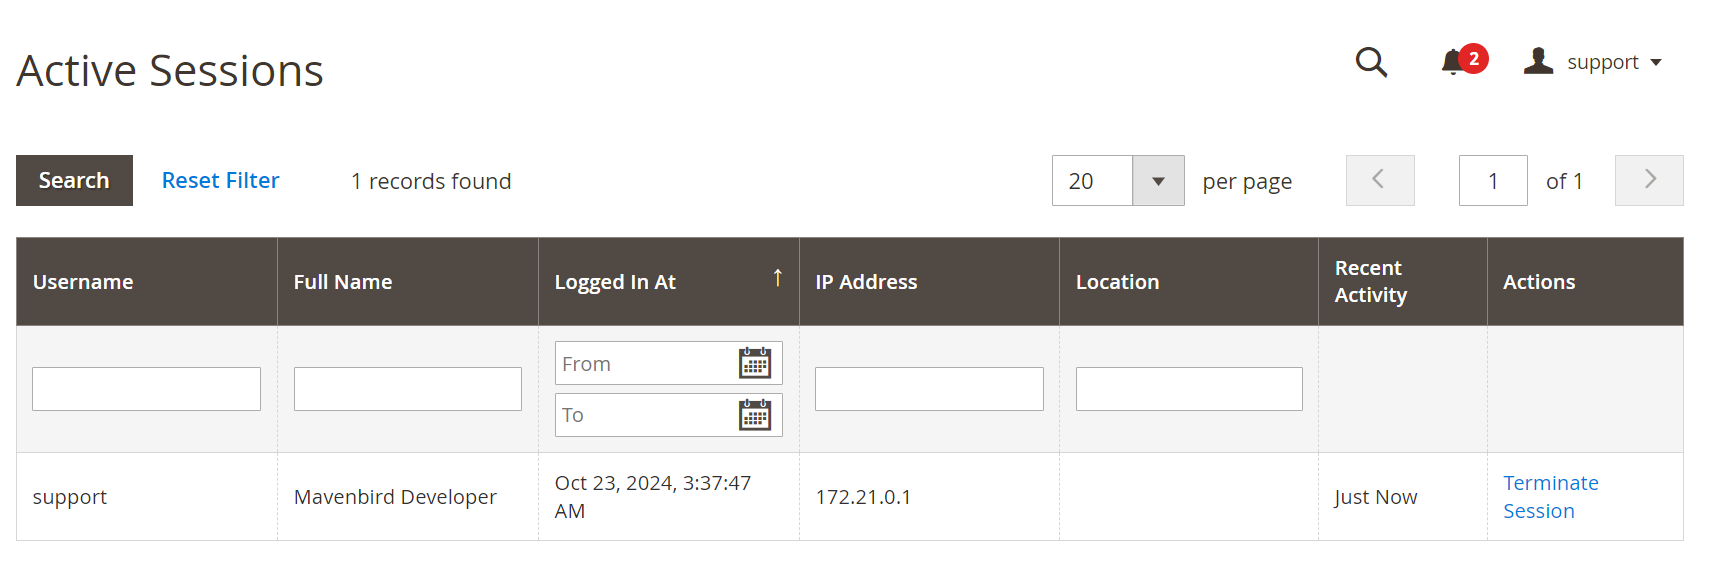
Active Sessions Table Details:
- Username: Displays the username of the logged-in administrator.
- Full Name: Shows the full name associated with the username.
- Logged In At: Indicates the date and time when the user logged in.
- IP Address: Displays the IP address from which the user is logged in.
- Location: Shows the geographical location of the IP address.
- Recent Activity: Indicates the most recent activity performed by the user.
- Actions: Provides an option to terminate the session if necessary.
Login Attempts
Go to System → Admin Actions Log → Login Attempts to see the Login Attempts for an administrator.
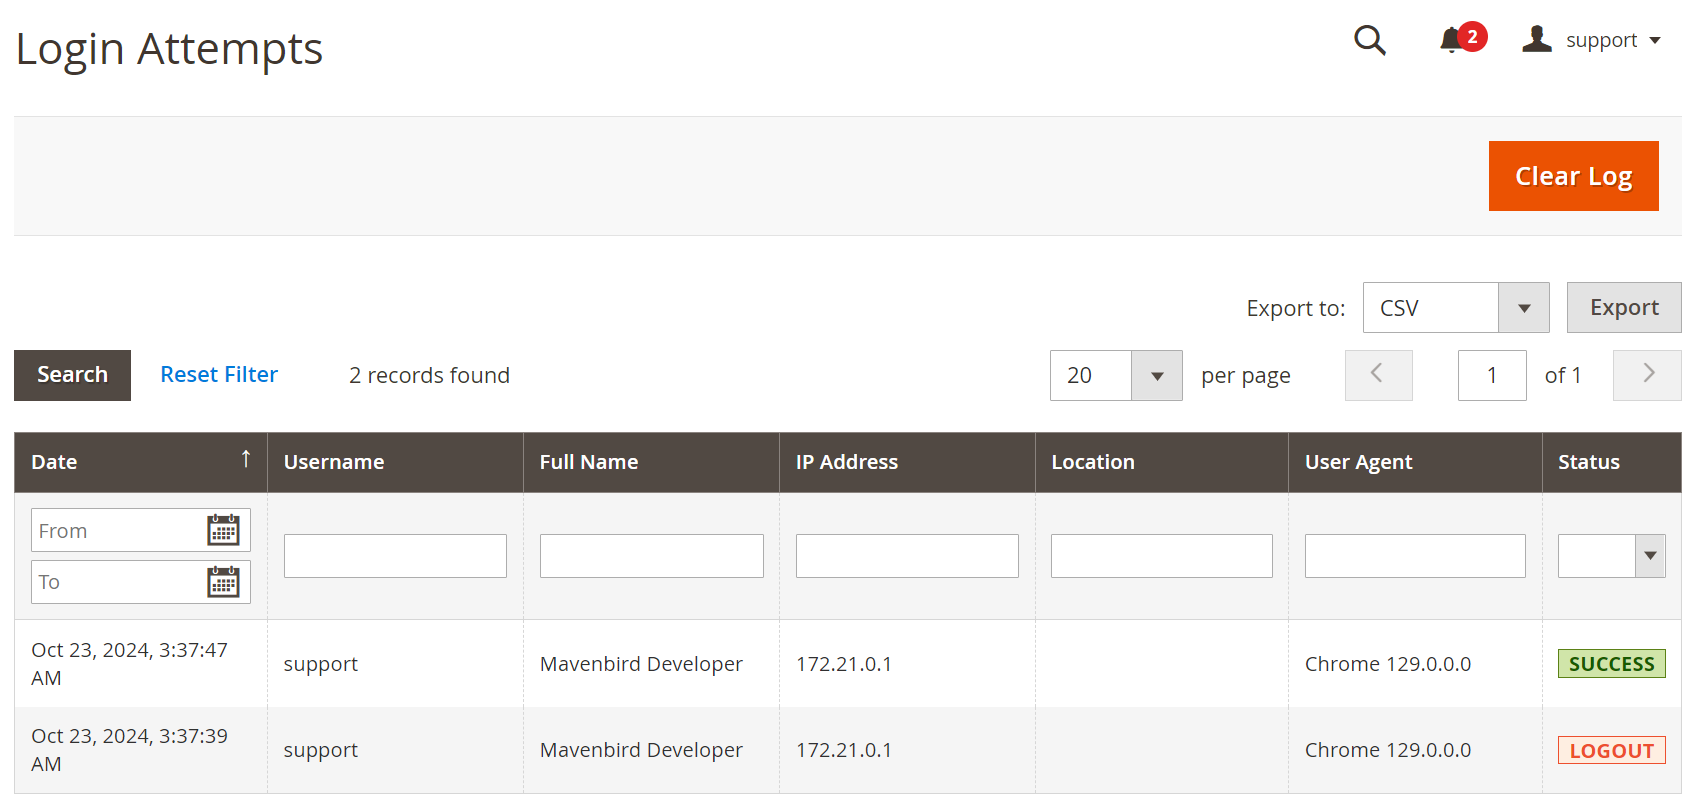
- Clear Log: This button allows administrators to remove log entries.
Login Attempts Table Details:
- Date: Displays the date and time of each login attempt.
- Username: Shows the username of the administrator who attempted to log in.
- Full Name: Displays the full name associated with the username.
- IP Address: Indicates the IP address from which the login attempt was made.
- Location: Shows the geographical location of the IP address.
- User Agent: Displays the browser used for the login attempt.
- Status: Indicates the result of the login attempt, showing SUCCESS for successful logins and LOGOUT for logged-out sessions.
Visit History
Go to System → Admin Actions Log → Visit History to see the Visit History for an administrator.
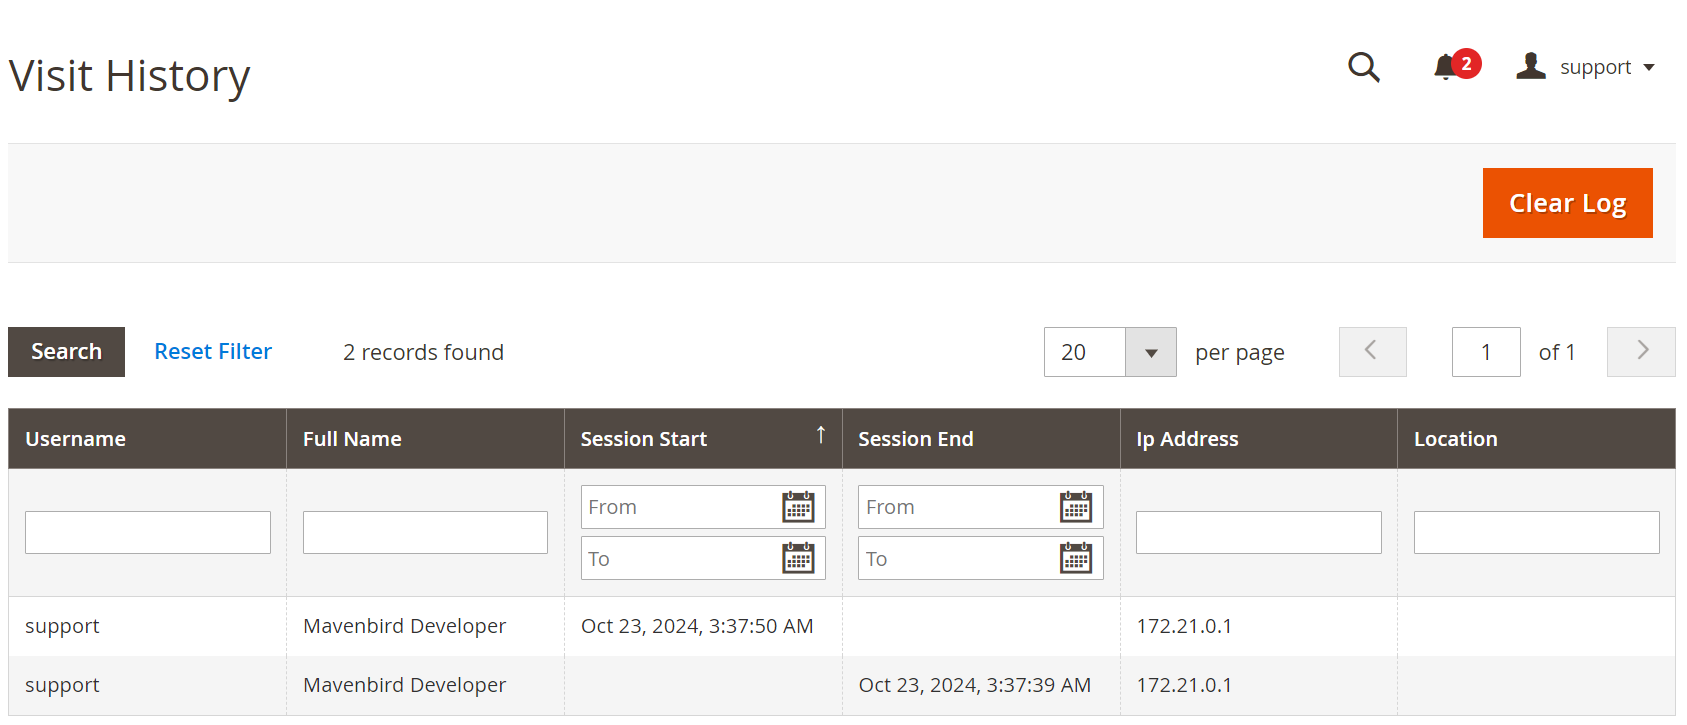
- Clear Log: This button allows administrators to remove log entries.
Visit History Table Details:
- Username: Displays the username of the administrator.
- Full Name: Shows the full name associated with the username.
- Session Start: Indicates the start time of the session, with options to filter by date range.
- Session End: Indicates the end time of the session, with options to filter by date range.
- IP Address: Displays the IP address from which the user accessed the admin panel.
- Location: Shows the geographical location of the IP address.