Stock Import
Extension Installation
For Magento Marketplace Customers
-
Find the Composer name and version of the extension in the extension's composer.json file.
-
Login to your SSH and run:
- composer require mavenbird/module-import-stock
- Wait for Composer to finish updating your project dependencies and make sure there aren't any errors.
-
To verify that the extension installed properly, run the command:
- php bin/magento module:status Mavenbird_StockImport
- By default, the extension is probably disabled.
- Enable the extension and clear static view files:
- php bin/magento module:enable Mavenbird_StockImport --clear-static-content
- php bin/magento setup:upgrade
- For Magento version 2.0.x to 2.1.x - php bin/magento setup:static-content:deploy
- For Magento version 2.2.x & above - php bin/magento setup:static-content:deploy --f
- php bin/magento cache:flush
For Mavenbird Customers
- Extract the zip folder and upload our extension to the root of your Magento 2 directory via FTP.
- Login to your SSH and run below commands step by step:
- php bin/magento setup:upgrade
- For Magento version 2.0.x to 2.1.x - php bin/magento setup:static-content:deploy
- For Magento version 2.2.x & above - php bin/magento setup:static-content:deploy --force
- php bin/magento cache:flush
The stock import module for Magento 2 enables efficient management of product stock information through CSV import functionality. This extension simplifies the process of updating and synchronizing stock data across your Magento store.
- Easily stock import quantities and statuses from CSV files.
- Support for batch processing to update stock information for multiple products simultaneously.
- Detailed error reporting for troubleshooting import issues, ensuring data integrity.
- Customizable field mapping to match CSV data format to Magento 2 database fields.
- Accommodates standard CSV formats, making it easy to integrate with various systems.
Configuration
Store→ Configuration→ MAVENBIRD EXTENSIONS->Stock Import
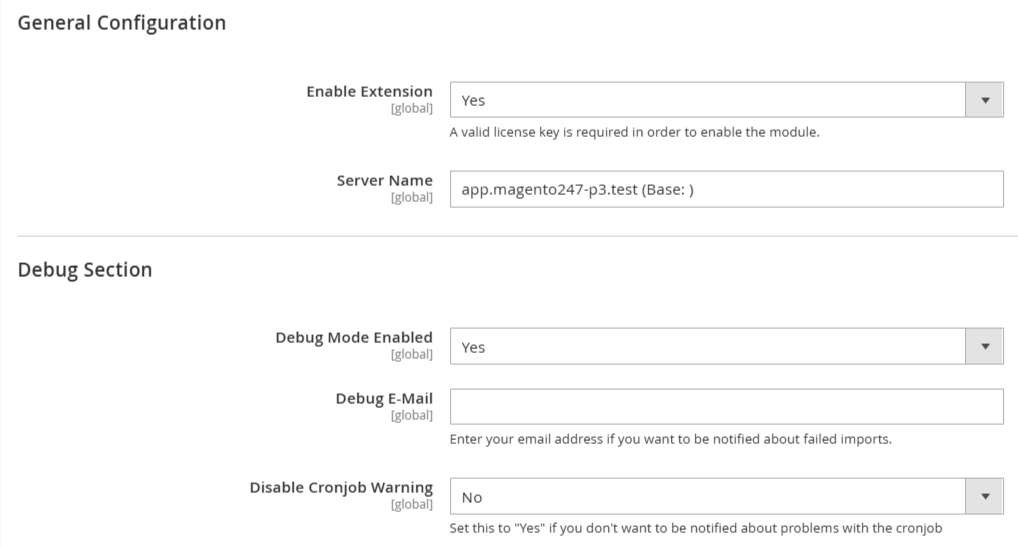
**General Configuration :- **
**Enable Extension:**Select yes/no option for module enable or disable.
**Server Name:**Enter your server name here.
**Debug Section :- **
**Debug Mode Enabled:**Select yes/no option for debug mode enable or disable.
Debug Email: enter your email address if you want to be notified about imports.
**Disable Cron Job Warning:**Select yes/no option for cron job.
Import Profiles
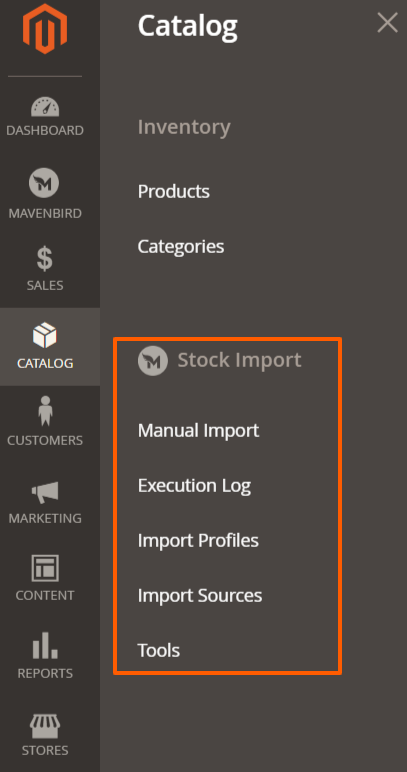
Go to Catalog->Stock Import
First of all click on Catalog → Stock Import → Import Profiles. Then Add New profile for stock import.
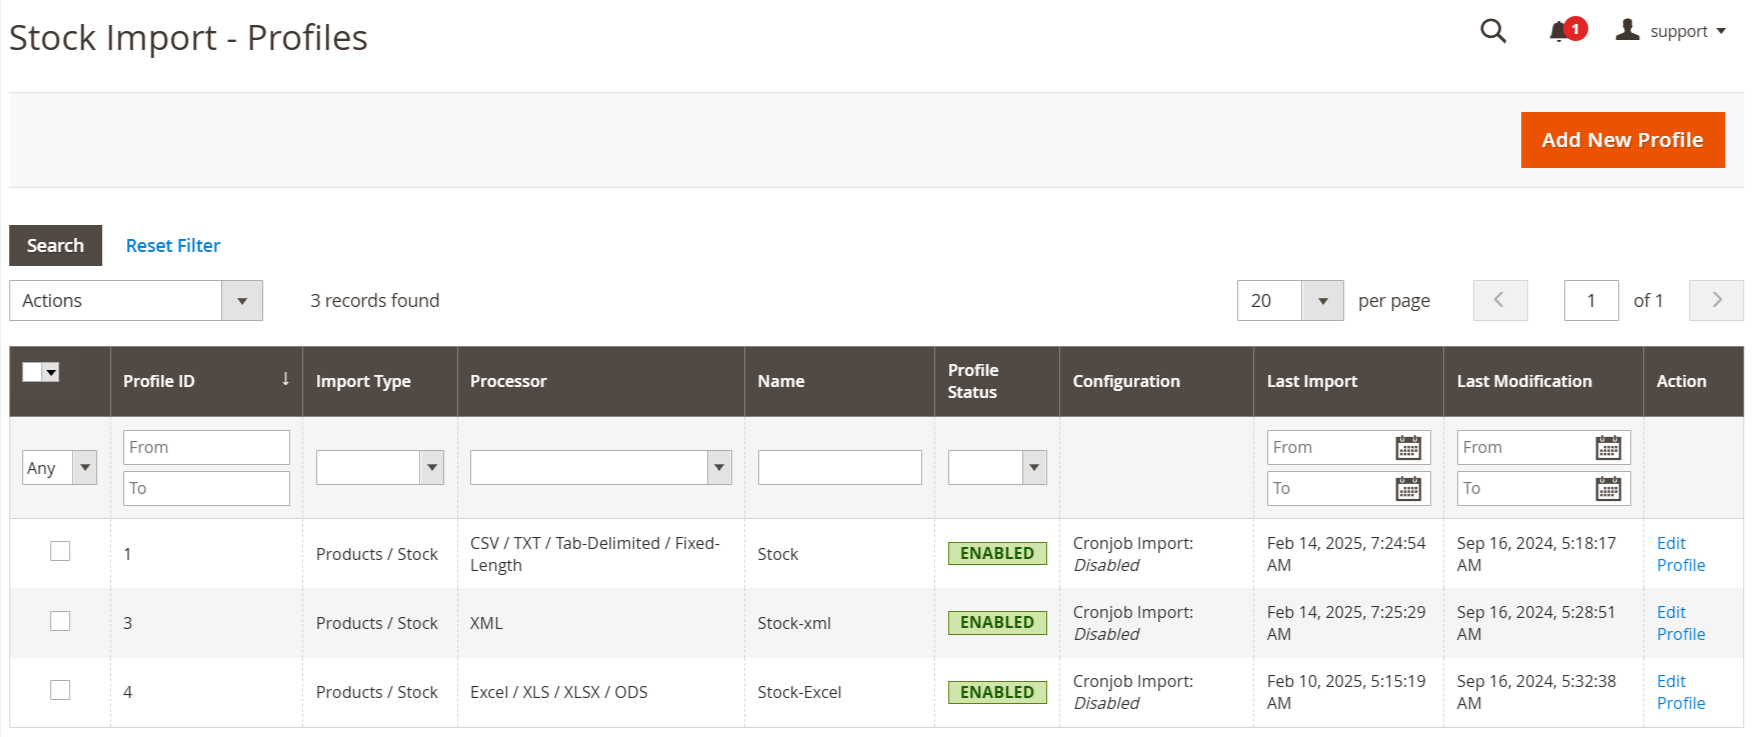
Then click on the Add New Profile button.
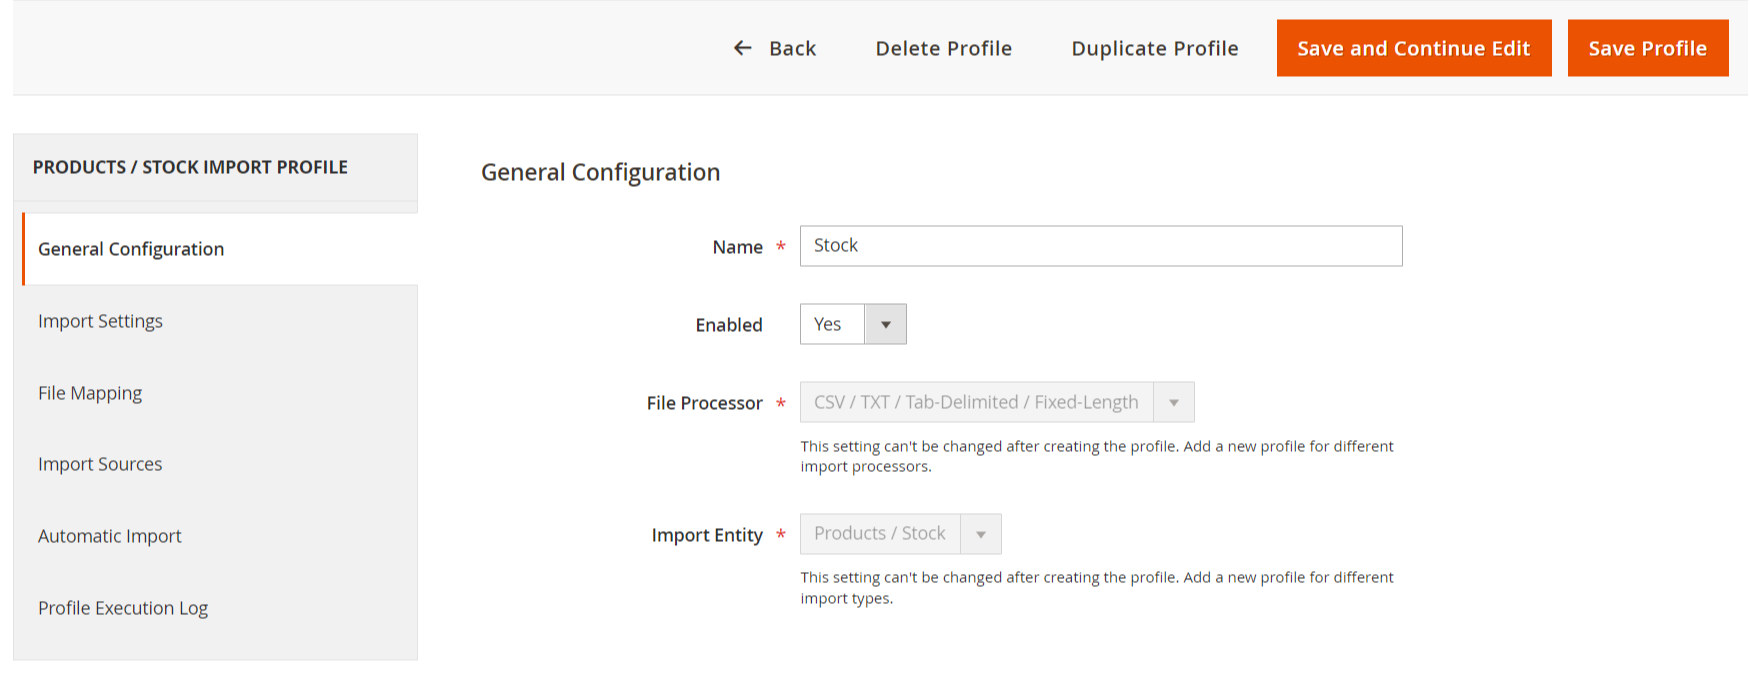
**Name:**Enter profile name here.
**File Processor:**Select one option from dropdown.
**Import Entity:**Import entity for product stock.
Then click on the continue button.
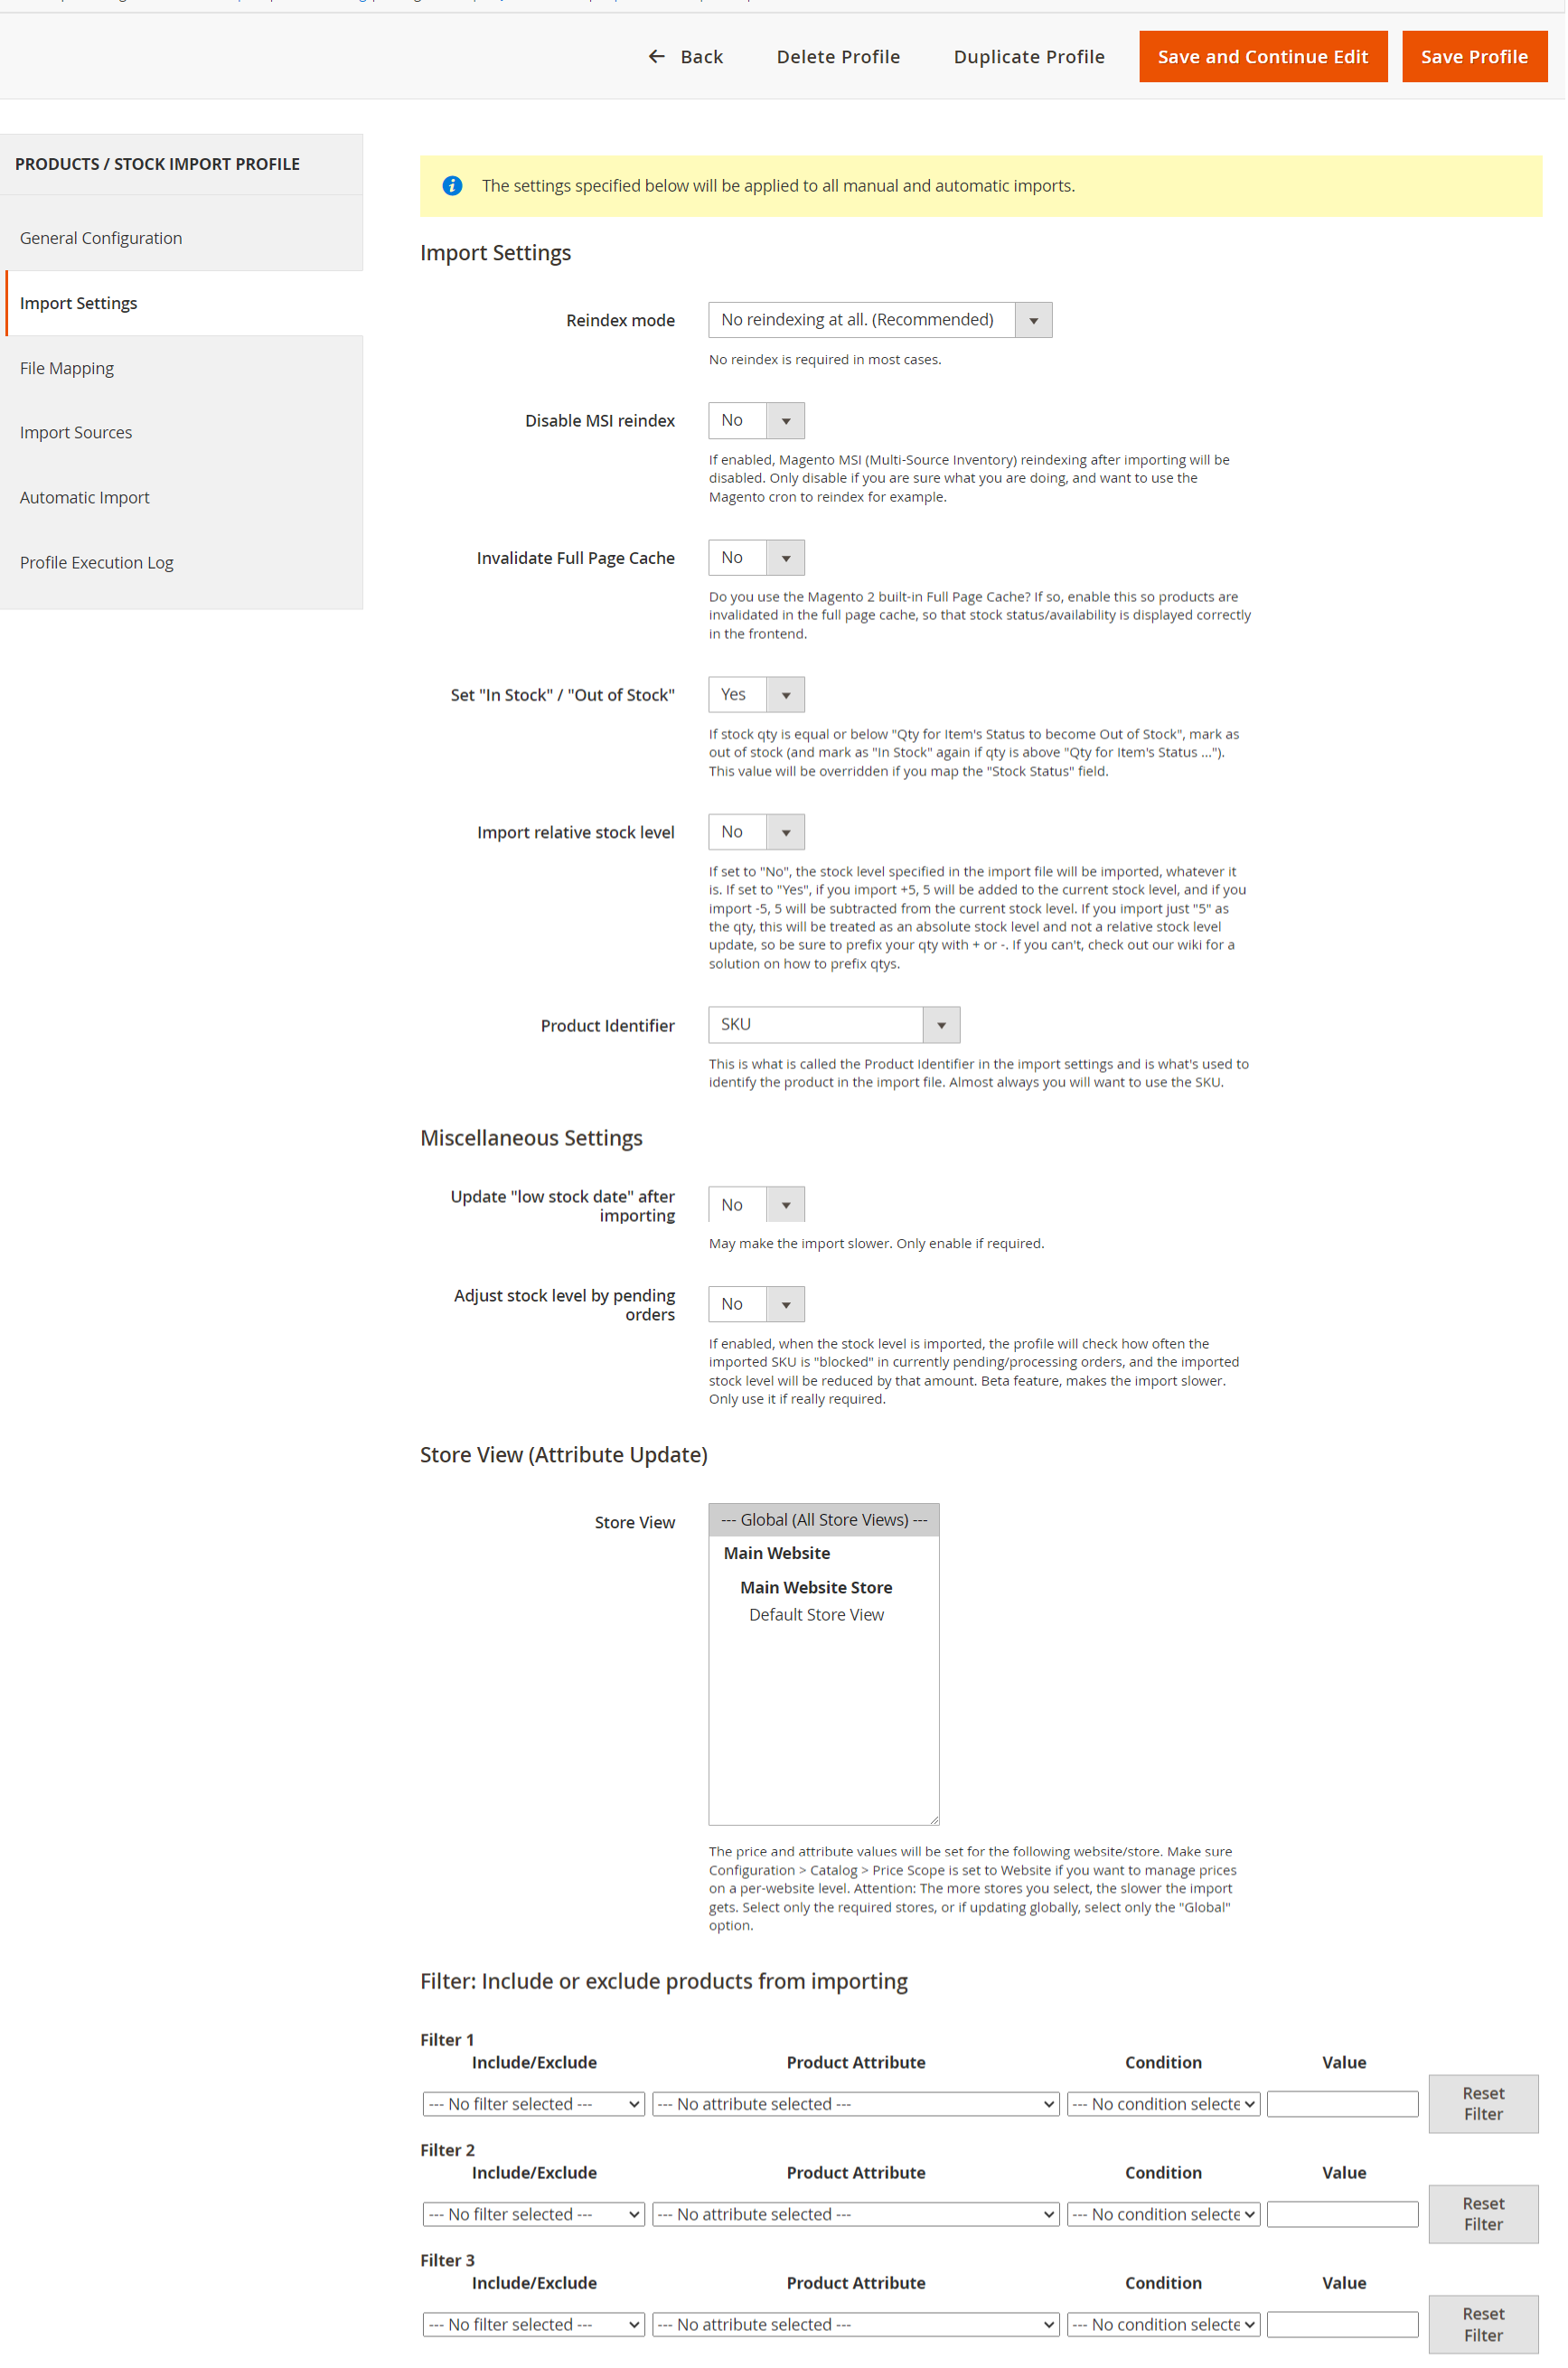
**Reindex Mode:**Options to choose whether to reindex or not, with a recommendation for reindexing.
**Disable MSI Reindex:**A checkbox to disable the Multi-Source Inventory reindexing during import.
Invalidate Full Page Cache: An option to invalidate the full page cache to ensure stock status is updated correctly on the frontend.
Set "In Stock" / "Out of Stock": A setting to determine how stock status is marked based on the stock quantity.
**Import Relative Stock Level:**A toggle to decide if the stock level specified in the import file should be used or if it should be adjusted based on current stock levels.
**Product Identifier:**Specifies the identifier used for products in the import file, typically the SKU.
Miscellaneous Settings:
**Update "low stock date":**Option to update the low stock date after importing.
**Adjust Stock Level by Pending Orders:**A setting to adjust stock levels based on pending orders.
**Store View (Attribute Update):**Allows selection of the store view for which the price and attribute values will be set.
**Filter Options:**Sections to include or exclude products from importing based on specified attributes and conditions.
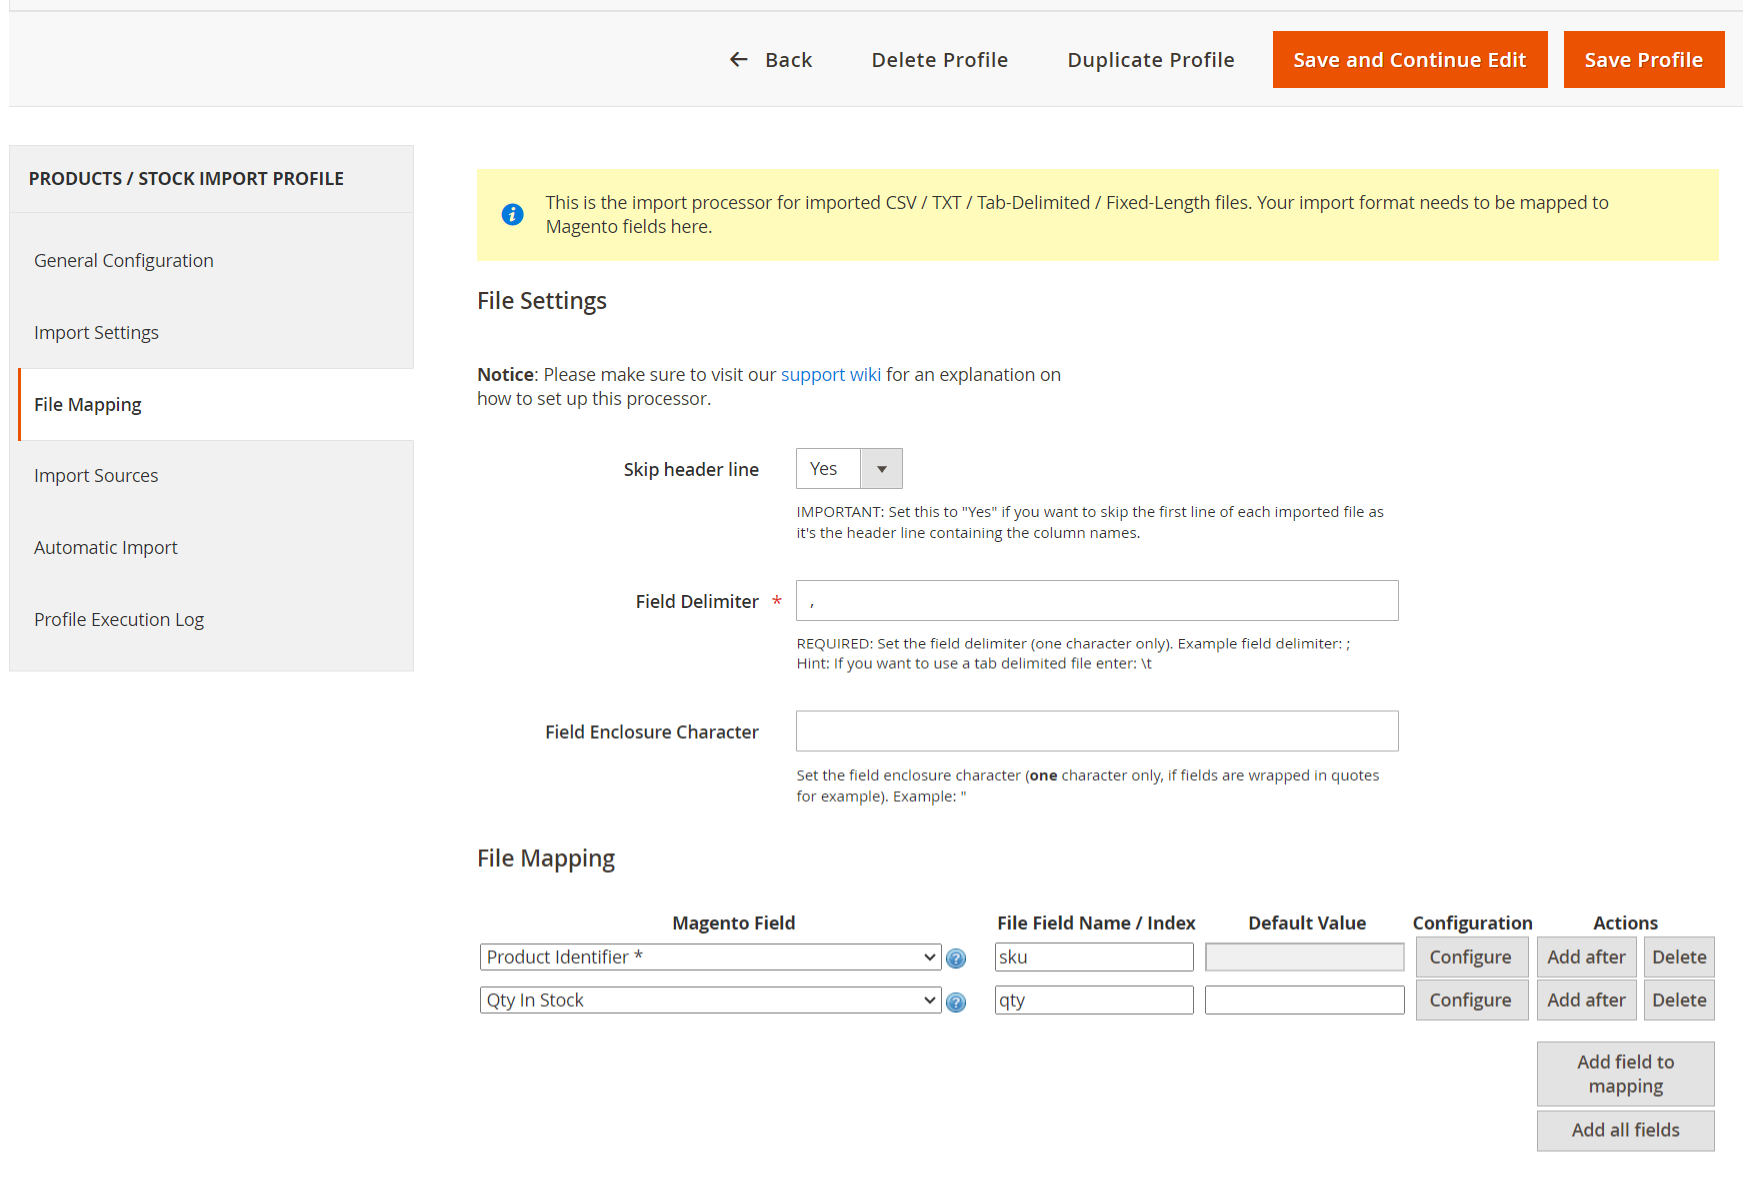
File Settings:-
**Skip Header Line:**A dropdown option to choose whether to skip the first line of the imported file, which typically contains column names.
**Field Delimiter:**A required field to specify the character that separates data fields in the file (e.g., a comma).
**Field Enclosure Character:**An optional field to define a character that encloses data fields, useful for handling fields with special characters.
File Mapping:-
This section allows users to map the fields from the import file to Magento's database fields.
**Magento Field:**Dropdowns for selecting Magento fields such as "Product Identifier" and "Qty In Stock."
**File Field Name / Index:**Input fields for specifying the corresponding names in the import file (e.g., "sku" for Product Identifier and "qty" for Quantity).
**Default Value:**An option to set default values for the fields if needed.
**Configuration and Actions:**Options to configure mappings and add or delete fields.
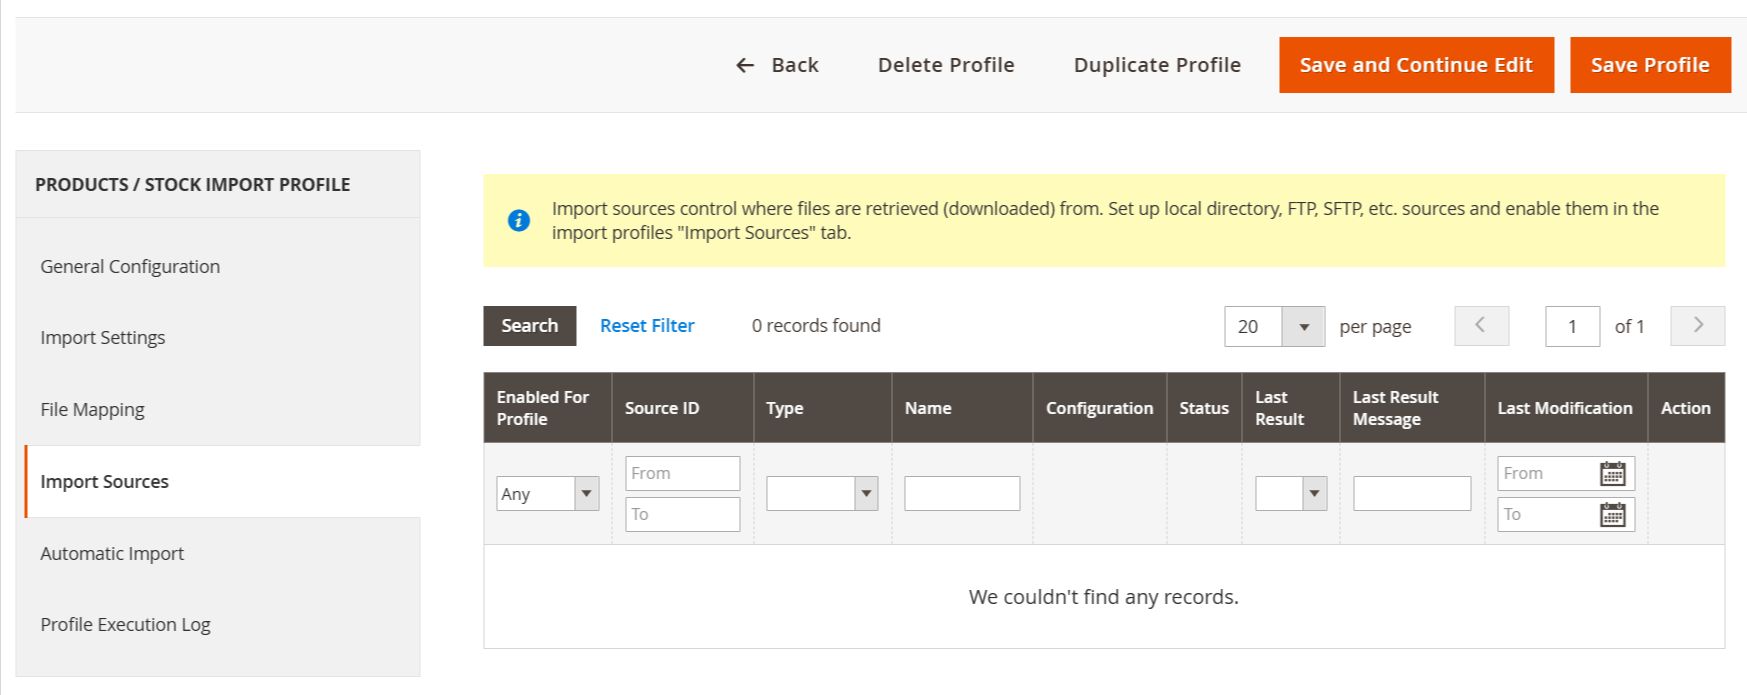
This tab is highlighted, indicating that it is currently selected. It provides options to manage where import files are retrieved from.
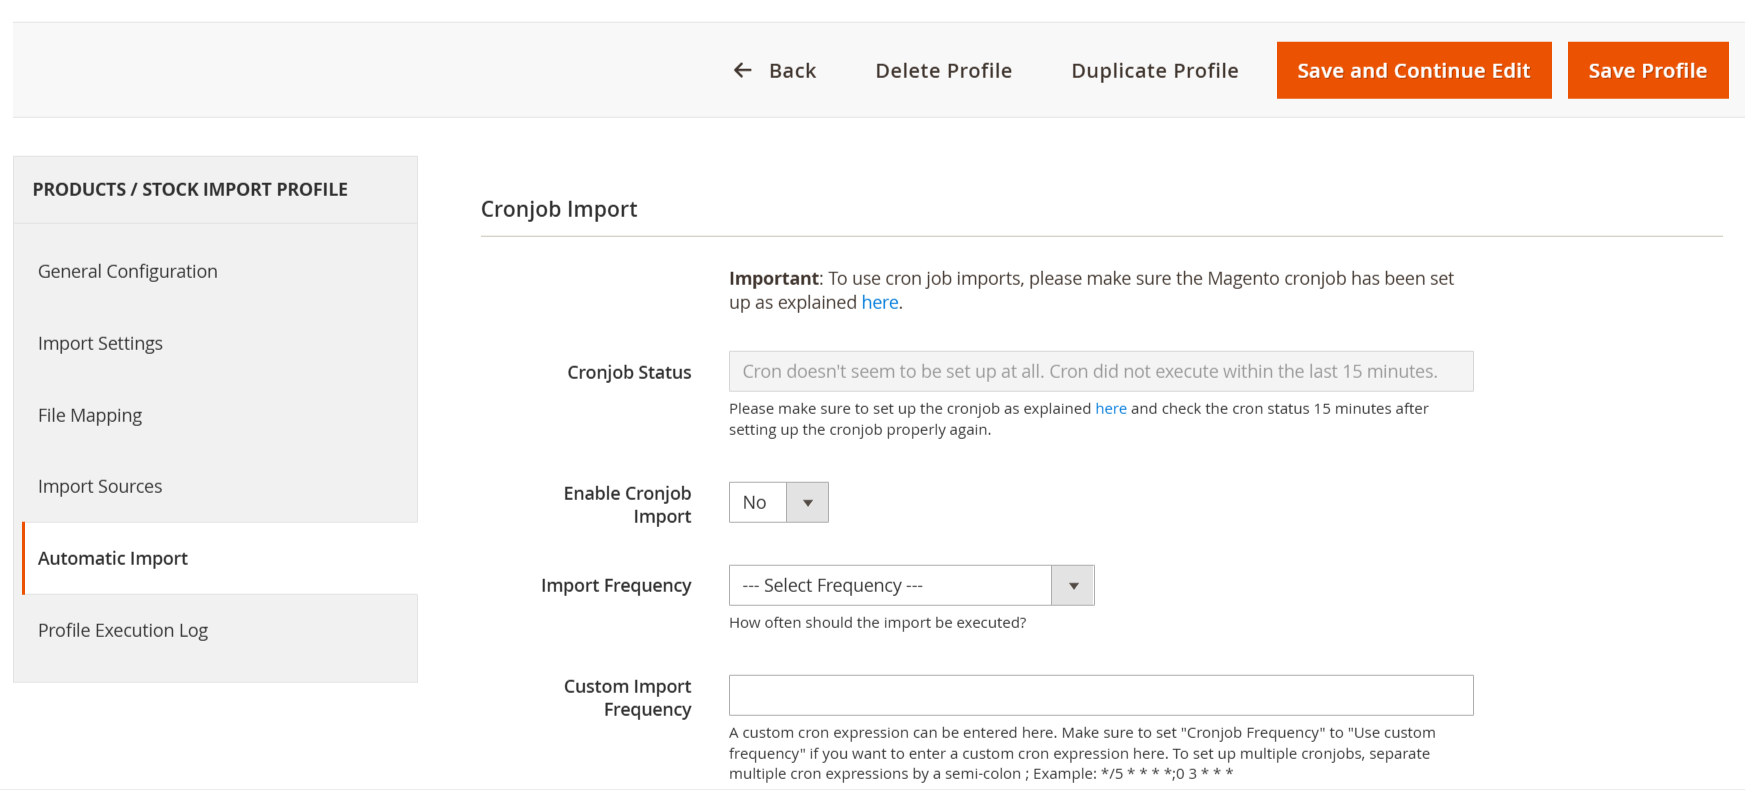
**Cronjob Status:**Indicates that the cronjob has not been set up. There is a note mentioning that the cronjob did not execute within the last 15 minutes.
**Enable Cronjob Import:**This dropdown allows enabling or disabling the cronjob for imports. In the screenshot, it is set to Yes.
Import Frequency: This dropdown allows selecting how frequently the cronjob should run. It is set to Every 15 minutes.
**Custom Import Frequency:**There is an input field for entering a custom cron expression if a specific schedule is required.
Import Source
First of all click on Catalog → Stock Import → Import Sources. Then Add New Sources for stock import.
Then click on the Add New Source button.
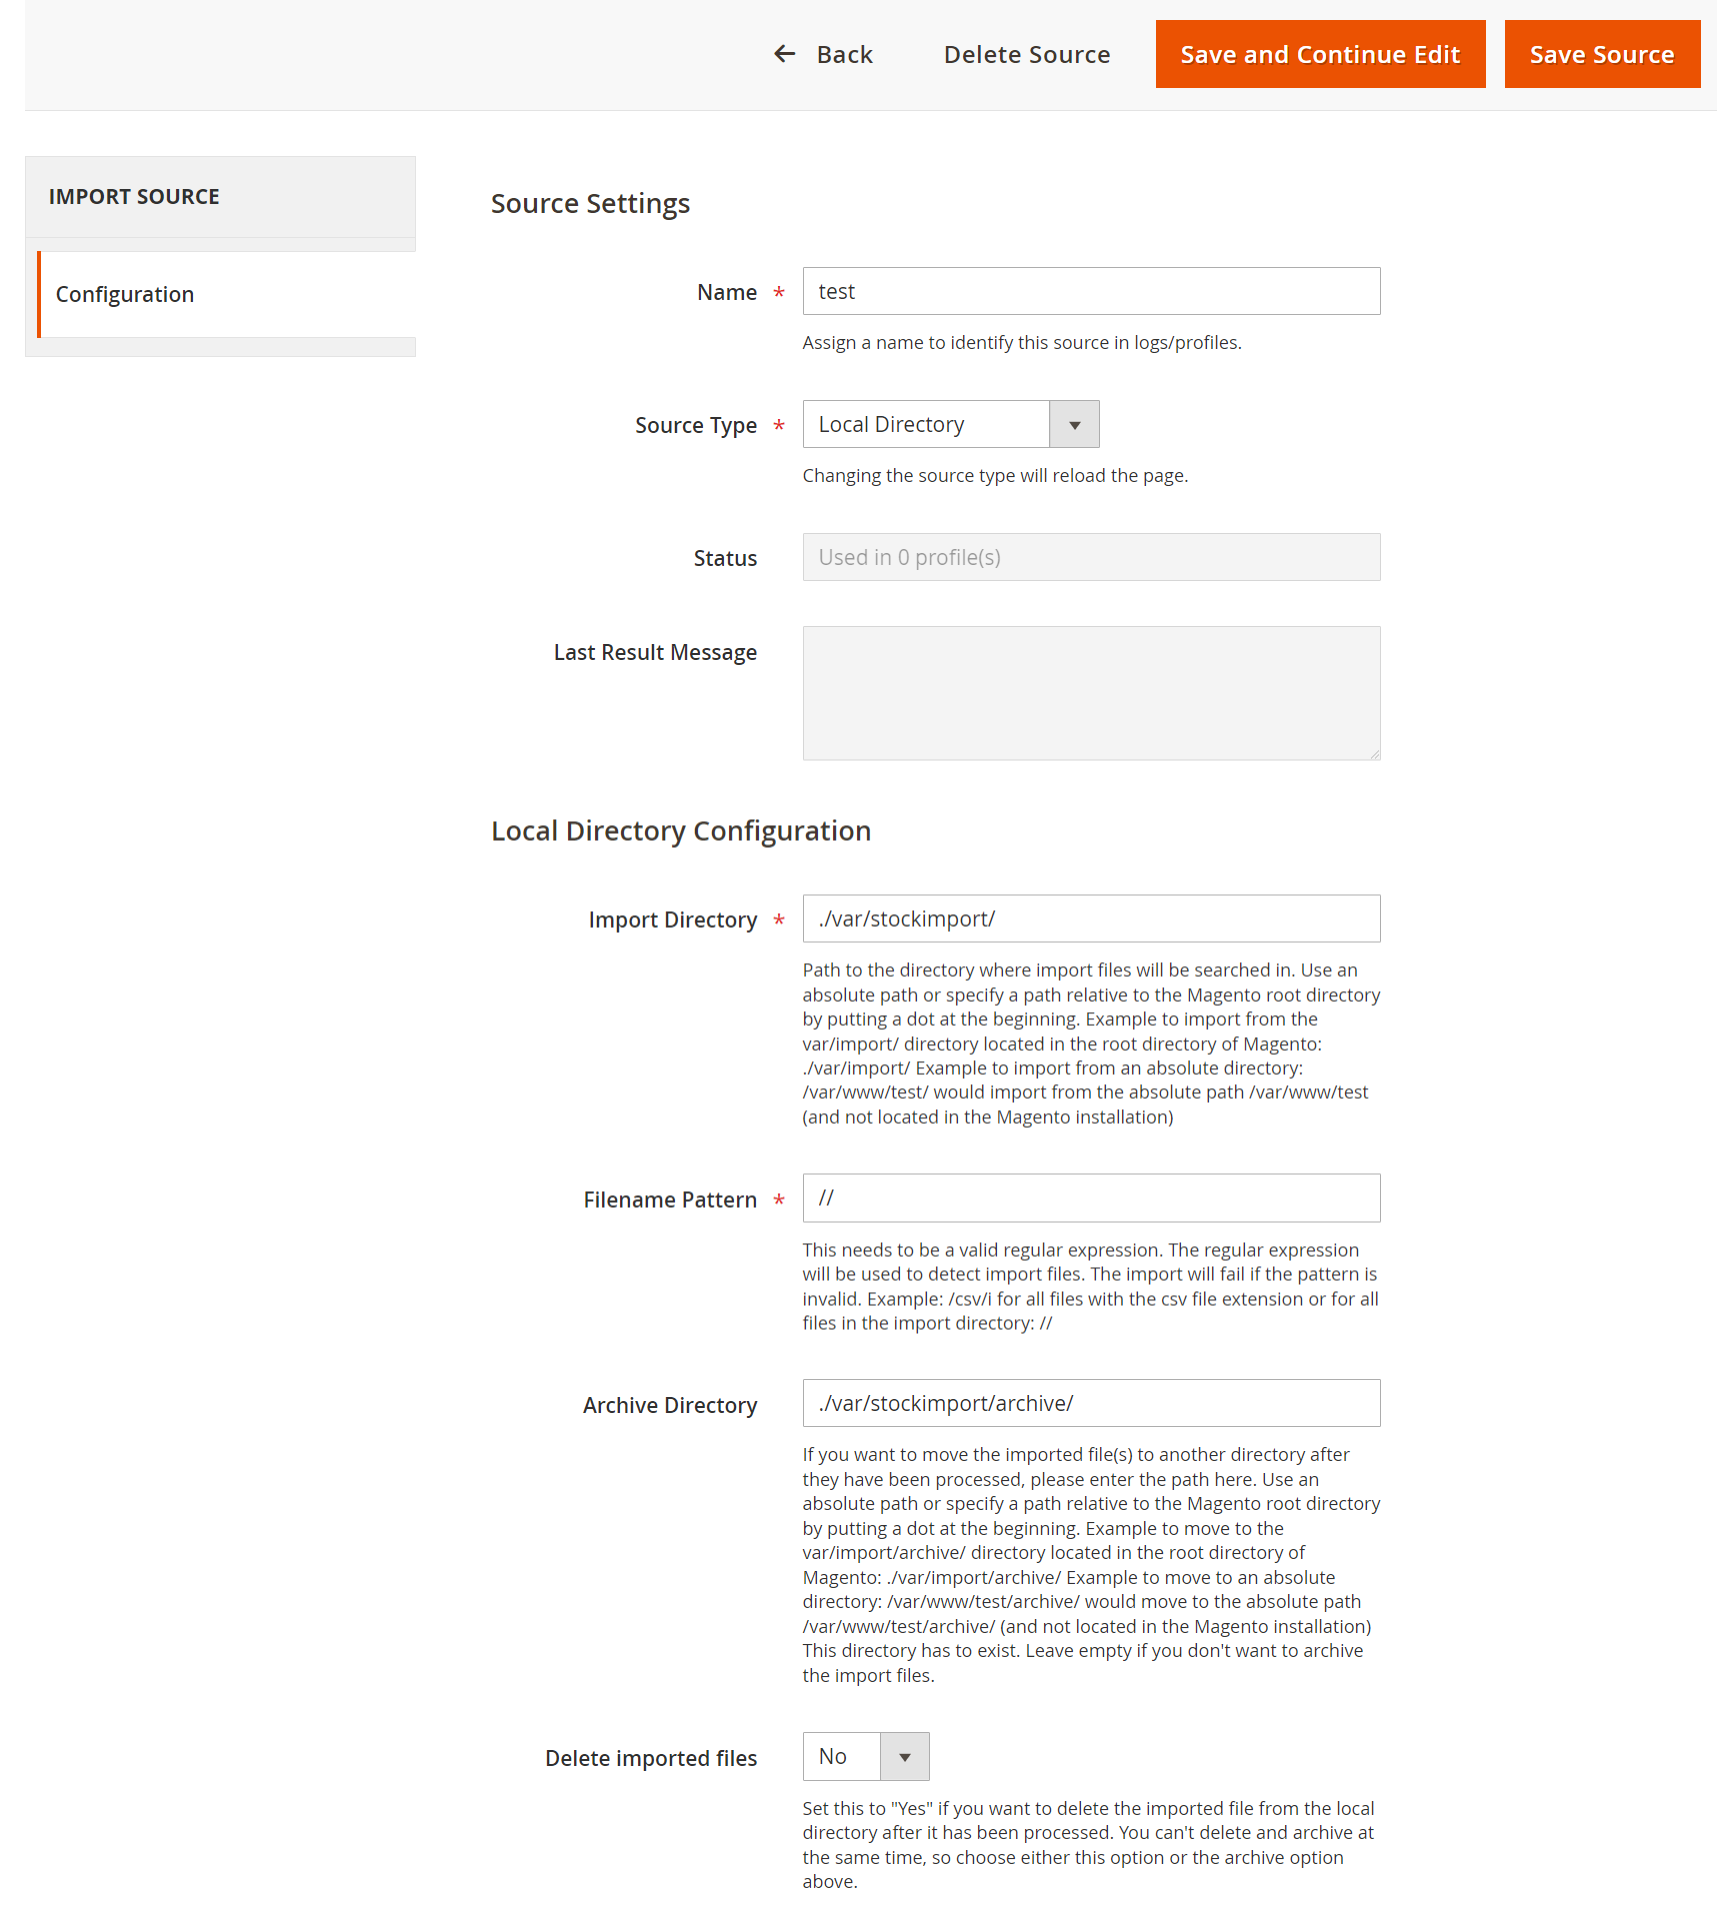
Source Settings:-
**Name:**A field to assign a name (e.g., "test") to identify the source in logs and profiles.
**Source Type:**A dropdown menu to select the type of source, with "Local Directory" currently selected.
**Status:**Indicates how many profiles are using this source (currently "Used in 0 profiles").
**Last Result Message:**A field to display the last result message related to the import process.
Local Directory Configuration:-
**Import Directory:**Specifies the path (/var/stockimport/) where import files will be searched. It allows for absolute or relative paths.
**Filename Pattern:**A field for entering a valid regular expression to detect import files. The current entry is , which is invalid.
**Archive Directory:**Path (/var/stockimport/archive/) where processed files can be moved. Similar to the import directory, it allows for absolute or relative paths.
**Delete Imported Files:**A dropdown option to choose whether to delete imported files from the local directory after processing. The current selection is "No."
Tools
First of all click on Catalog → Stock Import → Tools.
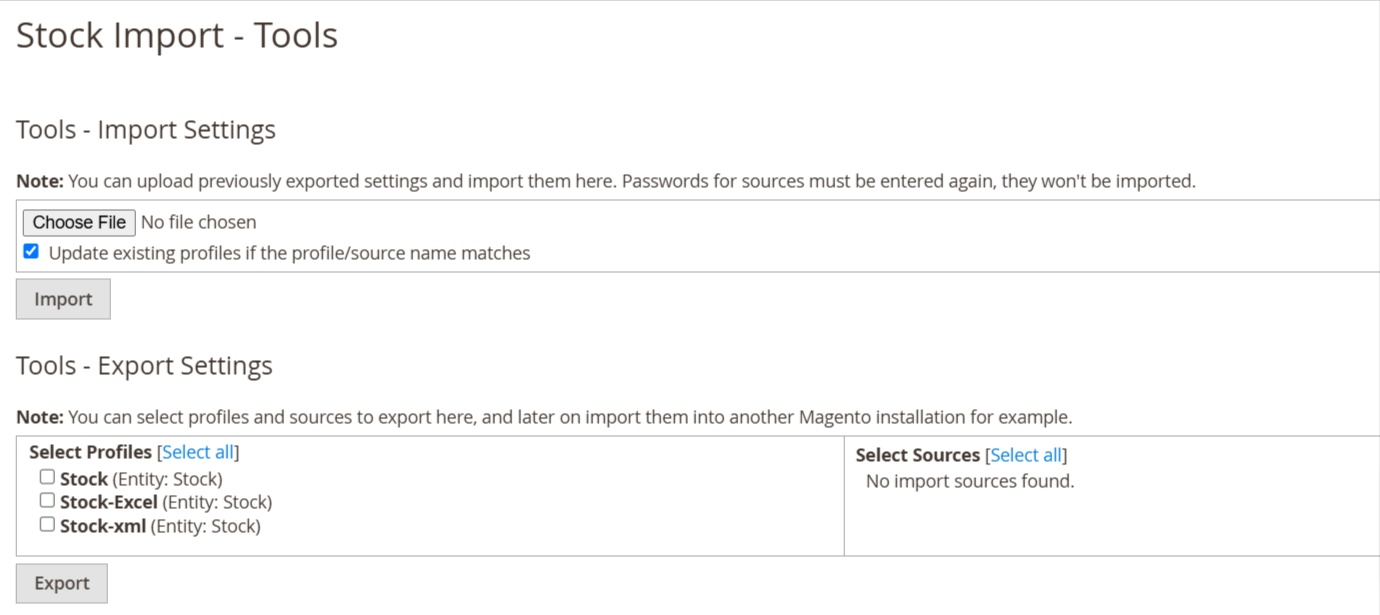
- After creating a profile and sources you have to export your profile and sources from here using the Export Settings button.
- Then you have an export profile json file then you can change anything and same changes file you have uploaded in Import Settings.
Execution Logs
First of all click on Catalog → Stock Import → Execution Log.
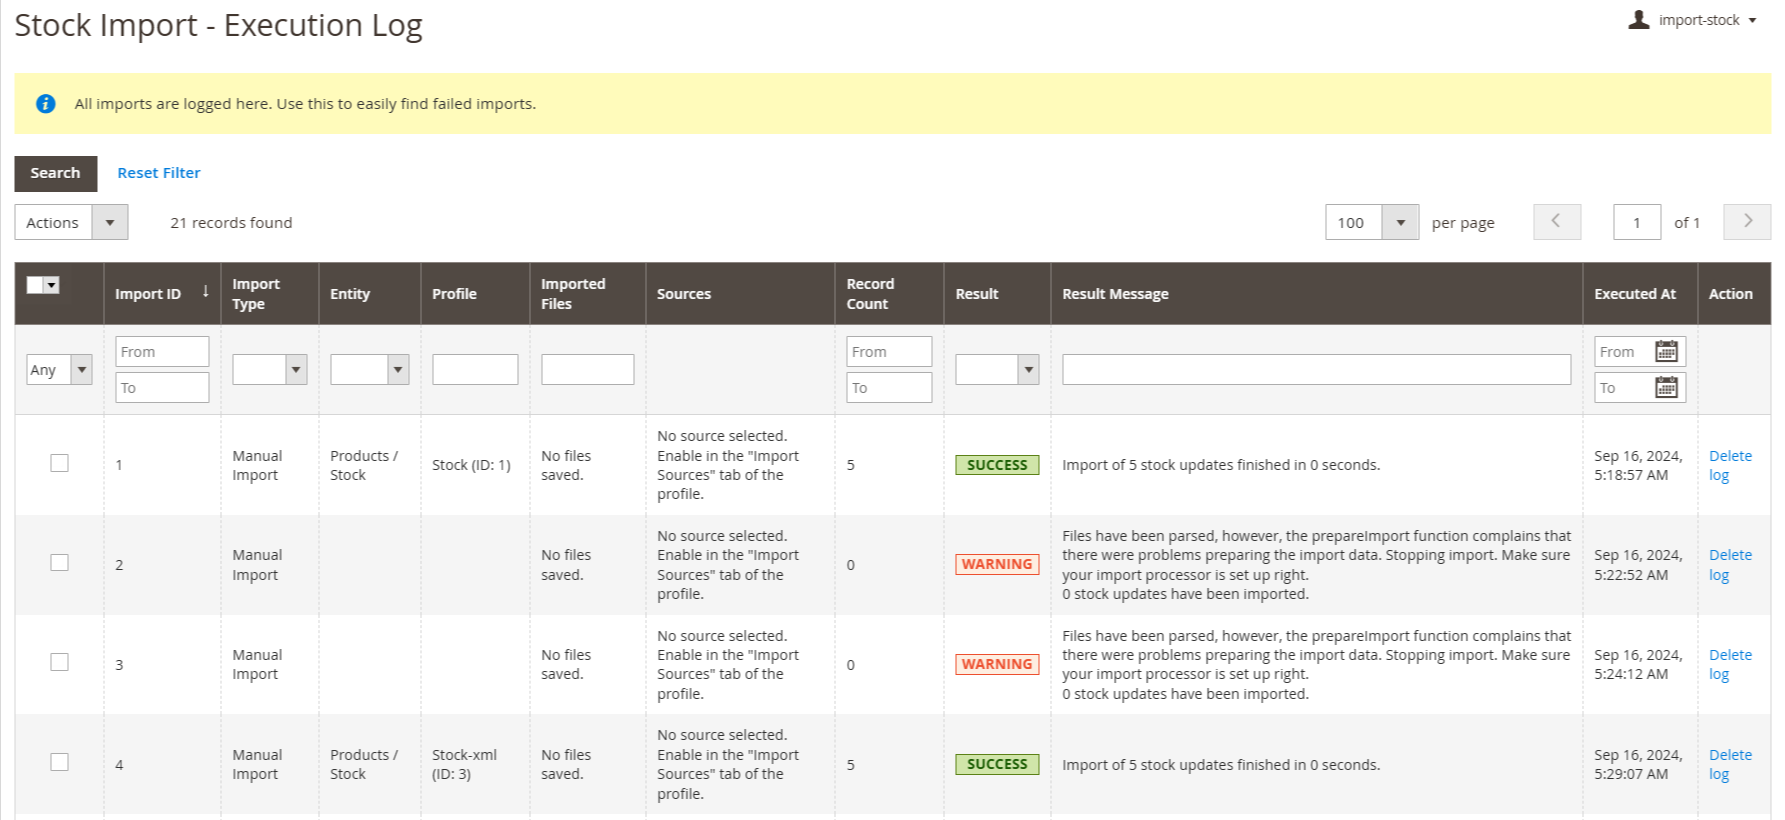
When import a file then some logs is create so this log entry in this table.
Manual Import
First of all click on Catalog → Stock Import → Manual Import.
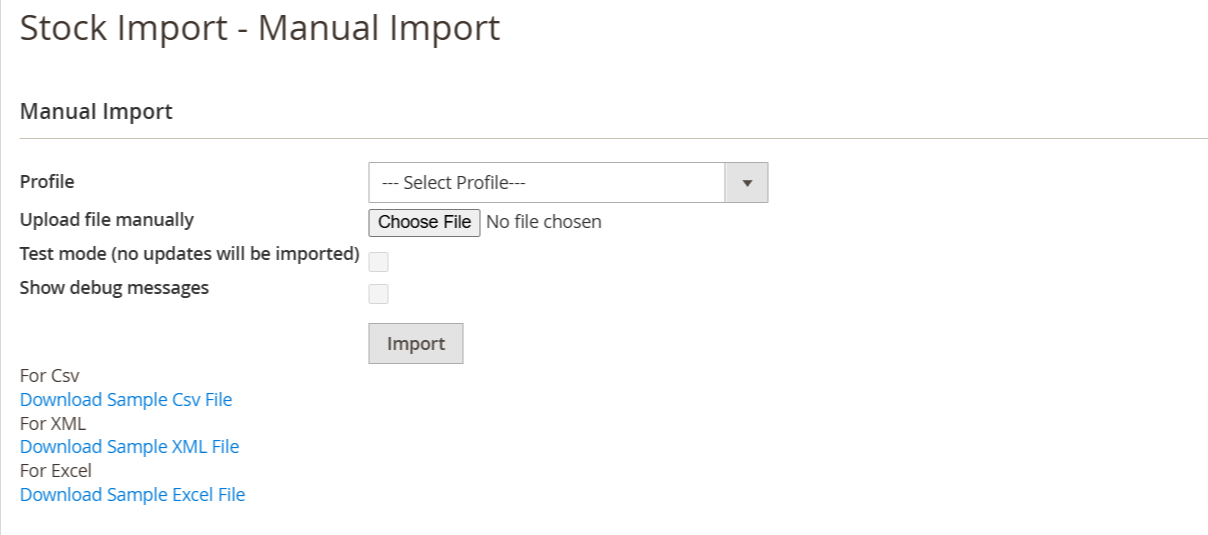
- After exporting the profile and sources file you can import changes file in the Manual Import section and also you can download sample files for csv and xml so based on profile you can import csv or xml file.
- In this section you have to import stock and also you have to see test mode and debug messages from here.
- In the above image you have seen 2 checkbox buttons Test mode and Show debug messages. This checkbox button is not mandatory if you select then you have to display test mode result and debug messages.
- Then click on Download Sample CSV file then download sample data in csv file.
- when you import the csv or xml or excel file the product quantity are changed as per the sample file. That are updated on below screen.
