Store Locator
Extension Installation
For Magento Marketplace Customers
-
Find the Composer name and version of the extension in the extension's composer.json file.
-
Login to your SSH and run:
- composer require mavenbird/module-store-locator
- Wait for Composer to finish updating your project dependencies and make sure there aren't any errors.
-
To verify that the extension installed properly, run the command:
- php bin/magento module:status Mavenbird_StoreLocator
- By default, the extension is probably disabled.
- Enable the extension and clear static view files:
- php bin/magento module:enable Mavenbird_StoreLocator --clear-static-content
- php bin/magento setup:upgrade
- For Magento version 2.0.x to 2.1.x - php bin/magento setup:static-content:deploy
- For Magento version 2.2.x & above - php bin/magento setup:static-content:deploy --f
- php bin/magento cache:flush
For Mavenbird Customers
- Extract the zip folder and upload our extension to the root of your Magento 2 directory via FTP.
- Login to your SSH and run below commands step by step:
- php bin/magento setup:upgrade
- For Magento version 2.0.x to 2.1.x - php bin/magento setup:static-content:deploy
- For Magento version 2.2.x & above - php bin/magento setup:static-content:deploy --force
- php bin/magento cache:flush
Effortlessly connect your webstore to physical shops with Magento 2 Store Locator. Help customers easily find the nearest offline stores, explore product availability, and navigate with interactive maps — all while boosting your in-store sales.
- Display multiple store locations on a customizable map.
- Automatically show the closest offline shops based on customer location.
- Let users refine results by specific criteria (e.g., services, products, or working hours).
- Highlight product stock status for individual stores.
- Add the store locator to any page with ease.
- Set metadata and keywords for each store location page to enhance search rankings.
Configuration
To set up the Store Locator extension, navigate to **Stores > Configuration > MAVENBIRD EXTENSION > Store Locator. **Here, you can customize various settings to enhance your store's location features.
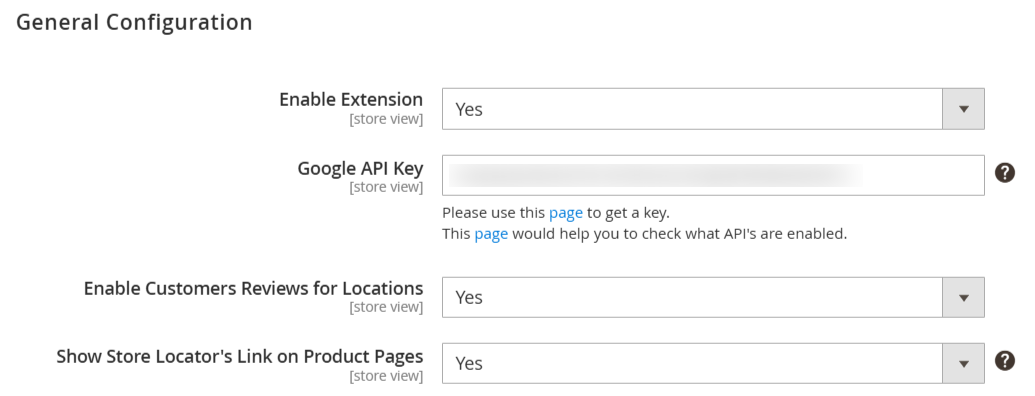
Enable Extension: Enable or disable the Store Locator extension.
Google API Key: Enter your Google API key to facilitate map functionalities. Instructions for obtaining and checking the API key are provided.
Enable Customers Reviews for Locations: Allows customers to leave reviews for different store locations.
Show Store Locator's Link on Product Pages: Enables the display of the Store Locator link on product pages, enhancing accessibility for customers.
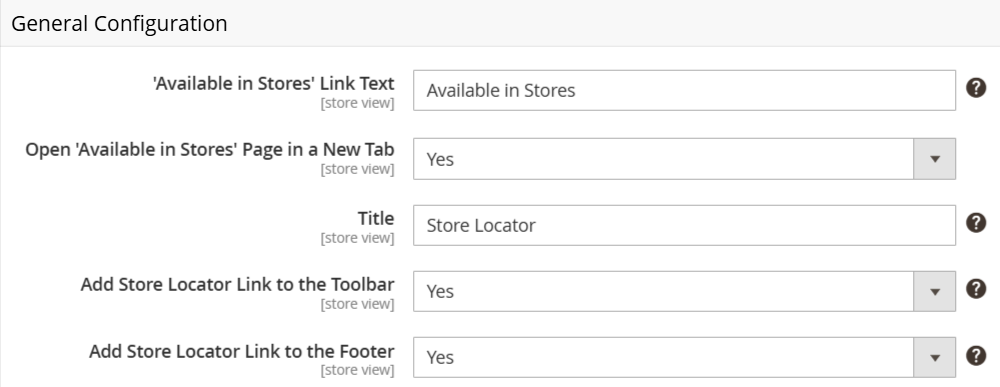
'Available in Stores' Link Text: Customize the text for the "Available in Stores" link.
Open 'Available in Stores' Page in a New Tab: Option to open the "Available in Stores" page in a new browser tab.
Title: Set the title of the Store Locator page displayed to customers.
Add Store Locator Link to the Toolbar: Allow display of the Store Locator link in the toolbar for easy access.
Add Store Locator Link to the Footer: Provides an option to add the Store Locator link to the footer of the website for visibility.
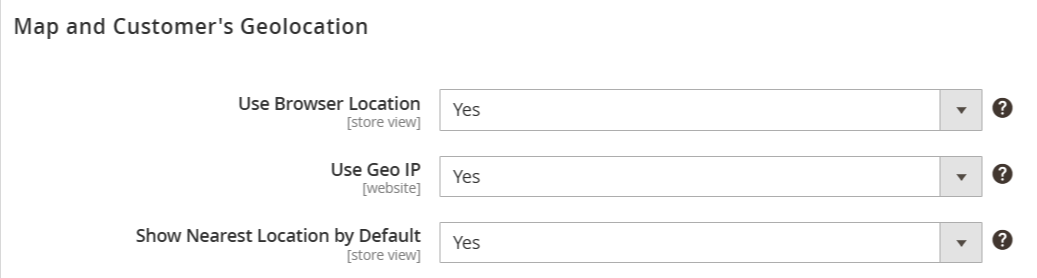
Use Browser Location: Allows enabling the user's browser geolocation to detect their current location.
Use Geo IP: Enables the use of Geo IP to determine the user's location based on their IP address.
Show Nearest Location by Default: Automatically displays the nearest store location to the user when they access the map.
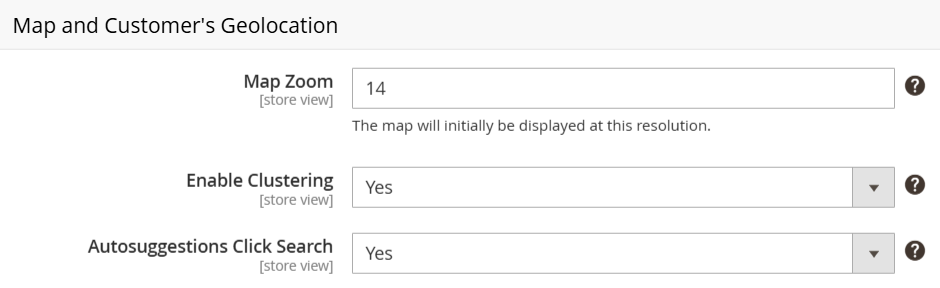
Map Zoom: Adjust the initial zoom level for the map when it loads (default is set to 14).
Enable Clustering: Option to enable or disable clustering of store locations on the map for better visibility.
Autosuggestions Click Search: Enable or disable the option for customers to initiate a search by clicking on an auto-suggested address.
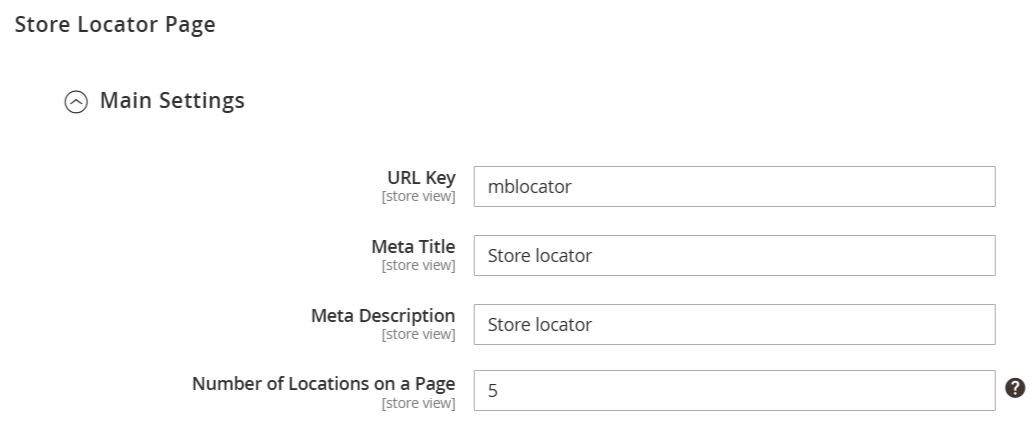
URL Key: Define the unique key for the Store Locator page URL.
Meta Title: Set a custom meta title for search engine optimization (SEO).
Meta Description: Provide a description for the page that will also be used for SEO purposes.
Number of Locations on a Page: Specify how many store locations should be displayed on each page of the Store Locator.
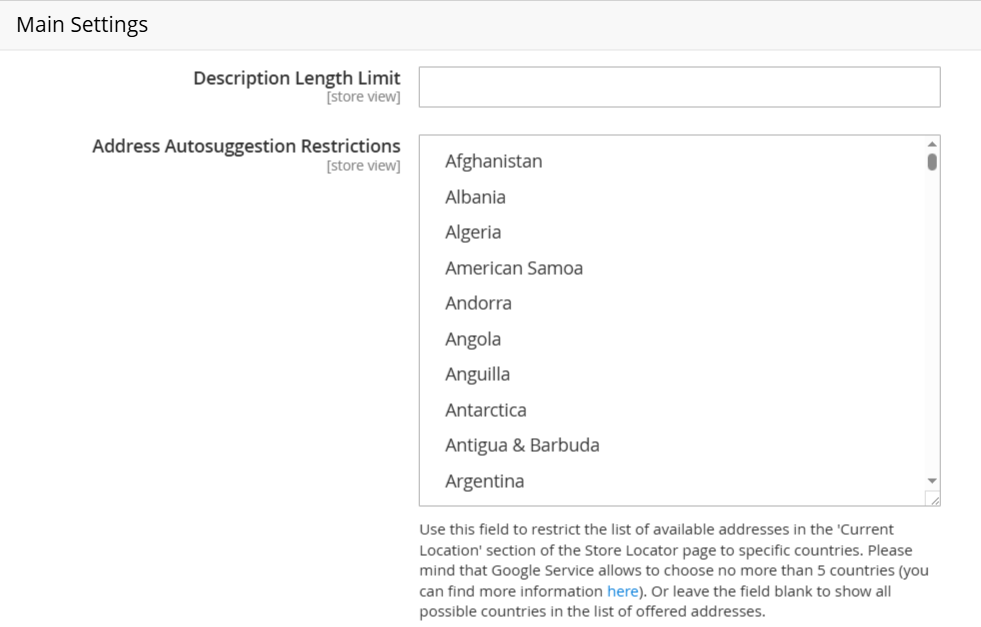
Description Length Limit: Set a maximum character limit for descriptions of store locations.
Address Autosuggestion Restrictions: Specify countries for which address suggestions will be restricted. If no countries are selected, all available countries will be displayed. Note: Google Service allows choosing a maximum of 5 countries.
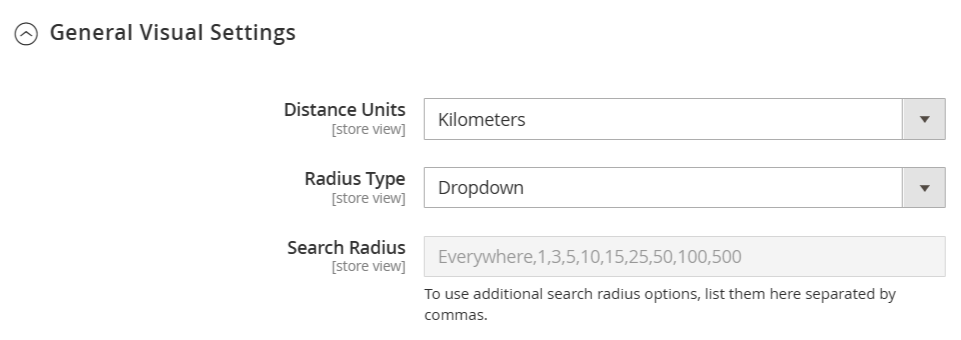
Distance Units: Select the unit of measurement for distance (e.g., Kilometers or Miles).
Radius Type: Choose the type of radius selection (e.g., Dropdown) for searches.
Search Radius: Define the search radius options that users can select, allowing them to search within specified distances (e.g., "Everywhere, 1, 3, 5, 10, 15, 25, 50, 100, 500").
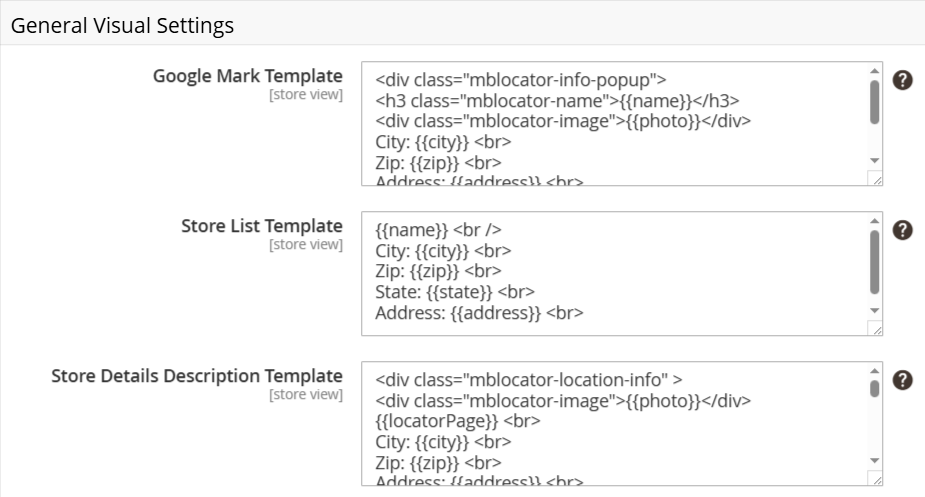
Google Mark Template: Customize the HTML template used for the Google map markers, including dynamic placeholders for store name, city, ZIP, and address.
Store List Template: Define the template for displaying the store list with dynamic placeholders for name, city, ZIP, state, and address.
Store Details Description Template: Set the HTML template for displaying detailed information about each store, including dynamic placeholders.
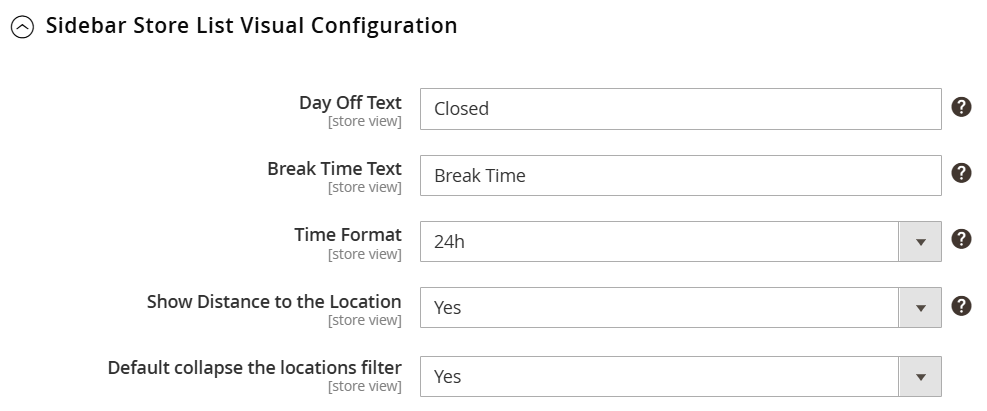
Day Off Text: Customize the text displayed when a store is closed for the day (e.g., "Closed").
Break Time Text: Set the text to indicate break times for stores (e.g., "Break Time").
Time Format: Choose the format for displaying time (e.g., 24-hour format).
Show Distance to the Location: Enable or disable the display of the distance from the user's location to the store.
Default Collapse the Locations Filter: Set whether the location filter should be collapsed by default when the page loads.
Add a New Store Location
To manage your store locations, navigate to Mavenbird > Locations. Here, you can oversee all store listings directly from the grid, allowing you to effortlessly update a store's name, address, status, and position. Select one or multiple stores to perform actions such as enabling, disabling, deleting, or editing as needed.
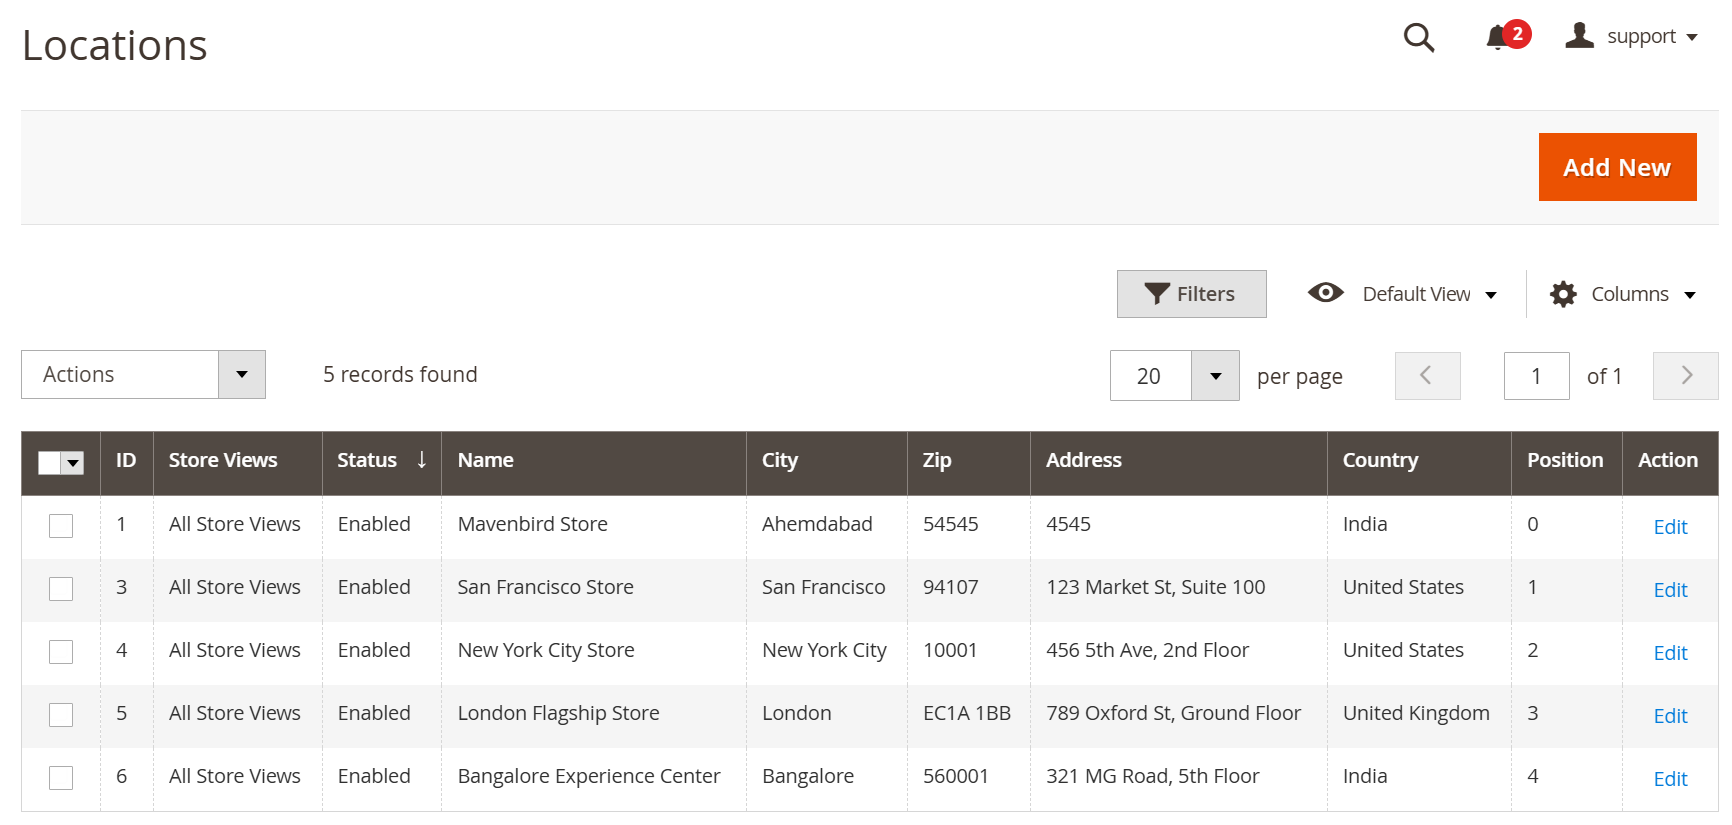
To add a new store location, click the Add New button. Alternatively, select an existing location to begin editing its details.
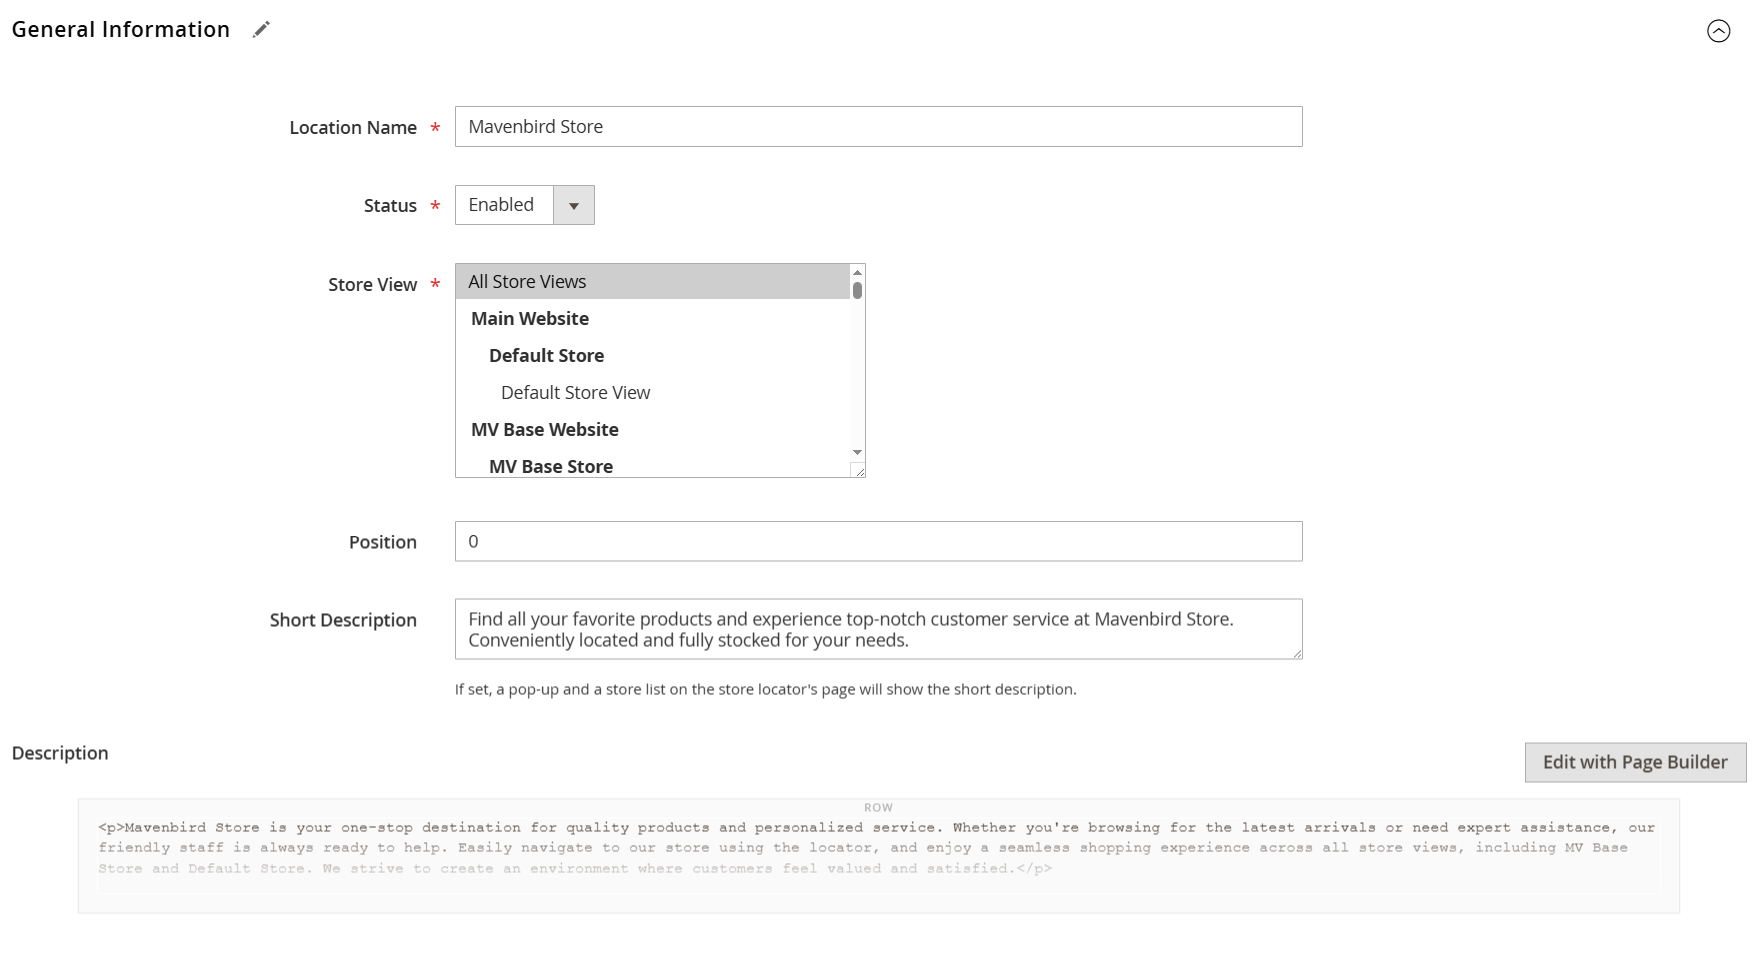
Location Name: Enter the name of the store.
Status: Configure the store's status (enabled or disabled).
Store View: Select the relevant store view.
Position: Set the order of the store in the sidebar list.
Short Description: Provide a brief description that will appear on the Google Mark and in the sidebar store list.
Description: Add additional details in the description field, which will be shown on the location page in the frontend.
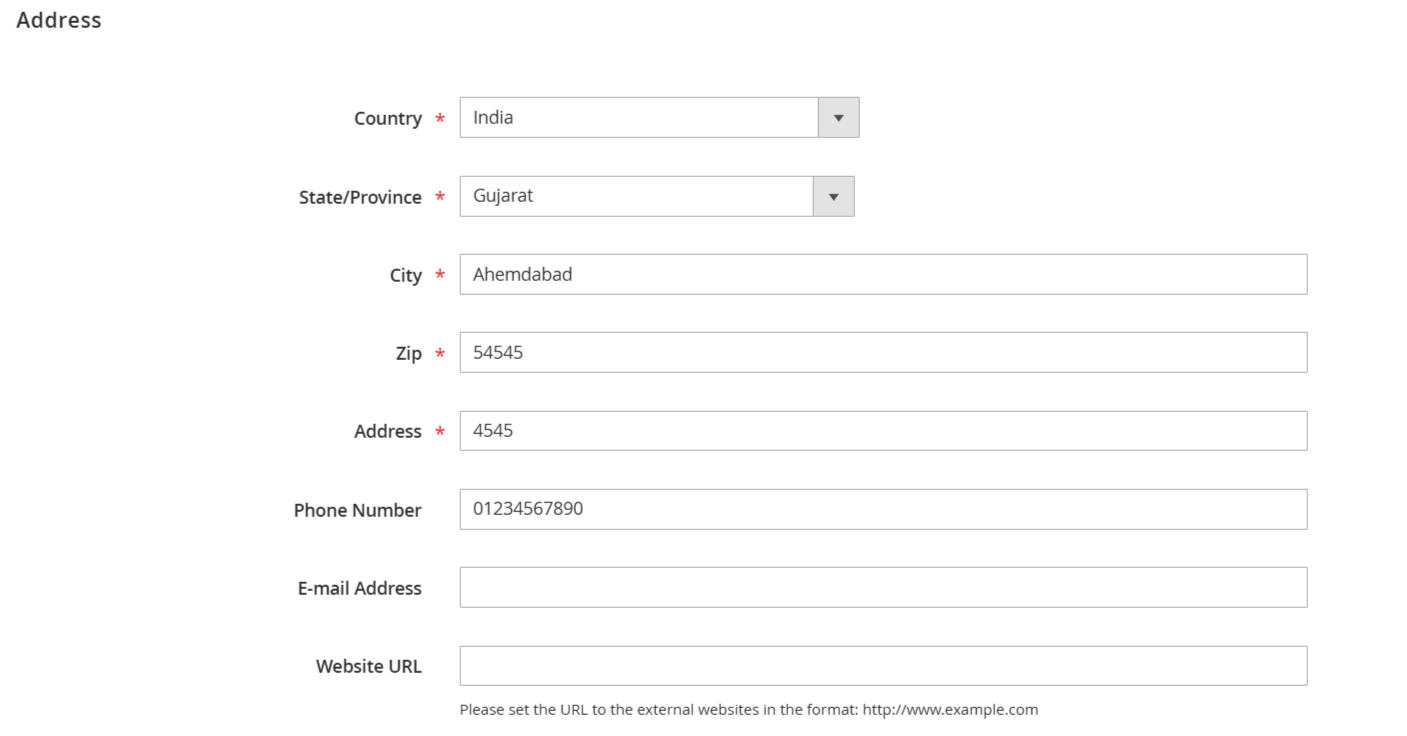
Enter the primary information for your store location, including the address, phone number, email, and website URL.
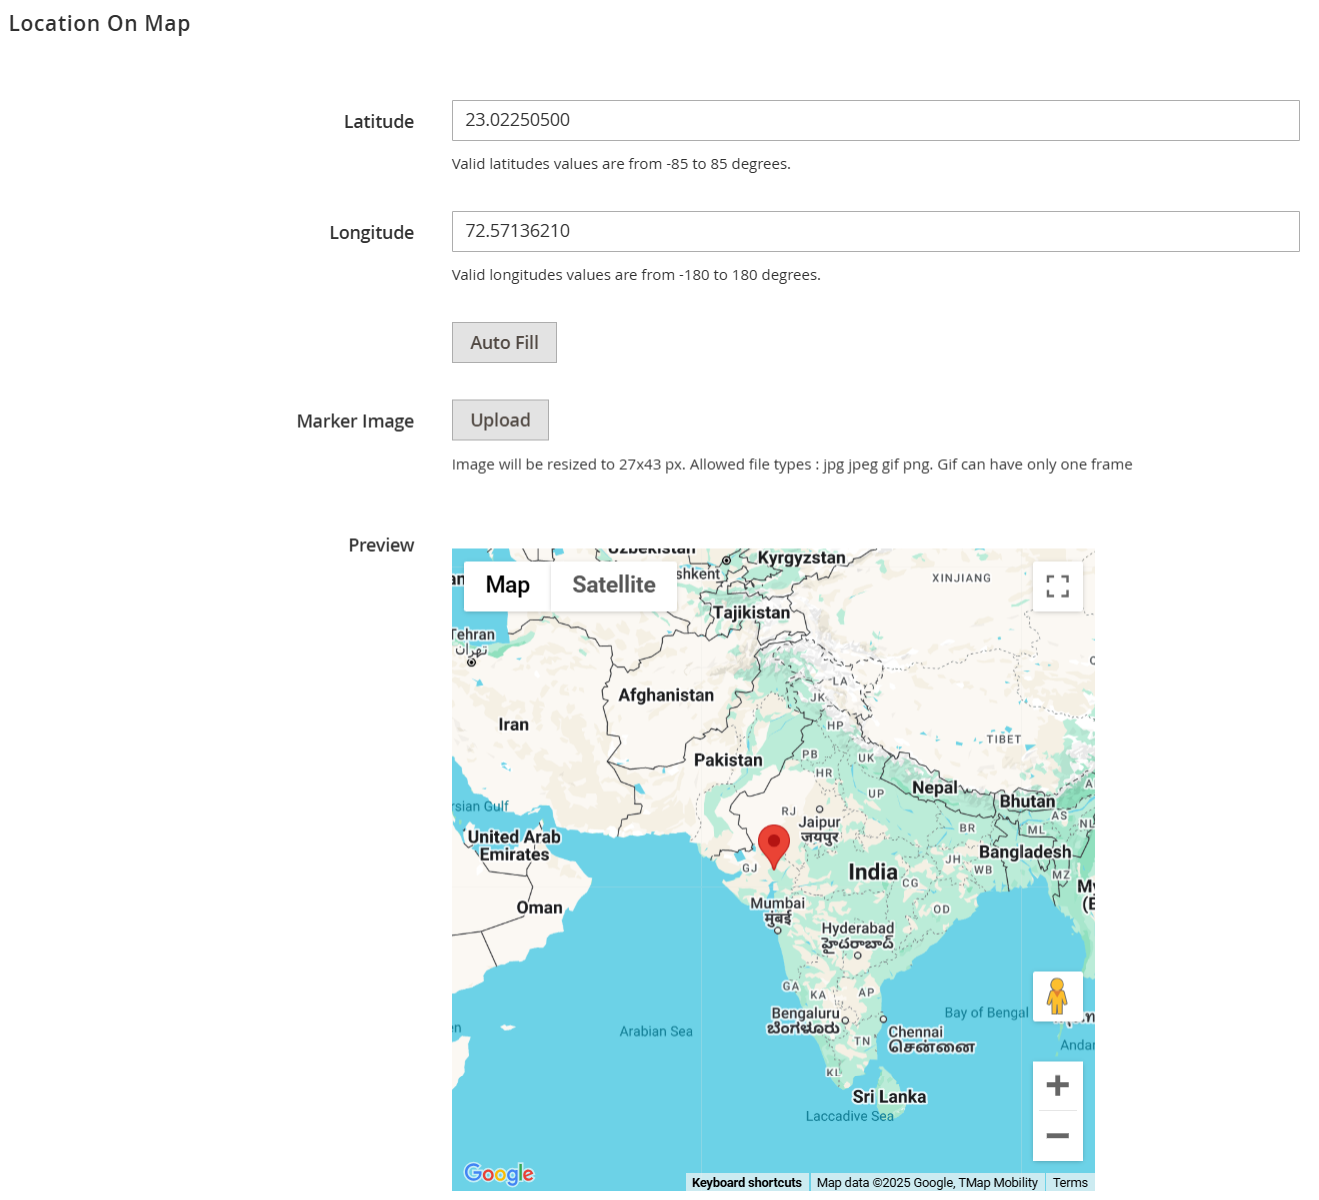
To display store locations correctly on the Magento 2 Google Map, you need to input the longitude and latitude for each store. The module includes an Auto Fill button to help you automatically determine these coordinates.
Additionally, you can customize the location marker by choosing an icon under the Custom Marker option. Feel free to upload an image that matches your map design, and you can even use different markers for various stores.
Once everything is configured properly, your store locations will be clearly visible on the Google Map.
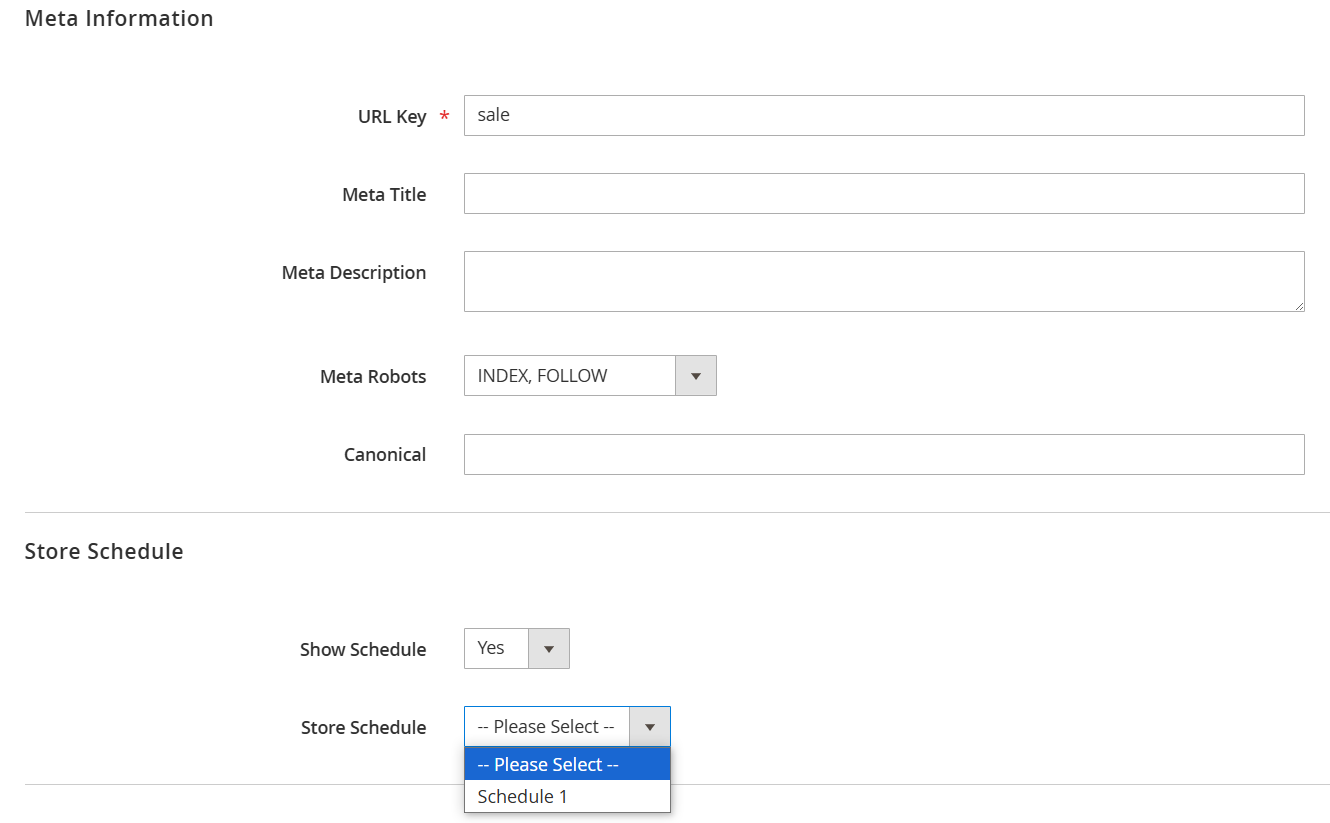
Meta Information: Accurately fill in the metadata for your store to enhance its search engine visibility and ranking.
Store Schedule: Select 'Yes' to showcase the store schedule on the frontend. Then, choose your preferred schedule type from the dropdown menu.

Here, you can provide extra details for each store location, such as parking options, payment methods, brands offered, and more. These attributes allow customers to filter stores on the frontend store locator page, making it easier to find what they need, especially when multiple stores are available.
Manage Location Attributes
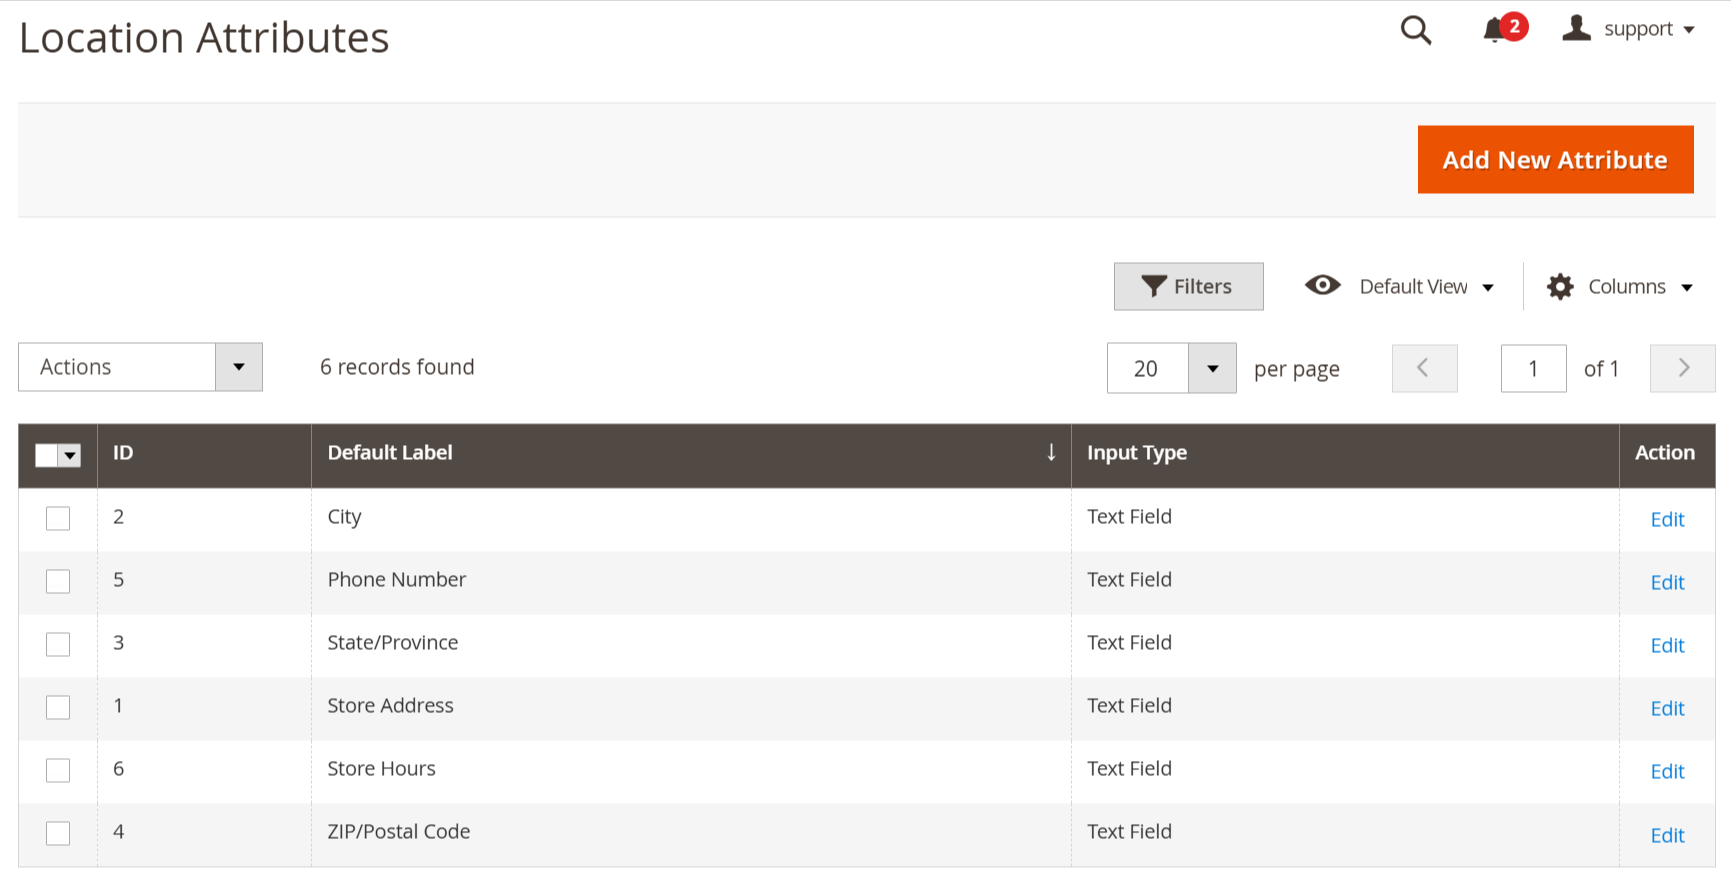
Control all location attributes from the grid view. You can easily edit any existing attribute or click on 'Add New Attribute' to create a new one.
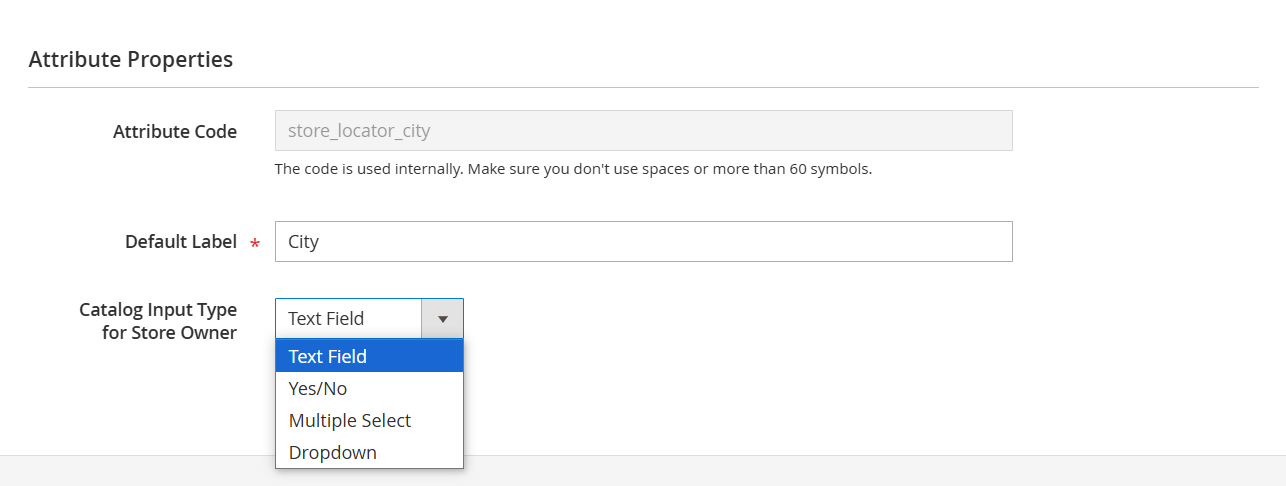
Configuring an attribute is straightforward. Follow these steps:
- Specify the Attribute Code.
- Enter the Default Label.
- Choose the Catalog Input Type (supports Yes/No, Multiple Select, Dropdown, and Text Field).
- Click the Save button to complete the attribute configuration.
You can now utilize this attribute in the Store Attributes tab for your locations.
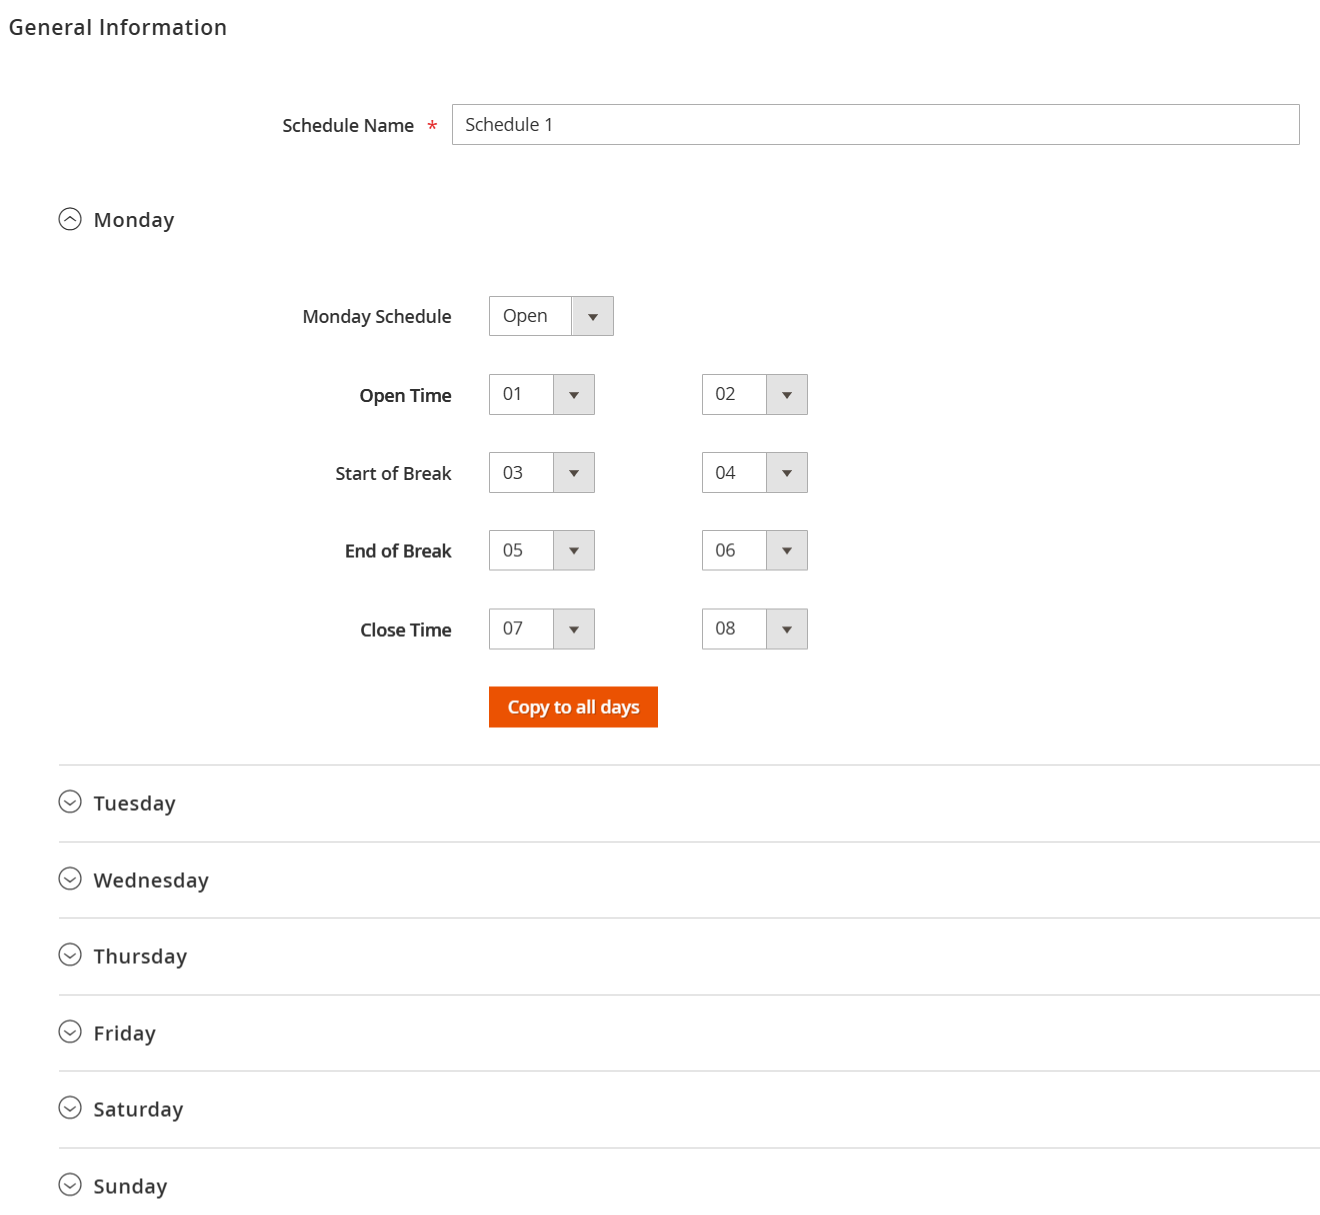
Manage Location Schedules
Navigate to Mavenbird > Location Schedules to handle all store schedules. You can create multiple schedules to accommodate various store types.

Access any schedule to modify it as needed. It’s easy to adjust the working hours for each day of the week.
Manage Store Reviews
To monitor and oversee customer reviews, navigate to Mavenbird > Location Reviews. You can select specific reviews for approval, rejection, or deletion using mass actions. Easily read review comments and update their status directly from the grid.
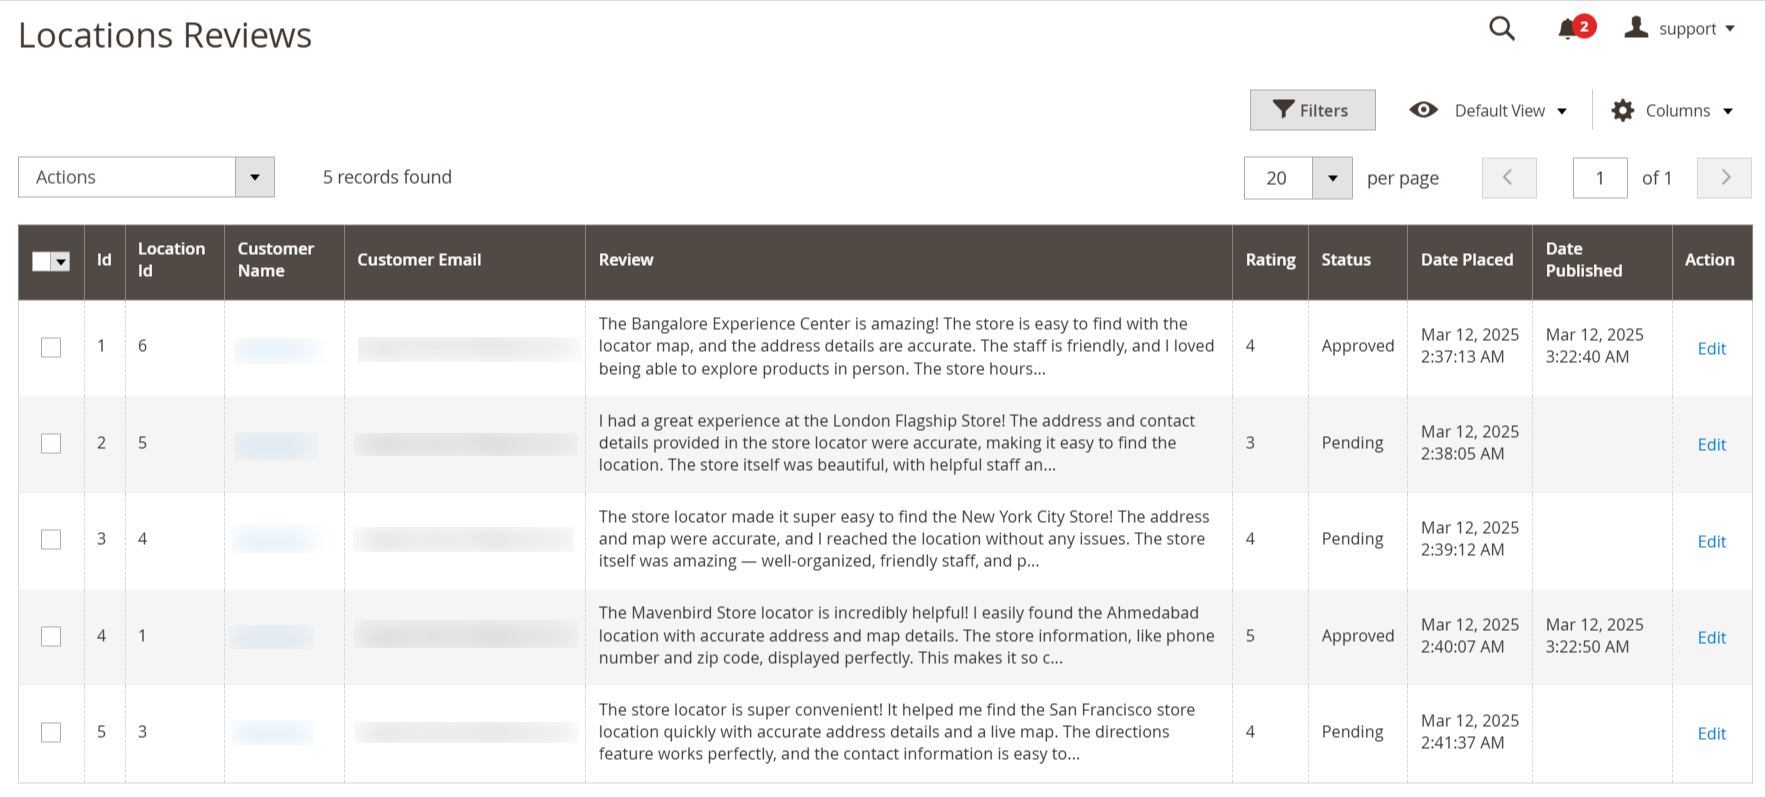
You can access and edit any review as needed.

Add Store Locator Widget
With this extension, you can easily add the store locator section to any page on your site as a widget. To create a new widget, navigate to Content > Widgets and click on the Add Widget button.
First, select Mavenbird Store Locator as the Widget Type and choose your current theme from the Design Package/Theme dropdown menu.

Next, enter the Widget Title, select the stores in the Assign to Store Views menu, and specify the Sort Order if necessary.
Once you’ve made your selections, click the Add Layout Update button. Then, choose the desired location for the widget from the Display On dropdown menu and fill in the remaining details.
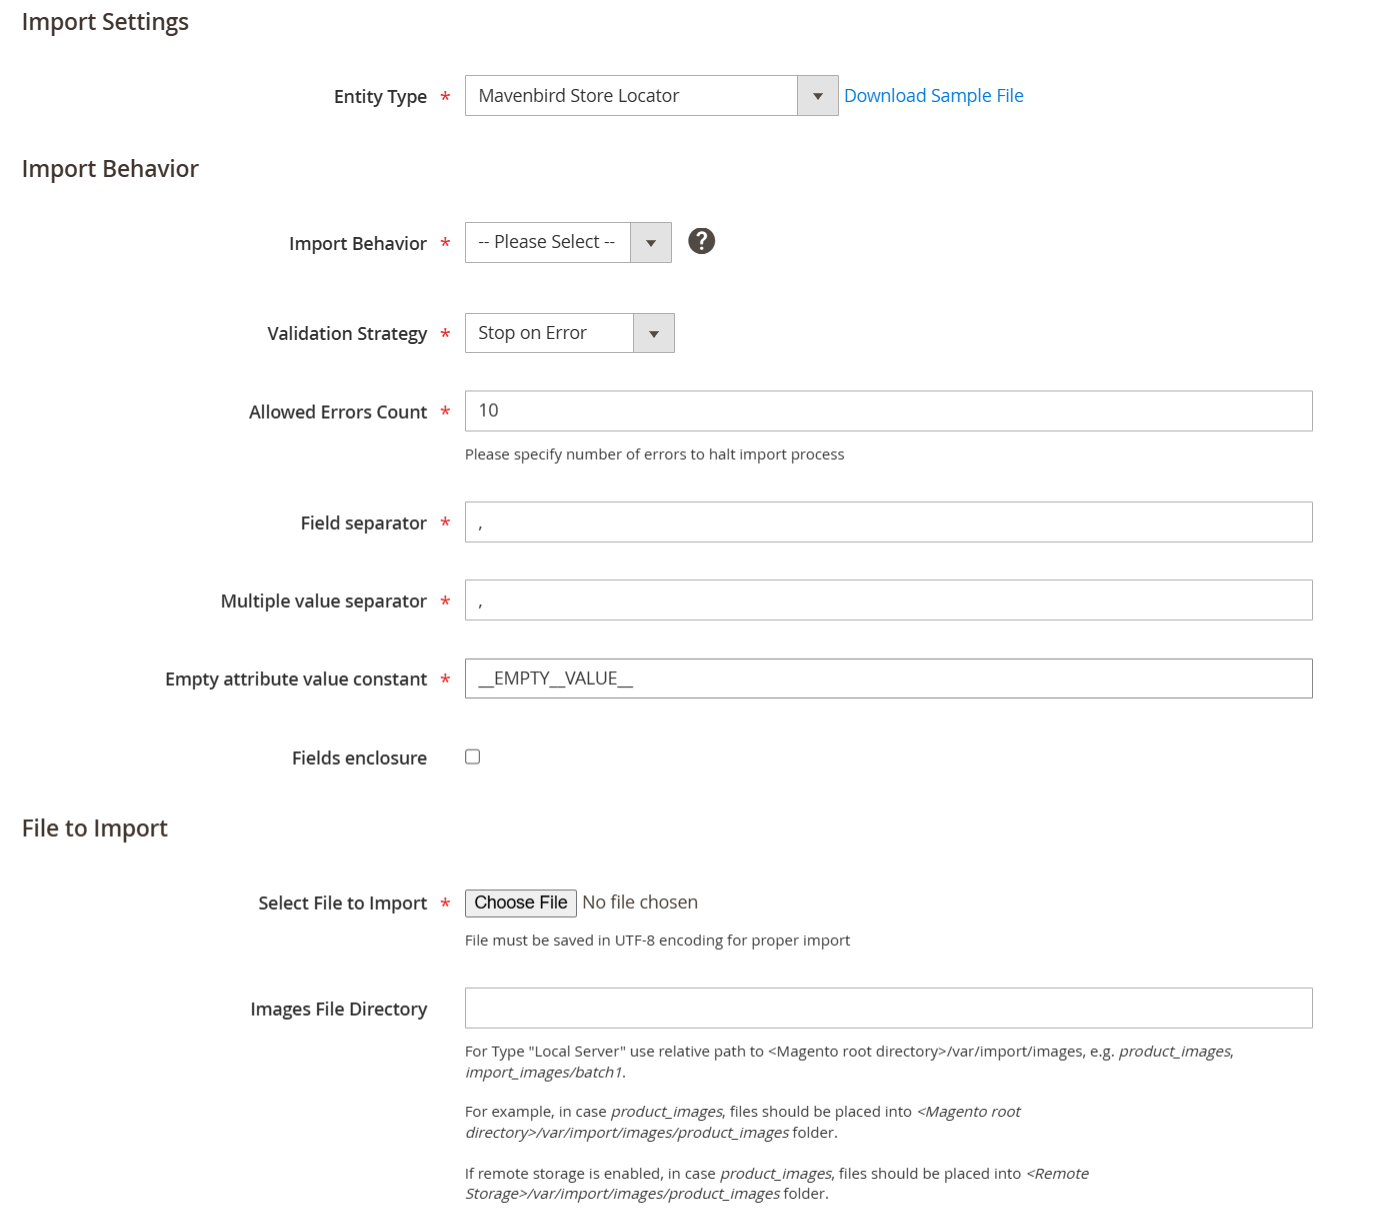
Import and Export Data
You can import and export various Store Locator data from other Magento 2 installations. This feature is available as part of an active product subscription or support plan.
Frontend Implementation
Integrate the Store Locator map into any page on your website.
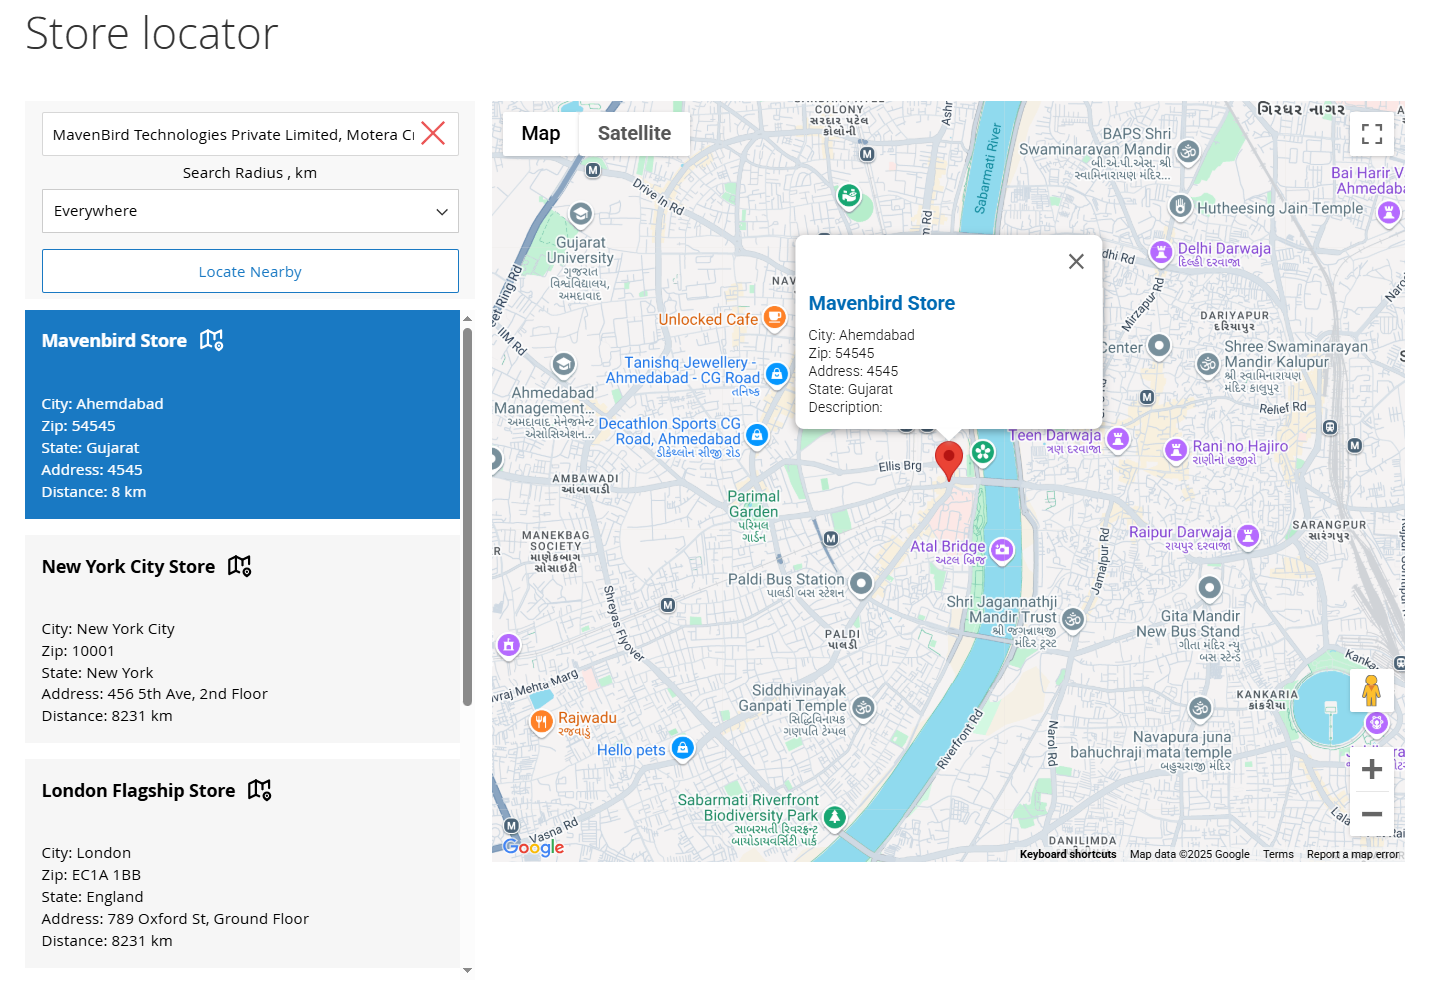
Customers can refine their search for stores by utilizing specific predefined attributes.

Showcase all essential store information on a dedicated location page. Customize the page to fit your business needs with ease. Include a detailed store description, an image gallery, a list of brands, key product categories, payment methods, and other store attributes.
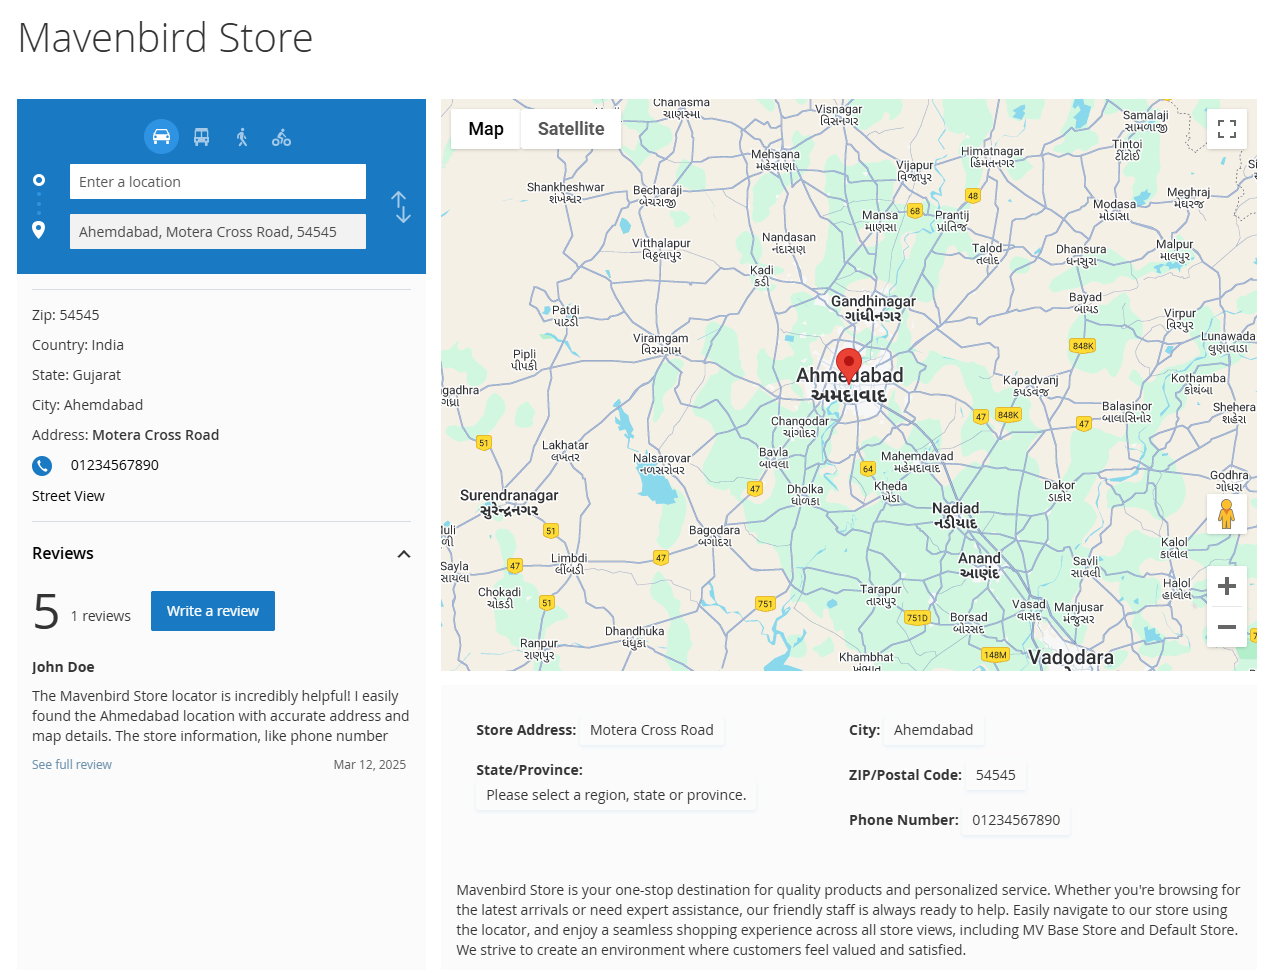
The Magento 2 Google Maps Store Locator offers your customers a panoramic view of the surrounding area at their selected map location, creating an experience as if they are physically present.
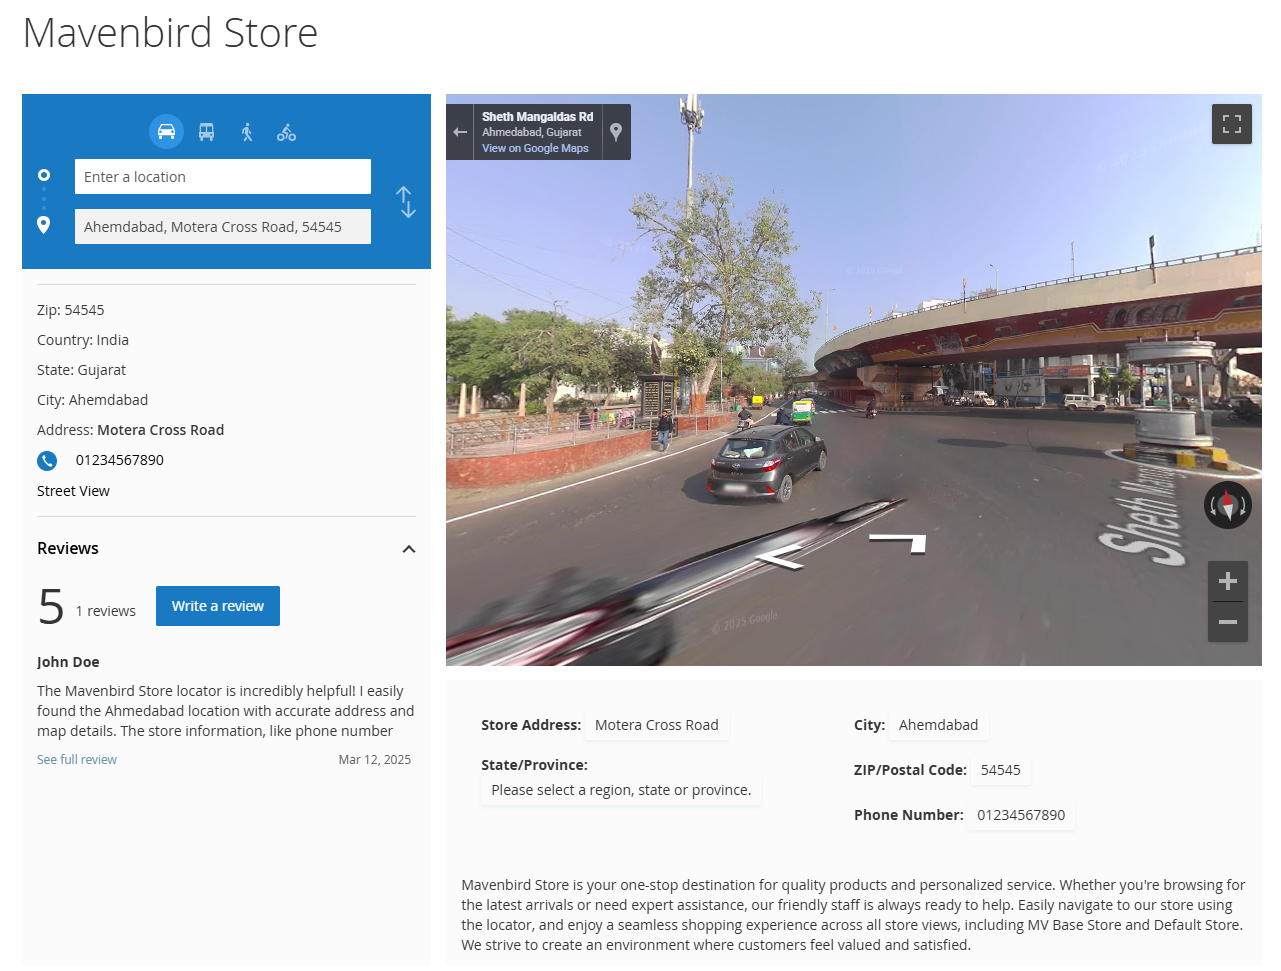
This feature ensures that your customers can easily locate your store.
Configuring the Google Marker Template
This extension allows you to present additional details in a popup, such as phone number, website, and email address.
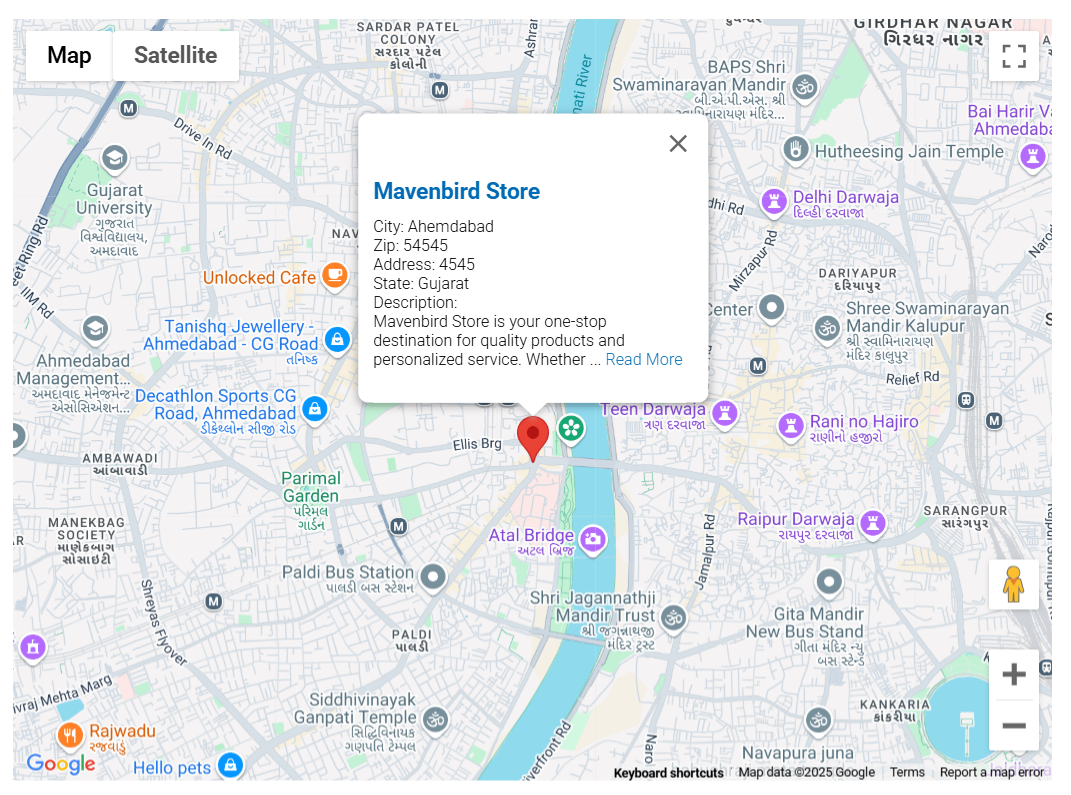
To set up the popup, you need to include the following details about each marker along with a text description in the module's Google Marker template configuration.