Import Export CMS Pages
Extension Installation
For Magento Marketplace Customers
-
Find the Composer name and version of the extension in the extension's composer.json file.
-
Login to your SSH and run:
- composer require mavenbird/module-import-export-cms-pages
- Wait for Composer to finish updating your project dependencies and make sure there aren't any errors.
-
To verify that the extension installed properly, run the command:
- php bin/magento module:status Mavenbird_ImportExportCMSPages
- By default, the extension is probably disabled.
- Enable the extension and clear static view files:
- php bin/magento module:enable Mavenbird_ImportExportCMSPages --clear-static-content
- php bin/magento setup:upgrade
- For Magento version 2.0.x to 2.1.x - php bin/magento setup:static-content:deploy
- For Magento version 2.2.x & above - php bin/magento setup:static-content:deploy --f
- php bin/magento cache:flush
For Mavenbird Customers
- Extract the zip folder and upload our extension to the root of your Magento 2 directory via FTP.
- Login to your SSH and run below commands step by step:
- php bin/magento setup:upgrade
- For Magento version 2.0.x to 2.1.x - php bin/magento setup:static-content:deploy
- For Magento version 2.2.x & above - php bin/magento setup:static-content:deploy --force
- php bin/magento cache:flush
You can import and export CMS pages from your store, such as a store, page title, URL keys, meta data, page design settings, custom design settings, etc., in bulk via CSV format. This extension allows you to import data from one store to another from all the Magento CMS pages. The store view-wise CMS pages can be exported from the store.
- Pages with all relevant data for import/export of CMS pages.
- CMS pages for import/export store view.
- Magento admin/browser for import/export files. No FTP connection requirement.
- No FTP connection requirement.
- Multi-store and multi-site support.
Create CSV
title: The title of the CMS page. In this example, it's "Login Page".
page_layout: Defines the layout of the CMS page. In this case, "1column" is used, meaning the page will have a one-column layout.
meta_title: The meta title for the CMS page, which is typically used for SEO purposes. It is left blank in this row.
meta_keywords: Keywords related to the CMS page for SEO purposes. It is also blank.
meta_description: The meta description of the CMS page, which provides a summary of the page for search engines. It is blank.
identifier: The unique identifier or URL key of the CMS page. Here, it is set to "login".
content_heading: The heading of the CMS page content. In this case, it's "Login Page".
content: The actual HTML content of the CMS page. For example, <p>Login Page Content Here</p>.
creation_time: The timestamp when the CMS page was created, e.g., "2016-11-03".
updation_time: The timestamp when the CMS page was last updated, e.g., "2016-11-03".
is_active: A flag to indicate whether the CMS page is active (1 for active, 0 for inactive). Here, it's set to "1", meaning the page is active.
sort_order: The order in which the page is displayed relative to other pages. It is set to "0", meaning no specific order.
layout_update_xml: Any custom XML layout updates for the page. This field is blank.
custom_theme: If the page uses a custom theme, this field defines the theme. It is blank in this row.
custom_root_template: Specifies the custom root template for the CMS page, if any. It is blank.
custom_layout_update_xml: XML layout updates specific to the CMS page. It is blank.
custom_theme_from: The start date for applying the custom theme. It is blank.
custom_theme_to: The end date for applying the custom theme. It is blank.
store_id: Specifies the store view(s) to which the CMS page applies. In this example, "0" means it applies to the default store view.
Import CMS Pages
The following steps must be followed:
Step-1
As per our documentation, you can prepare your CSV. See details for more information((How can CSV be created? Or the CSV sample reference). Create a new file called "something.csv."
Note: - Don't modify the header of the CSV.
Step-2
Go to Your Site Backend -> SYSTEM -> Import/Export CMS Pages -> Import CMS Pages.
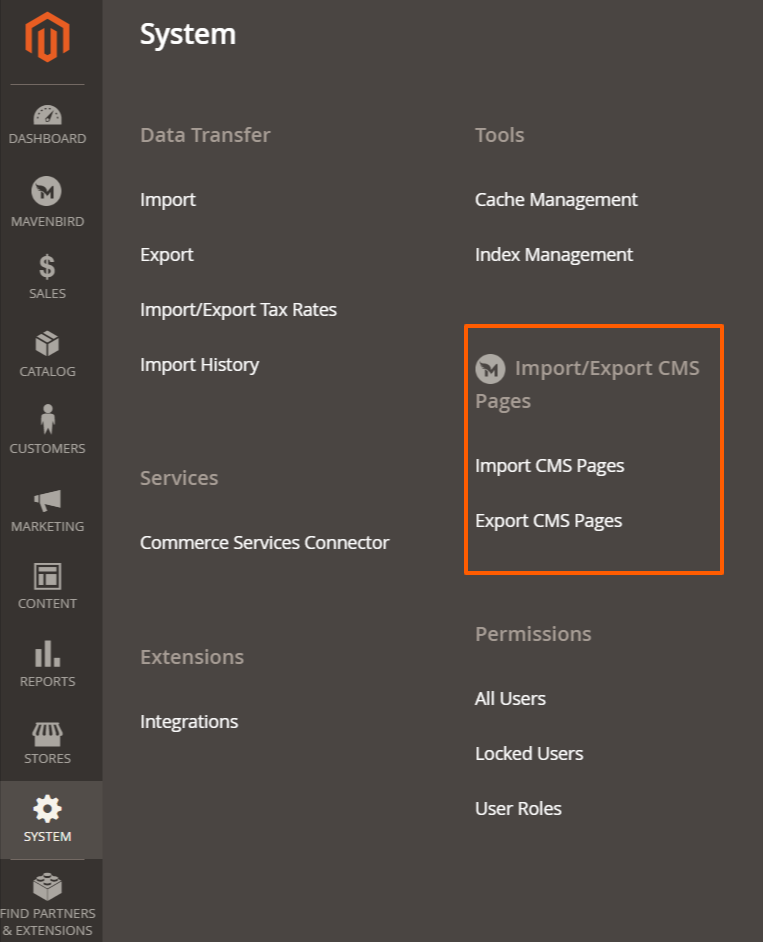
Step-3 Click on "Import CMS Pages" and upload your generated CSV file.
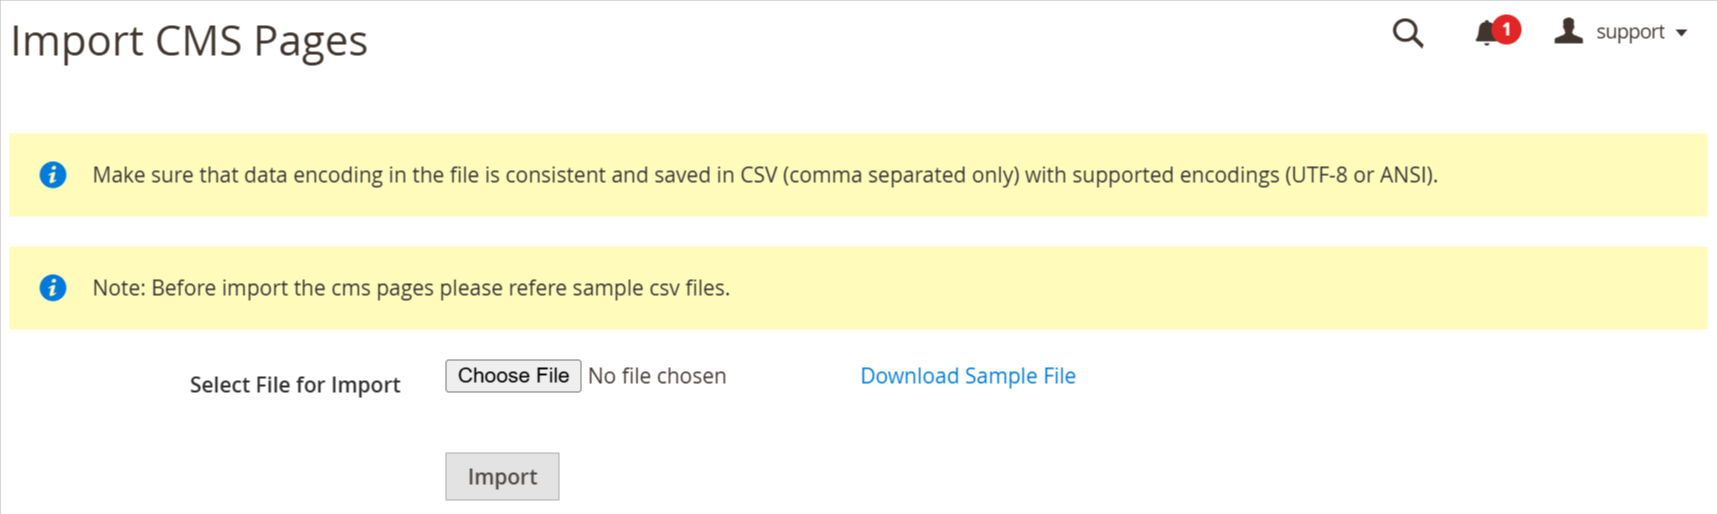
Note- Before completing the operation, please do not close this computer. If you close before completing the operation, it will lead to unwanted outcomes.
Step-4
Import CMS pages now successfully.
Your store CMS Pages will be display on Admin -> CONTENT -> Elements -> Pages.
Export CMS Pages
The following steps must be followed:
Step-1
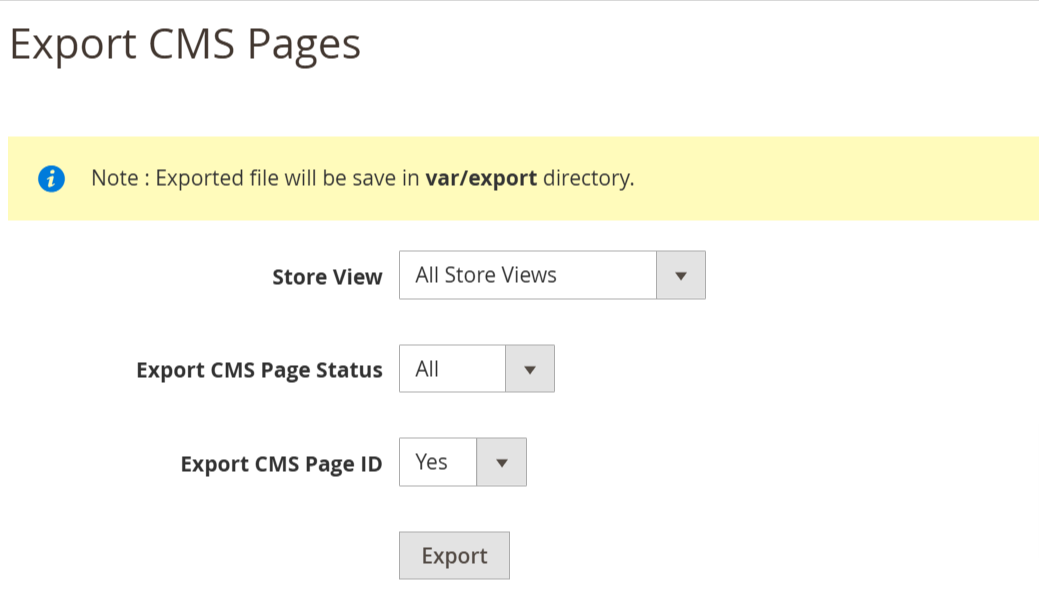
Go to Your Site Backend -> SYSTEM -> Import/Export CMS Pages -> Export CMS Pages
Step-2
Click the "Export CMS Pages" button. Select the field according to your requirements.
Step-3
Export CMS pages effectively now. You can get exported CSV file in <Magento-Root>>/var/export/ file