How to configure Mouseflow Session Replay, Heatmaps, Funnels, Forms on Magento 2
Founded in 2009 by Lasse Schou, a Danish entrepreneur, Mouseflow quickly becomes a powerful player in web analytics. This is a great tool that provides the experience for customers. This tool combines many of the features that are designed to understand how customers interact with your site, as well as help collect information from visitors. These features include standard version records, maps heat, form analysis, and surveys.
Mouseflow lets you know all your customer’s access behavior thanks to its powerful features. Using the Mouseflow tool, you will surely be satisfied with the benefits that it brings to your Magento 2 store.
Today, we will guide you how to configure Mouseflow Session Replay, Heatmaps, Funnels, Forms on Magento 2.
How to configure Mouseflow Session Replay, Heatmaps, Funnels, Forms on Magento 2
To configure Mouseflow Session Replay, Heatmaps, Funnels, Forms
Step 1: Install Mavenbird Google Tag Manager
- Download Google Tag Manager Enhanced Ecommerce (UA) tracking, follow this guide to use Google Tag Manager
Get Container ID for setting Magento

Setup in Magento
- Log in to
Magento Admin > Mavenbird > Google Tag Manager > Settings

- Choose Yes to enable the module.
- Enter Container ID from Google into Google Tag ID field.
Step 2: Step 2: Configure Mouseflow Session
- From your Mouseflow dashboard, click on your website’s name and choose
Add a Site.
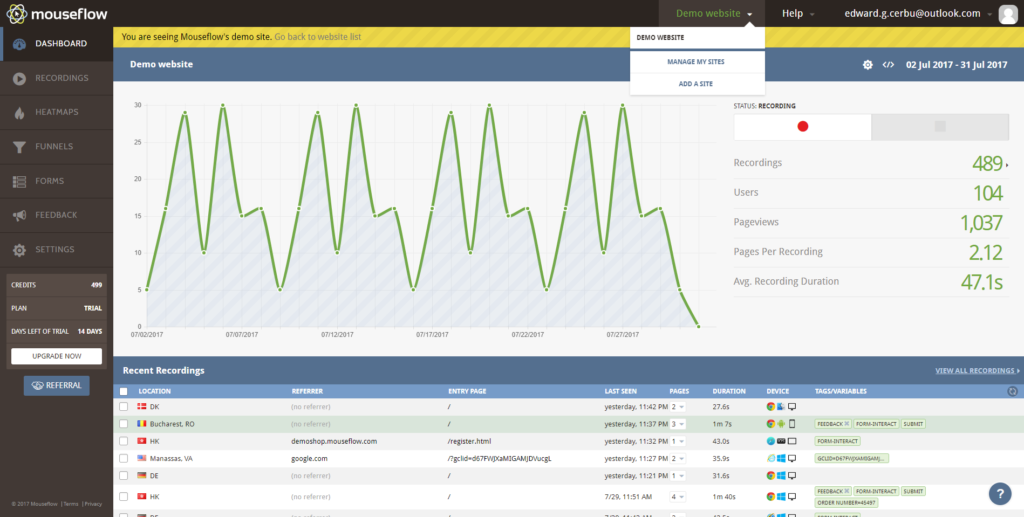
- Then, add your URL and choose
Nextbutton.

- You can totally modify the tracking settings on this screen. After you do, select
Finish and Create.
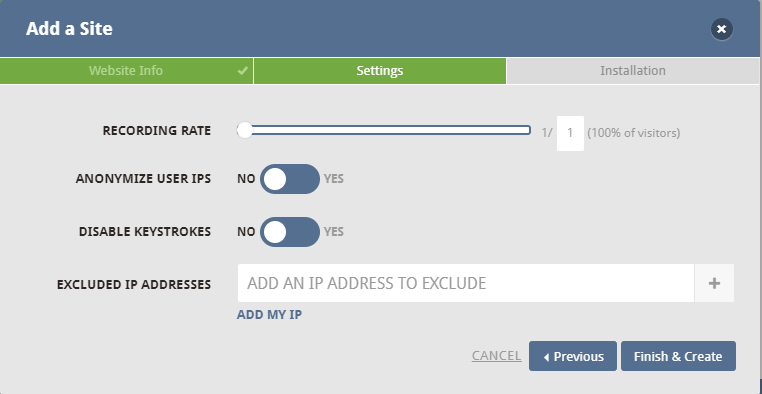
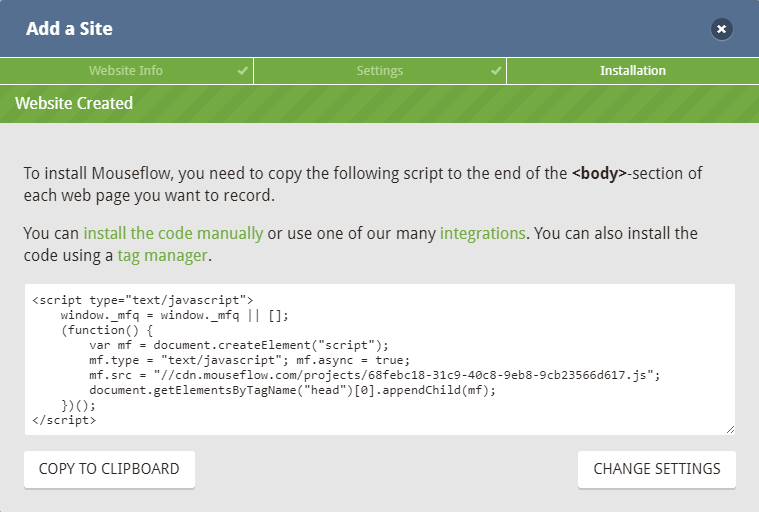
- There is the code snippet that you need to add to your site on the
Installation page. ChooseCopybutton to the clipboard and close the pop-up window.
Step 3: Save configuration
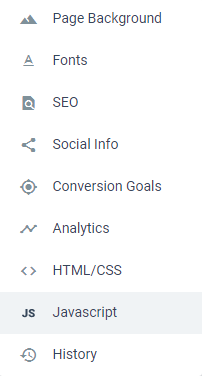
Access to your Installation page and add the code in Settings > JavaScript in the Body Section.
From now on, you will get all detailed information about your visitors as well as the time that they spend on your website.



Please complete your information below to login.