How to Configure Google Optimize on Magento 2
Google Optimize is a new Google site testing platform. It allows you to quickly and easily check the page design as well as to change the content. Besides that, it will monitor the performance of the test and will tell you which version is the best. This is a great free platform for customers.
Integrate this tool into your Magento 2 store to experience the great things that it brings.
To get the best results, in today’s article we will guide how to configure Google Optimize on Magento 2.
How to configure Google Optimize on Magento 2
To configure Google Optimize on Magento 2, follow 3 steps:
Step 1: Install Mavenbird Google Tag Manager
- Download Google analytics enhanced ecommerce (GTM), follow this guide to use Google Tag Manager
Get Container ID for setting Magento

Setup in Magento
- Log in to
Magento Admin > Mavenbird > Google Tag Manager > Settings

- Choose Yes to enable the module.
- Enter Container ID from Google into Google Tag ID field.
Some Related links:
Step 2: Create a new tag
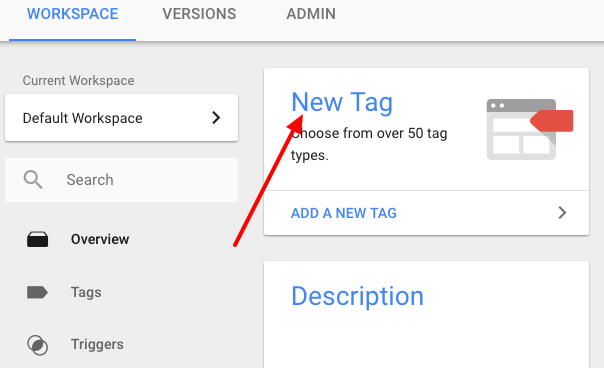
- Click on
New Tagin the GTM account and change the name of the tag

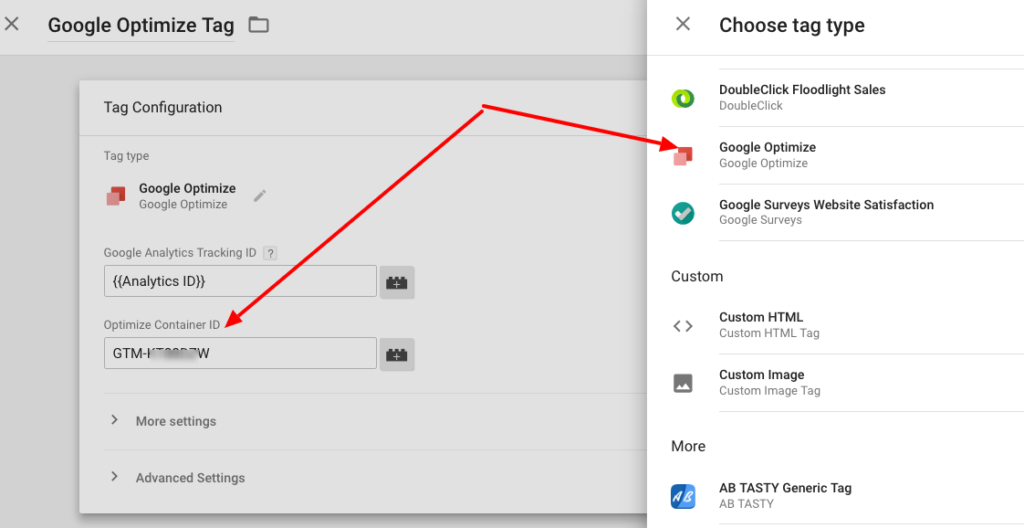
- Choose
Tag Configuration>Google Optimize

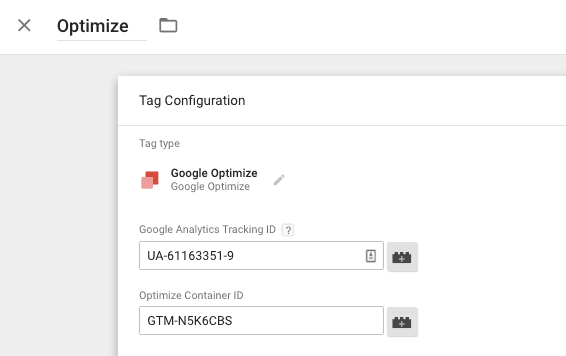
- Enter your Google Analytics Tracking ID and your Optimize container ID

- Click on
more settingsand configure thefields to setandadvanced configurationsas your Google analytics tags - Select
Savethis tag without adding triggers.
Step 3: Configure Google Analytics Page
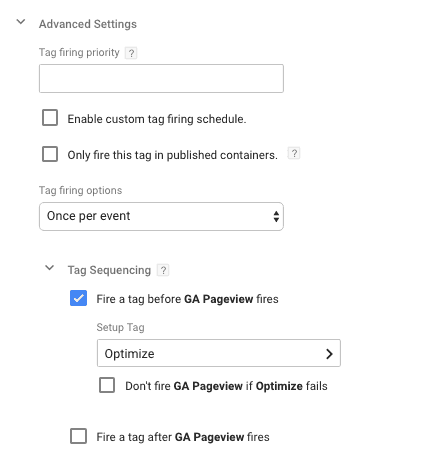
Open Google Analytics Page View tag, then edit Tag Configurations > Advanced Settings > Tag Sequencing. Next, click on Fire a Tag Before GA Pageview tag fires box and choose your Google Optimize tag as a Setup Tag.

Finally, choose Savethe Google Analytics Pageview tag. And remember repeating this process on any other tags as relevant. In this step, select Save to finish the process of the configuration this tag.


Please complete your information below to login.