How to Setup Crazy Egg on Magento 2
Google Tag Manager is a perfect free tool that makes it easy to add and update site tags like conversion tracking, web analytics, remarketing, and more. You can accomplish them with just a few clicks. In today’s article, we’ll show you how to set up Crazy Egg as a new tag in Google Tag Manager.
First of all, we need to understand what Crazy Egg is?
For Magento 2 shop owners, the efficiency of the business is the most important factor that they care. They want their websites not only customizable but also attractive, eye-catching and attracting customers. With Crazy Egg, it will help you better understand the behavior of your customers and from that, you can improve your business. Crazy Egg is an online application that provides you with an eye tracking tool like Heatmap, Scroll map, Overlay, and Confetti. Crazy Egg’s sharp and intuitive tools will help you track every detailed activity of the website and discover hidden profits based on visitor activity.
How to setup Crazy Egg on Magento 2
To setup Crazy Egg, follow 3 steps:
Step 1: Install Mavenbird GTM
- Download Magento 2 Google Tag Manager, follow this guide to use Google Tag Manager
Get Container ID for setting Magento

Setup in Magento
Login to Magento Admin > Mavenbird > Google Tag Manager > Settings

- Choose Yes to enable the module.
- Enter Container ID from Google into Google Tag ID field.
Step 2: Sign into your Google Tag Manager account
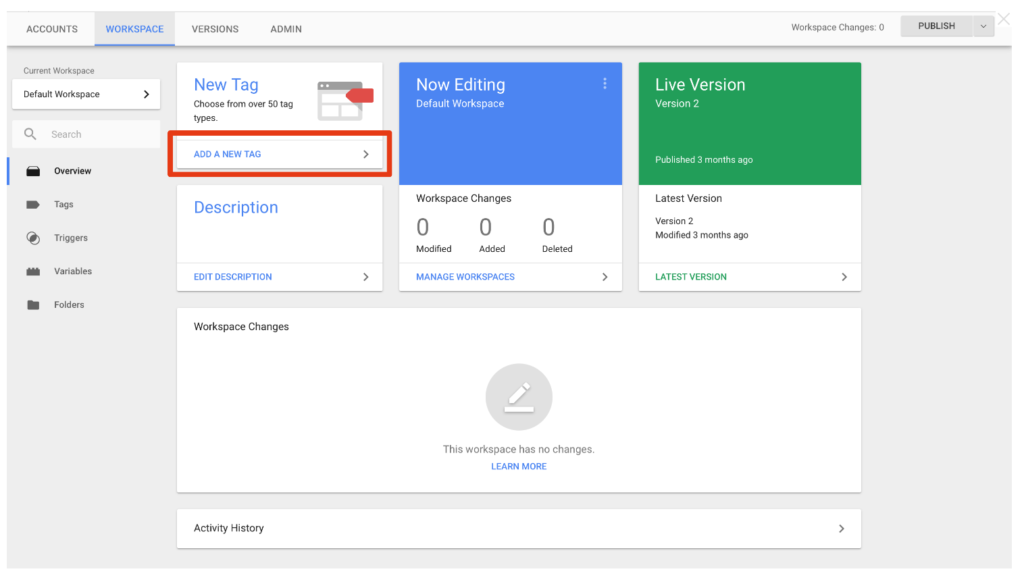
- From the dashboard, choose
Add a New Tag - Select
Add a New Tagas an image below:
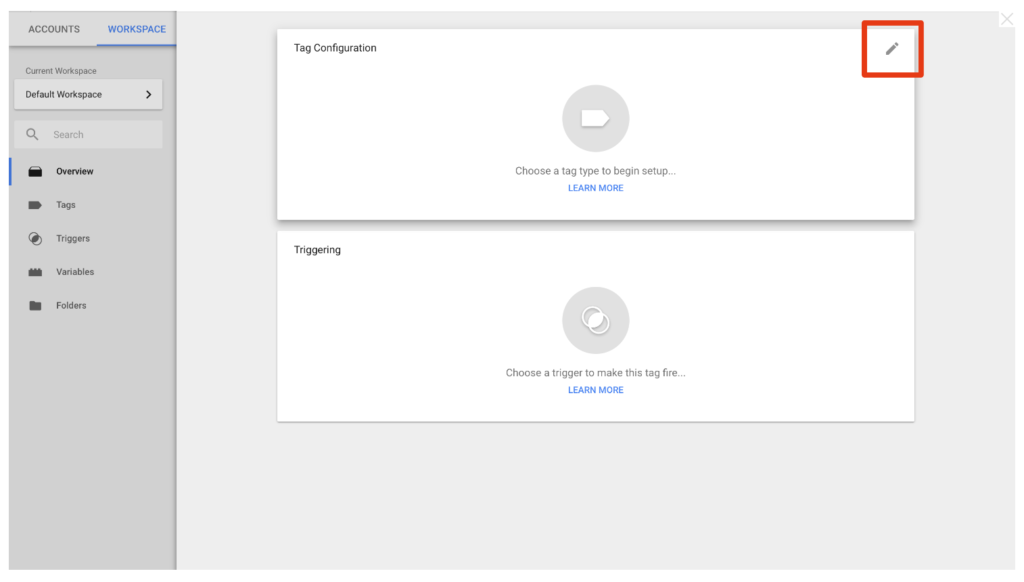
- Click on the pencil icon in the top right and Select
Crazy Egg - First, you click on the pencil icon in
Tag Configuration
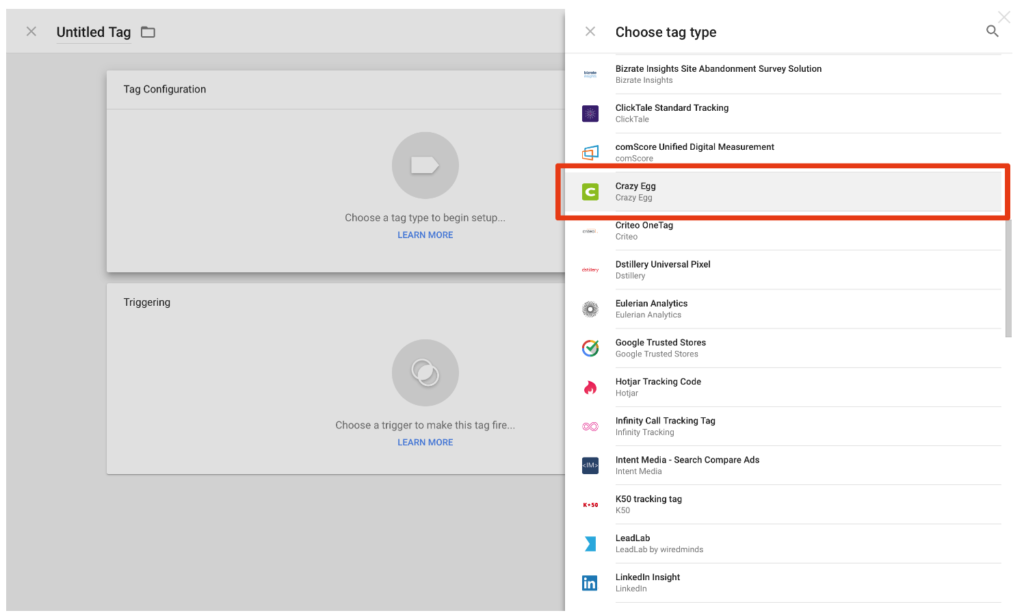
- Next, choose ` Crazy Egg` tool
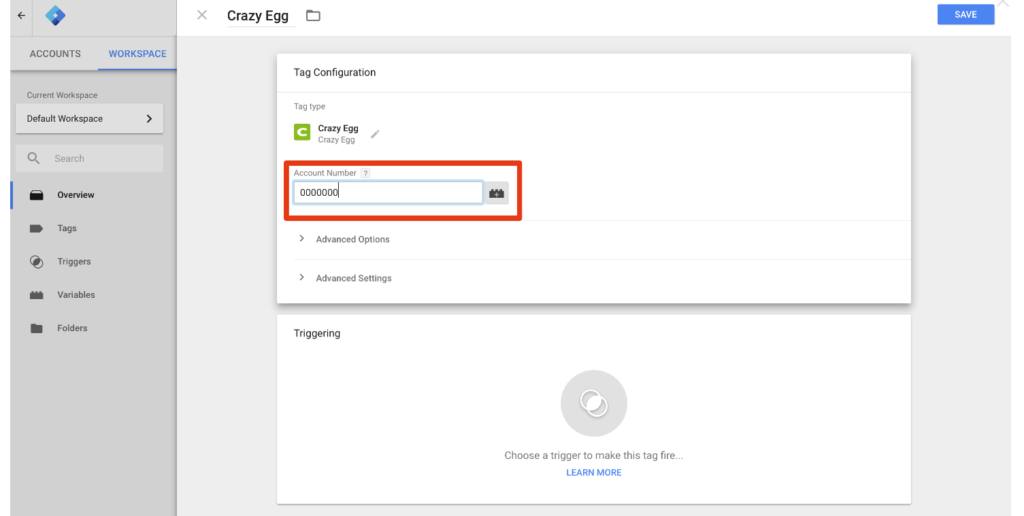
Step 3: Enter your Crazy Egg account number
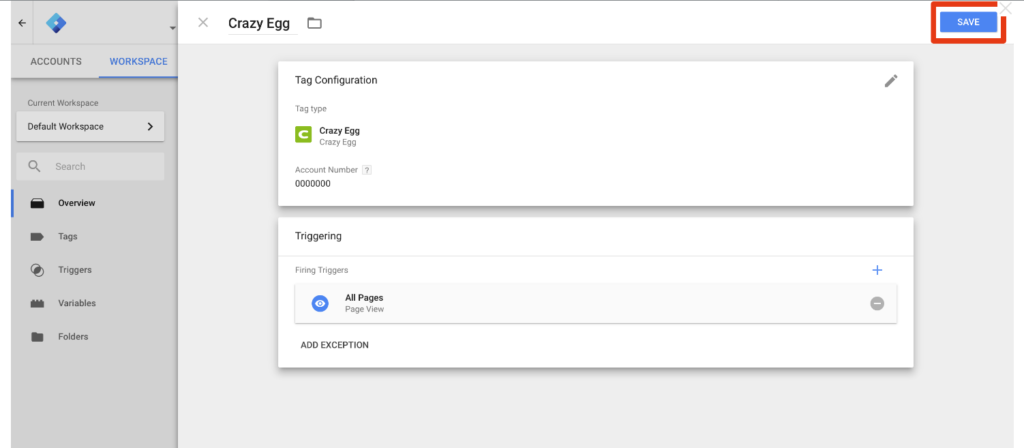
- If you have the Crazy Egg account, you enter your Crazy Egg account number as the image following:
- If you don’t have the Crazy Egg account, please sign up here: Signup Crazy Egg account
- Under Triggering choose
All Pages - Next, select
All PagesunderTriggering - Click
Savein the top right, then selectPublishto publish the script to all pages of your site. - Then, choose
SaveandPublicto finish


Please complete your information below to login.