How to Translate CMS Pages in Magento 2
Translating CMS Pages is one of the supported way to develop your business on the global. This means you can create a translated site and then make it visible on a specific store view for your customers. To set the content page for the translation, you have to create a new page with the same URL to assign it to the store. After configuring, you will update the CMS page for the specific view with the translated text.
6 Steps to Translate CMS Page in Magento 2:
- On the Admin Panel, Content > Elements > Pages.
- Find the page that needs to be translated, and open it in the edit mode.
- Copy the URL Key to the clipboard. Then, tap the Back button to get back to the Pages grid.
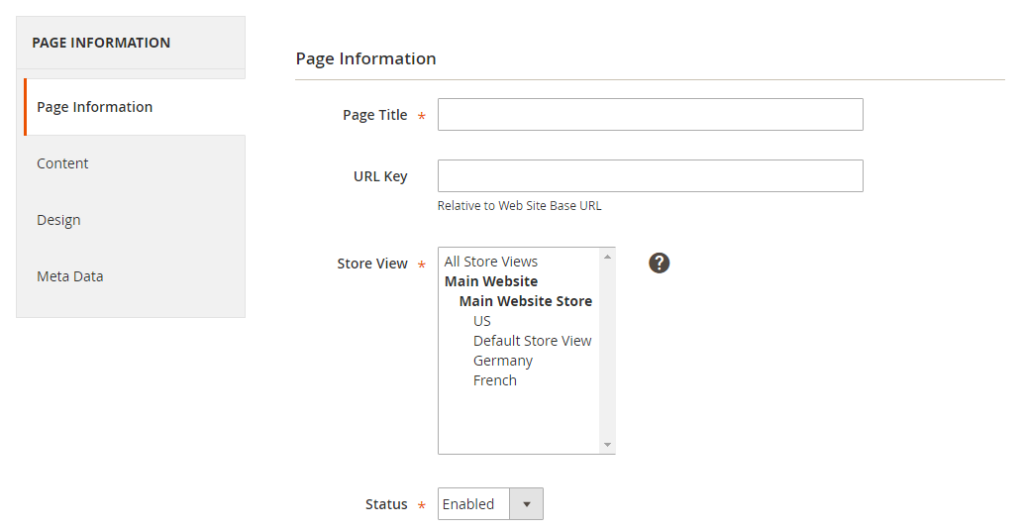
- Click on Add New Page, you need:
- Translate the Page Title.
- Paste the URL Key that you have copied before
- In the upper-left corner, select Store View for the translation display
- On the left panel, under Page Information, select Content, then insert the translated text for the page.
- Create the Layout for the page in the Design tab.
- Complete the translation for Keywords and Description in the Meta Data tab
- Click Save Page to complete, and flush the cache if prompted.
- Go to the storefront and use the language chooser to check the translation on the store view. Some elements such as the company footer links block and the welcome message also need to be translated.

Final words
Online merchants need to translate CMS Pages in Magento 2 if they want to run the business in different countries. It helps CMS Pages to be translated in the suitable language to drive more traffic. If you are interested in the CMS topic.


Please complete your information below to login.