
If you are wondering how to set Locale, Language, and Country in Magento 2, this tutorial will cover everything you need. Locale Options in Magento 2 provides more details about your store. Set up your store information in Locale Options to determine the timezone, language, and official working days in your area. Also, others can identify your country, tax rate, and gain some needed information related to your location.
With the information you can set from Magento 2 Locale Options, your store will become closer and friendlier to the audience. Also, you can take a closer step in operating your store in other countries. Follow this tutorial to know what you can do.
4 Steps to set store locale in Magento 2
Step 1: Login to your Magento 2 backend
- On the Admin sidebar, click on Stores. Then under Settings, choose Configuration.
- In the panel on the left under General, choose General.
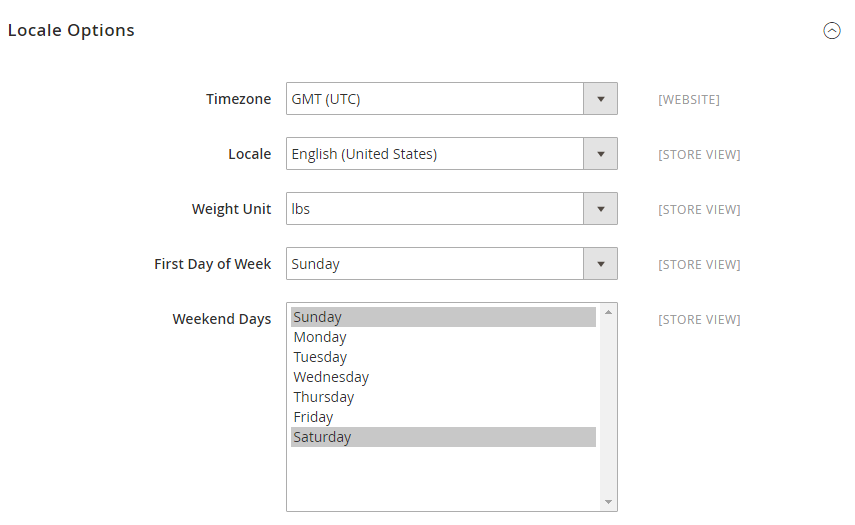
- Expand the Locale Options section.
- Select your Timezone from the list. Then, do the following:
- Set Locale to the store language.
- Set Weight Unit to the unit of measurement that is typically used for shipments from your locale.
- Set First Day of the Week to the day that is considered to be the first day of the week in your area.
- In the Weekend Days list, select the days which fall on a weekend in your area. (To select multiple options, hold down the Ctrl (PC) or Command (Mac) key.)
- When all are done, click Save Config.
Besides Locale Options, you can also configure State Options and Country Options clearly if needed. The standard address format is different for every country, so filling in the state information is optional. In many countries, the state, province, or region is a required part of a postal address used for shipping and billing information to calculate tax rates, and so on. In State Options, you can set up whether the state is required for different countries.
In addition, Country Options determine the country where your business is located, and which countries you accept payments from.
Step 2: Set up the State option
Configuring State options allows you to have better control over address requirements, as this information can be used to handle orders more effectively. Follow these steps to start setting things up:
- On the Admin sidebar, click on Stores. Then under Settings, choose Configuration.
- In the panel on the left under General, choose General.
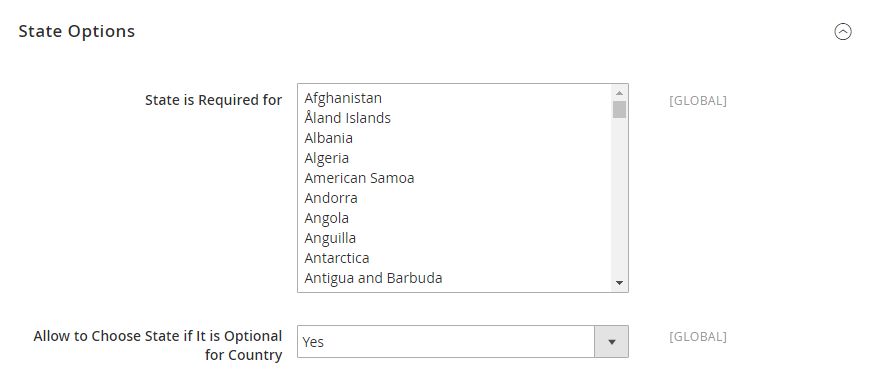
- Expand the State Options section, and do the following:
- In the State is required for list, select each country where Region/State is a required entry.
- Set the Allow to Choose State if It is Optional for Country field to one of the following:
- Yes: In countries where the state field is not required, include the State field as an optional entry.
- No: In countries where the state field is not required, omit the State field.
- When complete, click Save Config.
Step 3: Set up the Country option
Your store may operate and ship orders to customers in different countries. Therefore, you can configure which countries to conduct business with by following these steps:
- On the Admin sidebar, click on Stores. Then under Settings, choose Configuration.
- In the panel on the left under General, choose General.
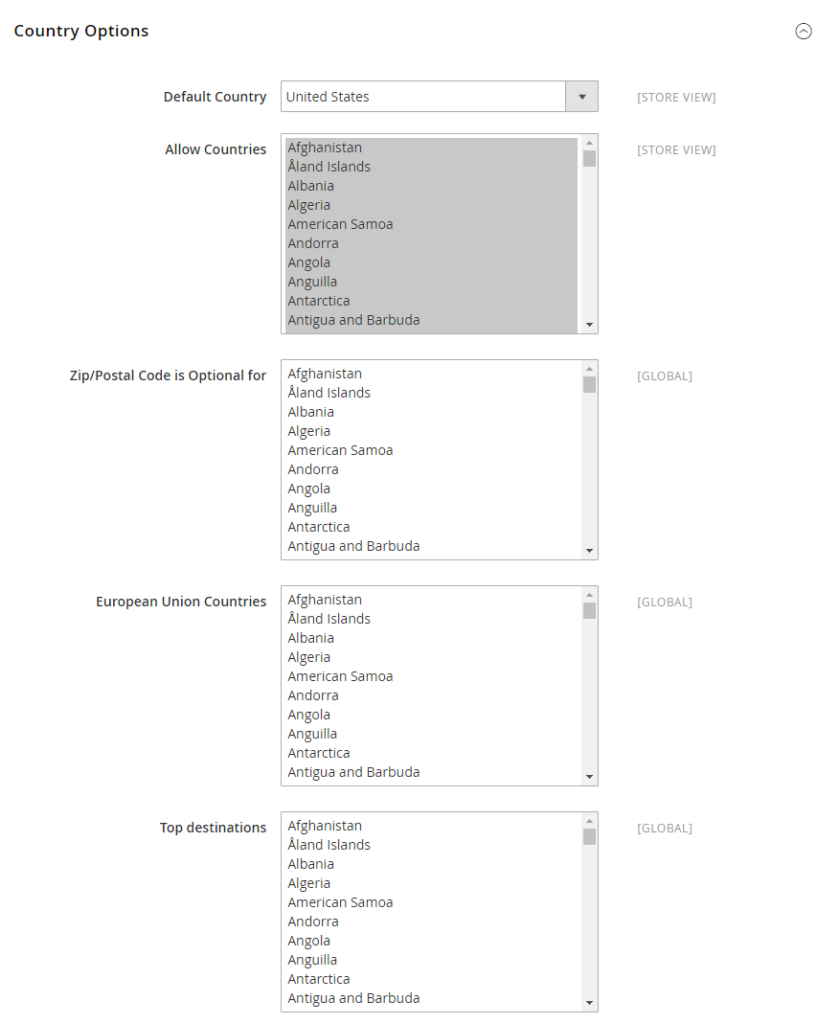
- Expand the Country Options section, and do the following:
- Choose the Default Country where your business is located.
- In the Allow Countries list, select each country from which you accept orders. By default, all countries in the list are selected. To select multiple countries, hold down the Ctrl (PC) or Command (Mac) key.
- In the Zip/Postal Code is Optional for list, select each country where you conduct business that does not require a ZIP or postal code to be included as part of the street address.
- In the European Union Countries list, select each country in the EU where you conduct business. By default, all EU countries are selected.
- In the Top Destinations list, select the primary countries that you target for sales.
- When complete, click Save Config.
Step 4: Check the result
You can check the final result on the frontend now. Before checking, please make sure you’ve tried basic tips like reindexing, flushing/clearing cache in your server/browser. Using incognito mode is also recommended.
The bottom line
Setting Locale options for your Magento 2 store can provide your customers with more details about your business, helping you build trust and a closer business-customer relationship. Moreover, you can set state and country requirements to conduct business, which is essential for operating on a global scale. If you need further explanation or guidance, give us a shout or comment below!