How To Manage Newsletter Campaigns On Magento 2
The newsletter is a type of email marketing that supports customers to keep updated with everything from your store. Hence, managing newsletter campaigns effectively is the key factor to build great relationships with your customers.
Magento 2 provides an essential tool for managing newsletters. This platform allows the store owners to create, add, send and cancel the newsletter subscription. Also, they can view the reports of the newsletters sent and recognize the issues coming from sending these newsletters. In this article, you will be instructed to manage the Newsletters campaign in Magento 2. Let’s explore the five steps below!
Step 1: Configure Newsletter
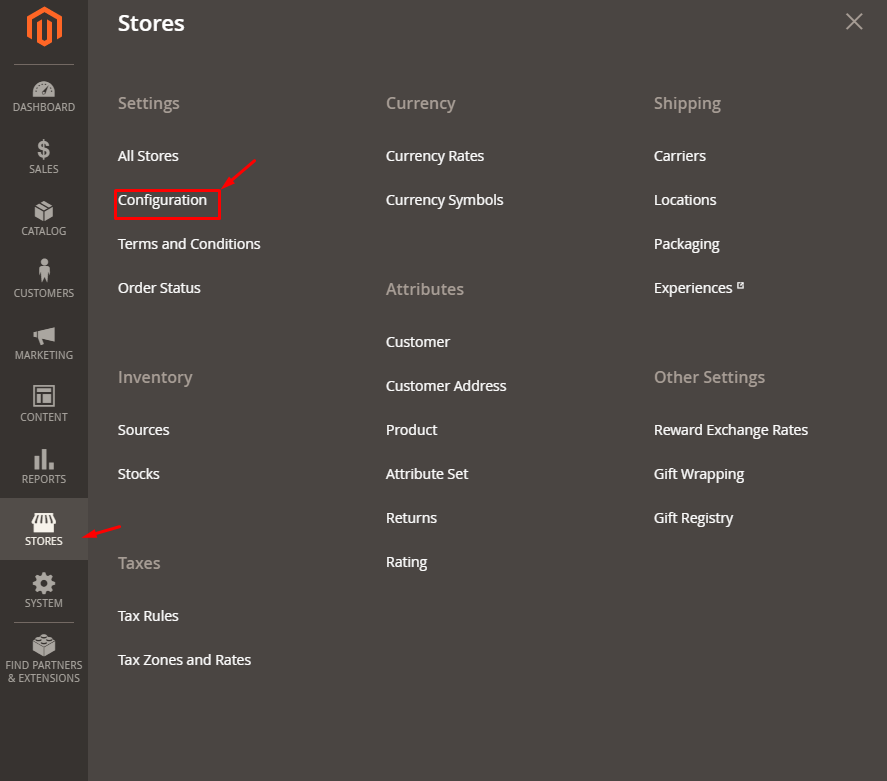
Before you begin sending the newsletter to your customers, you might want to check the few configuration settings related to the mailing system. For that purpose, log in to your Magento admin panel and navigate to Stores > Configuration.
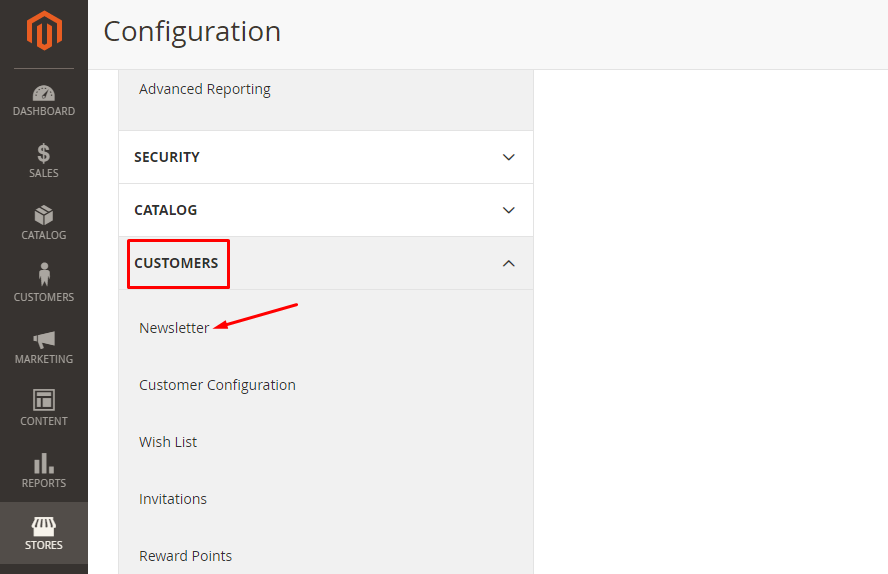
In the panel on the left, select CUSTOMERS, then click to Newsletter.
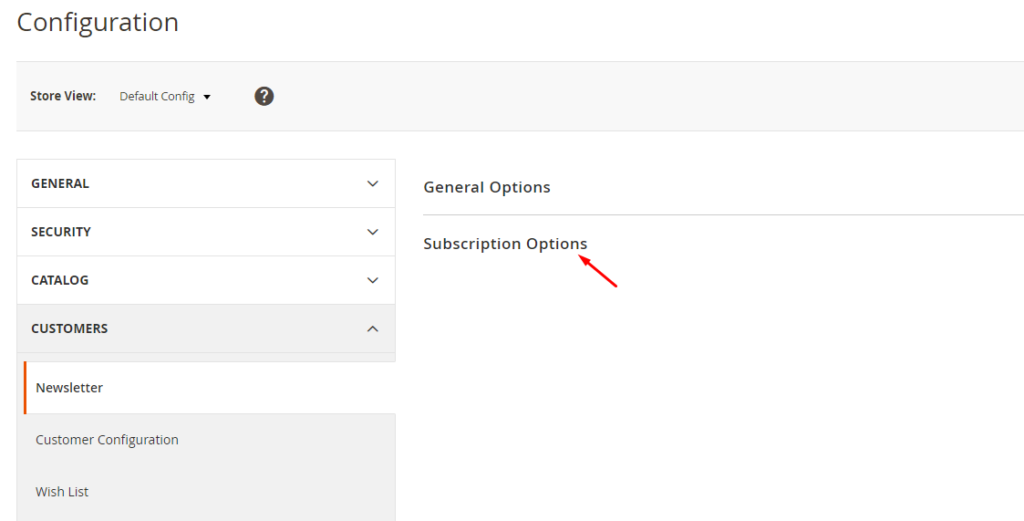
Then click to Subscription Options to expand this field.
Here you will see the interesting options regarding subscription and unsubscription, as below:
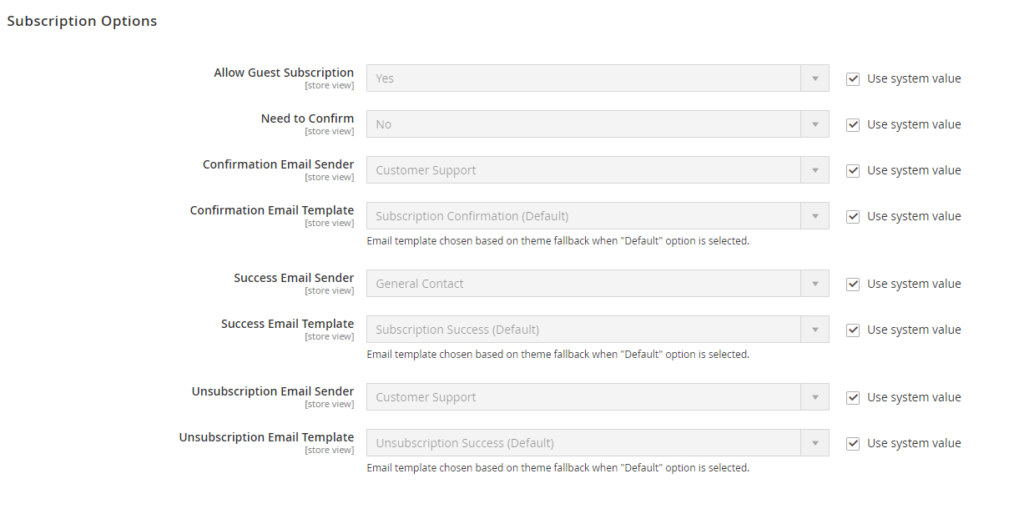
- Set the Allow Guest Subscription field to Yes if you allow Guests to subscribe to your Newsletters.
- Set the Need to Confirm field to Yes if you want customers to confirm before signing up for the subscription.
- In the Confirmation Email Sender field, select the Form in the confirmation email that customer will receive after subscribing.
- Click on Save Config button and refresh the Configuration and Page Cache afterward if necessary.
Step 2: Create A Newsletter Template
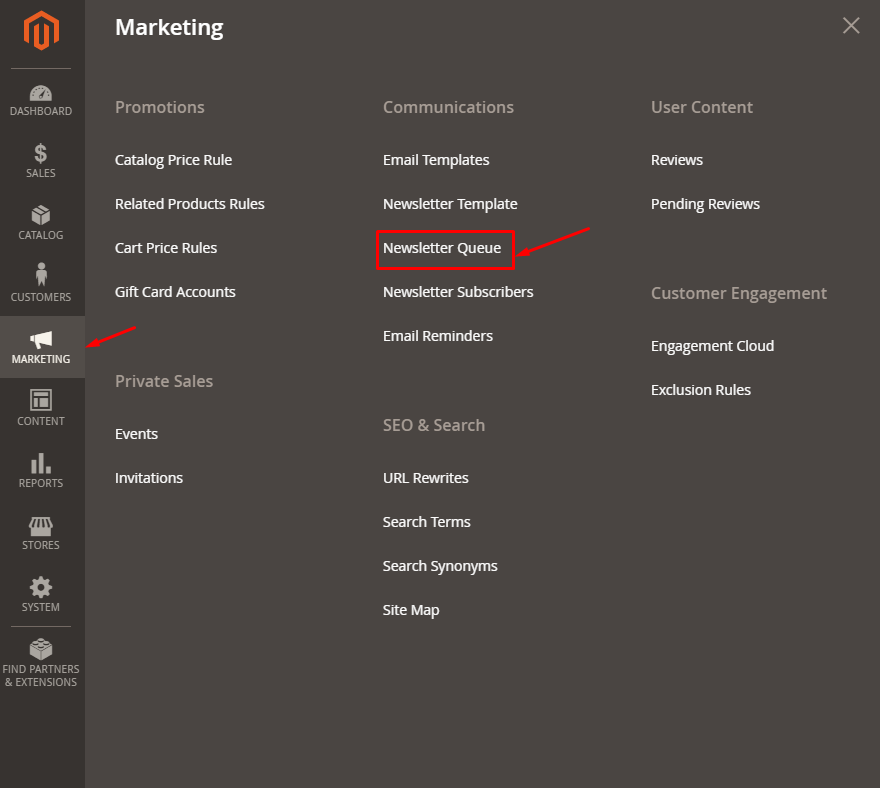
From your Admin dashboard, navigate to the** Marketing** > Newsletter Template section
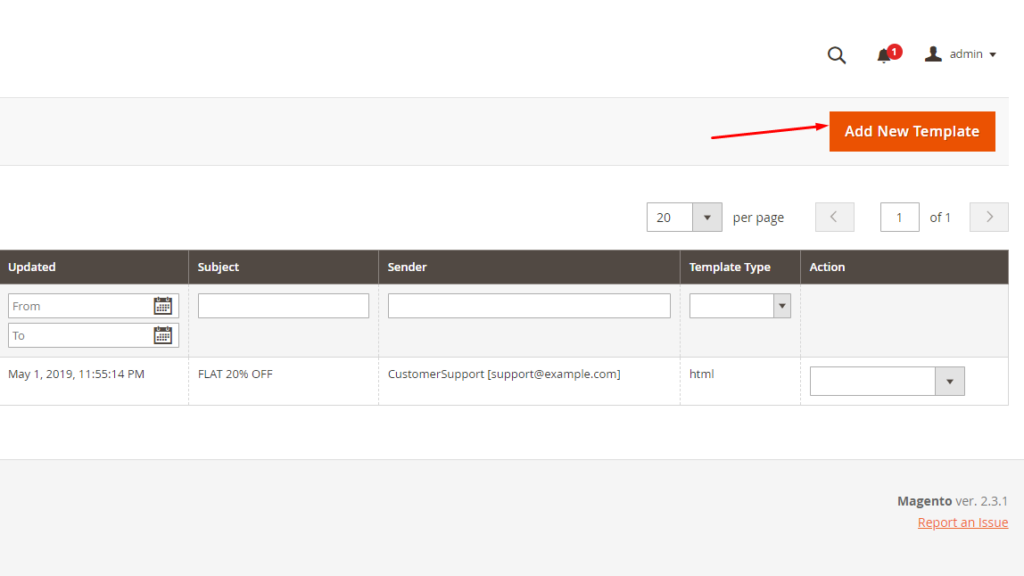
On the Newsletter Templates page, click on Add new Template button to create a new template.
Then you will see the New Template page where you can create a new template for newsletters by filling the required fields with the details.
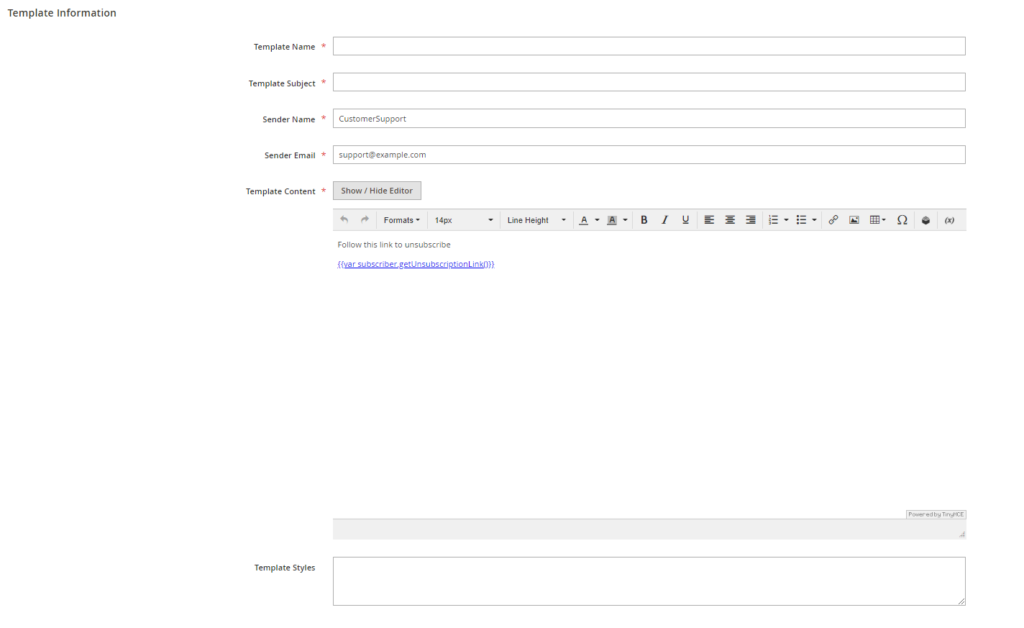
Note: In the Template Content field, write about the promotion you want to market and then click on the Save Template button to save the template for future use.

Step 3: Send Newsletters
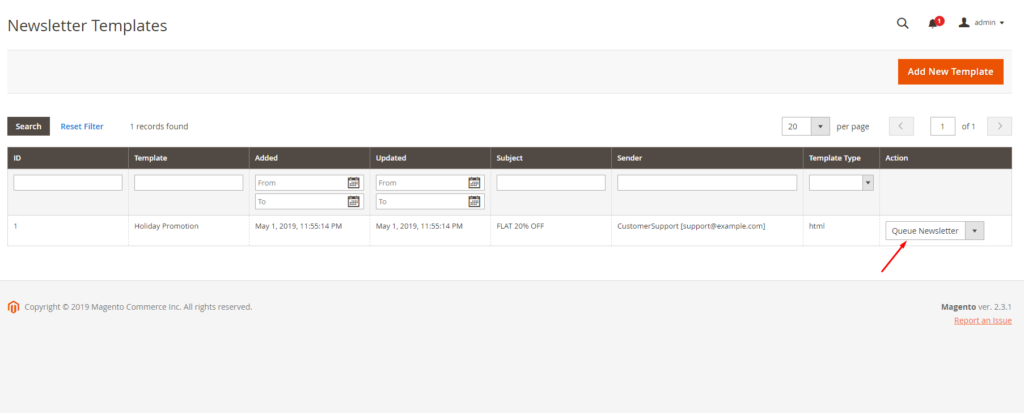
After clicking to Save Template button, you will be returned to the Newsletter Templates manager page. Click on the newly added template and from the drop-down menu in the Action column, select the Newsletter Queue option.
You will be directed to Edit Queue page where you can select the proper time the newsletter will be sent by clicking on the Calendar icon next to Queue Date Start. Use the sliders and calendar to set up the time for starting to send the newsletter.
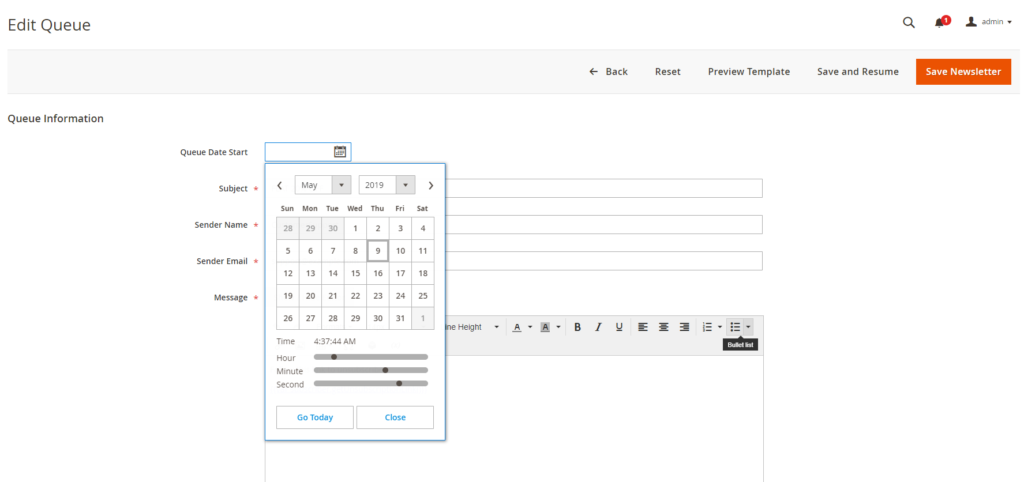
After defining the send time, click to the Save Newsletter button for applying the values.

Step 4: Manage The Subscribers
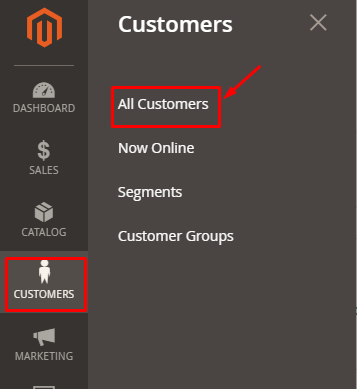
To manage the newsletter subscriptions, you need to click to CUSTOMERS from your Admin panel. Then, under Customer, select All Customers.
This will take you to the Customers page. Click to the Action menu drop down just above the details of the customers, and you will see the option to subscribe or unsubscribe to the newsletter.
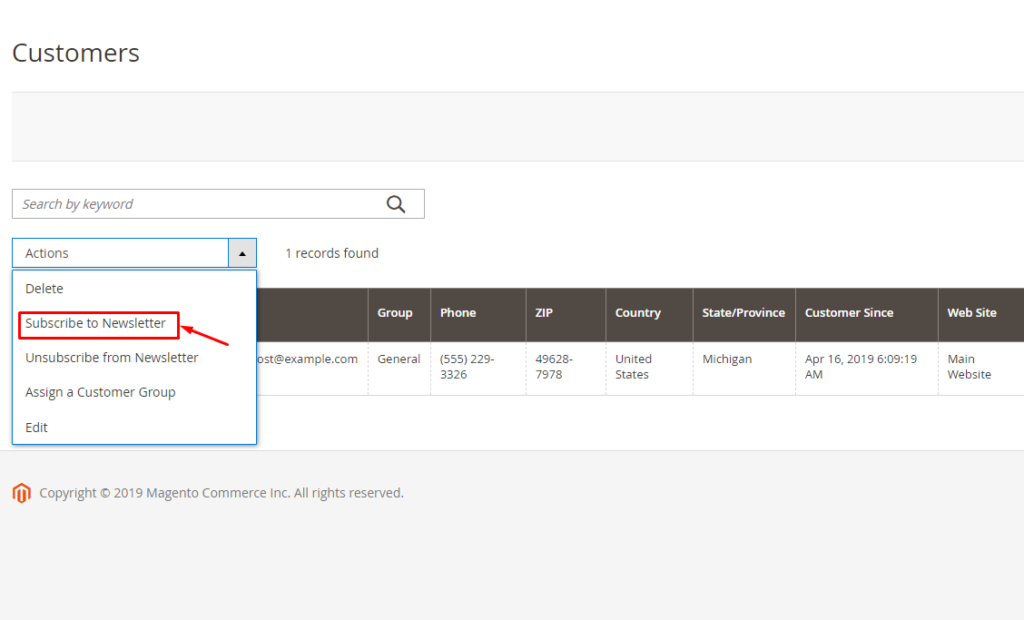
Here, you can choose the number of customers from the list by ticking on their checkbox, and then click on Subscribe to Newsletter or Unsubscribe from Newsletter option.
Another way to manage the subscription is to click to the Edit option in the Action column for the particular customer.
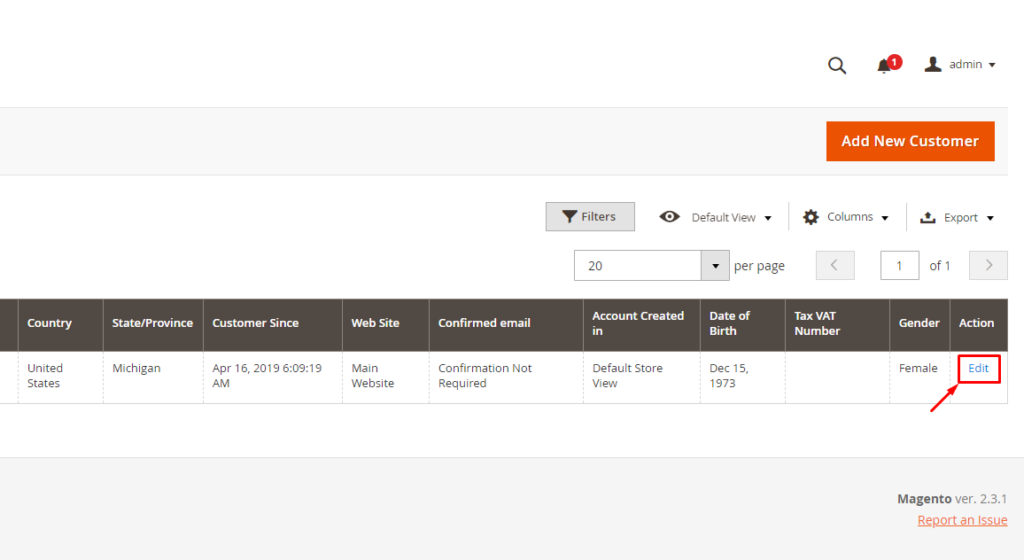
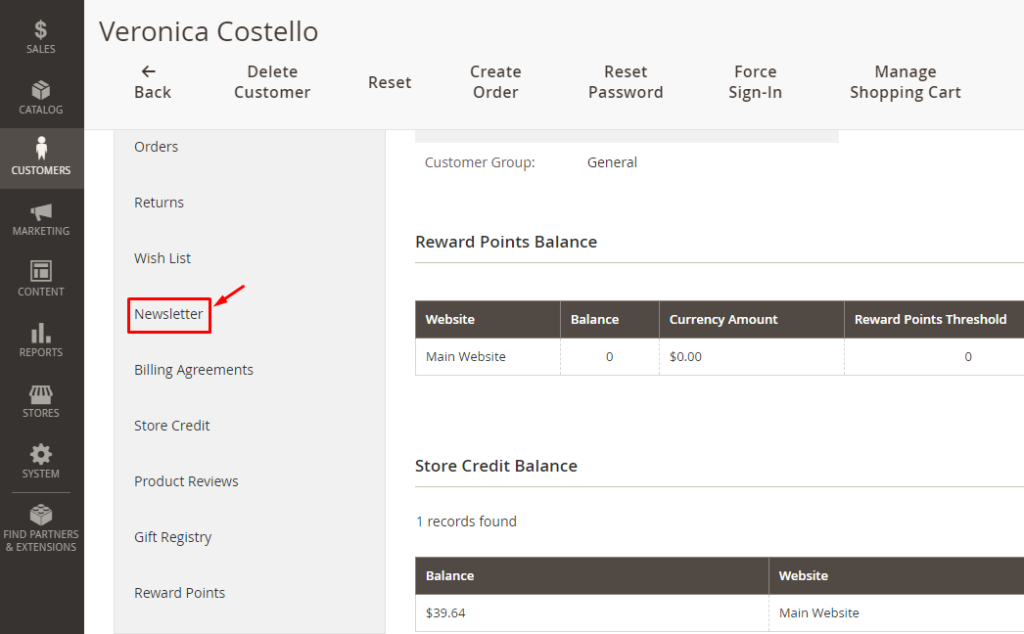
On the Edit page, under the Customer Information menu at the left-hand side, select Newsletter option.
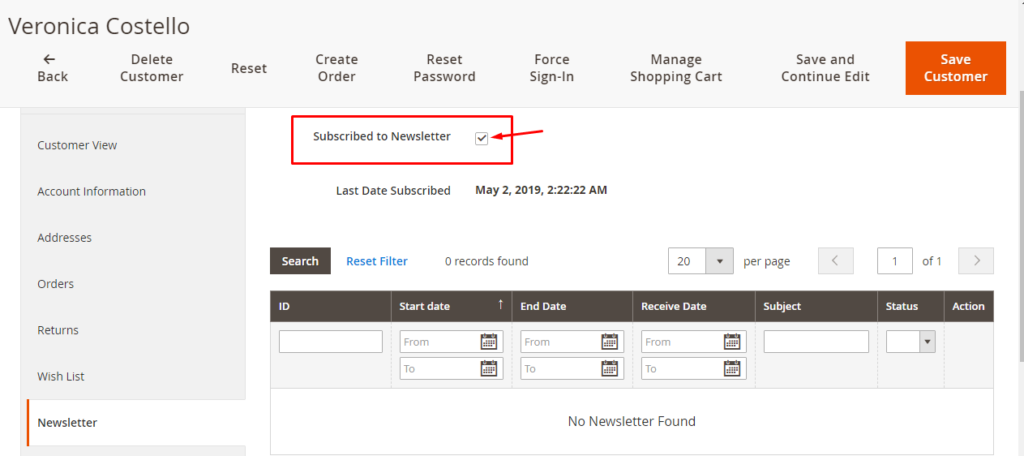
Then tick the checkbox to subscribe to newsletters or clear the box to unsubscribe for newsletters, and finally click on the Save Customer button.
Step 5: Check Newsletter Report
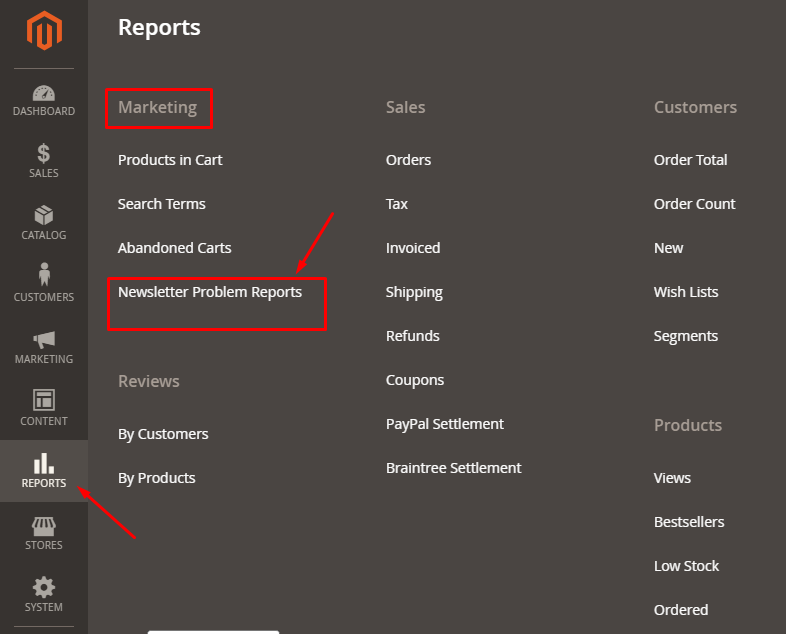
If you consider any issues related to your Newsletters or your customers’ complaints about receiving their emails, you can check for problems in the Newsletter Problems Report. From your Admin panel, select Reports. Then under the Marketing section, select Newsletter Problem Reports.
On the report page, you will see the details of the issues and exact error number/text for the emails that have failed to send and reasons for the sent failed messages.

Conclusion
In this article, I have instructed you to manage your newsletter section in Magento 2. If you have questions on any steps, don’t hesitate to contact us. Would you like to reach as many potential customers as possible? Unquestionably, the newsletter is the key to making your website more attractive to visitors, you can not only customize the popup design but also create appealing newsletters contents.


Please complete your information below to login.