How to Insert a Widget into Sidebar in Magento 2
Magento 2 provides an XML Widget file that allows you to manage the page layout as well as place CMS Blocks at any position on the page. Widget can vary from buttons, dialog box, to search box, clock, or visitor counter. Displaying a Widget in the sidebar on your site will help provide more information and increase conversion rates. In the tutorial today, I will instruct you how to insert a Widget into Sidebar with two elements: “Configure a Widget” and “Configure a Layout Update”.
Configure a Widget
Widget is the awesome functionality you can insert to the CMS page from Magento 2 Configuration because it can be considered as a predefined set of configuration options. In the widget, you can add links that navigate directly to any content page, category, or product as you need.
Step 1: Select the Type
- On the Panel Admin, Content > Elements > Widgets.
- In the upper-right corner of Widgets workplace, click on Add New Widget button.
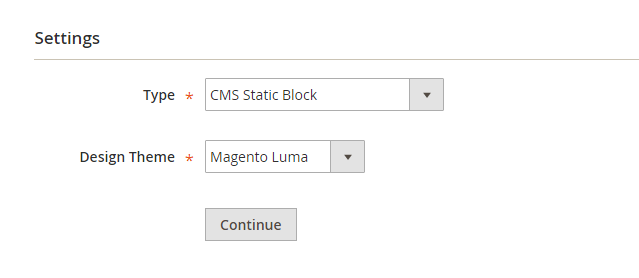
- In the Settings section:
- Choose CMS Static Block type in the Type box.
- Choose the current theme you are applying in the Design Theme.
- Click the Continue button.

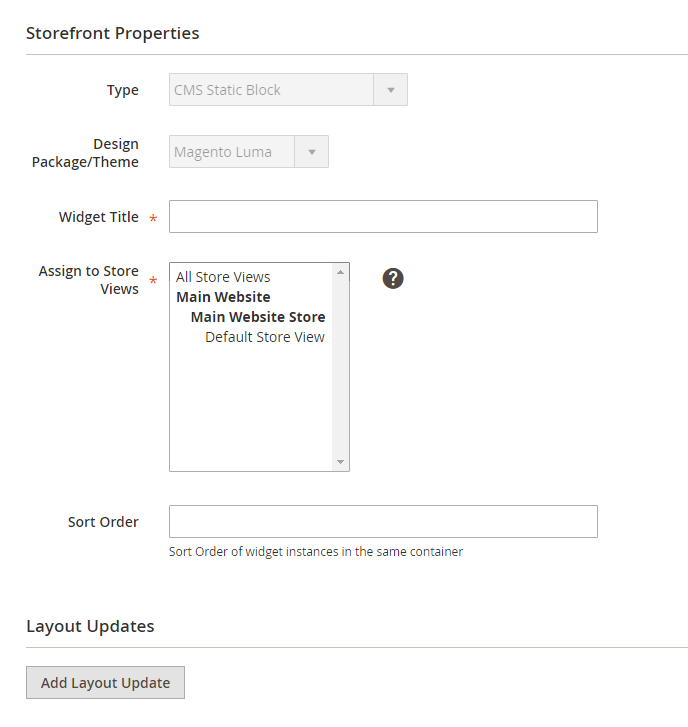
- In the Storefront Properties section,
- Enter Widget Title for the internal reference.
- Assign the block to all store views in the Assign to Store View field or to any store view you want to apply the block.
- Set the Sort Order if many blocks are placed at the same container. The block is at the top if the inserted value is zero.

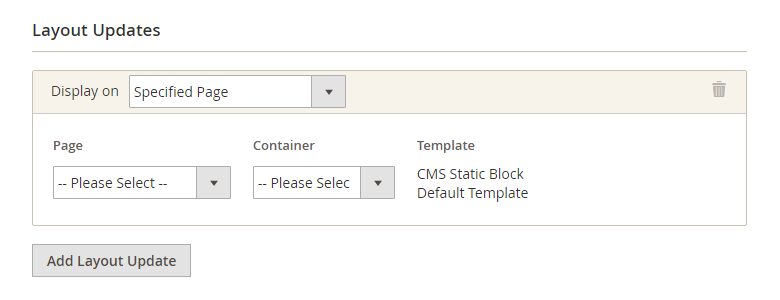
Step 2: Complete the Layout Updates
- In the Layout Updates section, click on Layout Update to set the layout.

Step 3: Place the Block
- Continue to select the Widget Options tab on the left panel.
- Click on Select Block to choose the block from the list you want to place.
- Click Save to complete.
- Remember to flush the cache by getting the Cache Management link in the system message at the top of the workplace.
- Go to your storefront to check the position of the block. If you want to move the block, back to the widget settings and try a different page or block reference.
Configure a Layout Update
To insert the widget into the sidebar, you need to make a layout update to the XML code by changing lightly in the code. Due to that, it is simple to place the CMS Block Static on the right or left sidebar even or at different positions on the page.
- On the Admin Panel, Content > Elements > Blocks.
- In the list of blocks, select the block you want to place, and then modify the Identifier.
- On the Admin Panel, Content > Elements > Pages.
- Choose the page where you want to place the block, then open the edit mode.
- On the left panel, select the Design tab, in the Layout Update XML box, insert the code for the right or left sidebar.
Code for CMS Block in Sidebar
your-block-id
- Change the reference name to identify either the “right” or “left” column, according to the layout of the page.
- Change the block_id to the identifier of the block that is being placed.
- Save Page to complete.
Now you’re done with the widget insert process in Magento 2. Start creating your own now to communicate with customers more effectively. In case you have any questions, feel free to write in the comment box. There are also other widget posts for you to check out below.


Please complete your information below to login.