
Transactional Email is the short message that is sent by the system as a response to customer’s activities on your site while a default template for the body content is supported and associated with the header and footer template for a completed email. Especially, because the format of the content is HTML and CSS, it is flexible to customize the email template for Magento 2 store to fit with each website or each store view. It is easy to customize by inserting variables and saving it in the backend, your custom email template will be available to use. To make sure it is sent to customers’ inbox, you should enable SMTP.
The email template contains your logo and store information, so there is nothing more for you to edit or design. Follow this tutorial, you can get the guides in detail to edit email templates or create a new one Transactional Email, follow up email. Moreover, to ensure that your customization is right as you expect, you should tap Preview links to check before sending them to the customers.
As mentioned above, the email is divided into three elements: Header, Body, and Footer.
- Header Template: The Header is the top of the email that is sent to customers, simultaneously, it attracts the viewer’s sight very well, so your logo is placed there and linked directly to your store. This is a great idea to drive more traffic to your site.
- Footer Template: The footer template includes the conclusion and the signature of the sender. Feel free to edit the content of the footer, and also to add more information as company email, number or address.
- Message Template: The message template is referred to as the body of the email and the customization is similar when you do with the header and footer template. However, with the message template, it is different when you apply different activities or events. Magento provides you the corresponding templates to use or modify how to be suitable for your brand. For example, you can start with the main information related to the recipients.
Therefore, to customize a transactional email template, let scroll down the topic:
4 Steps to Customize Email Template in Magento 2
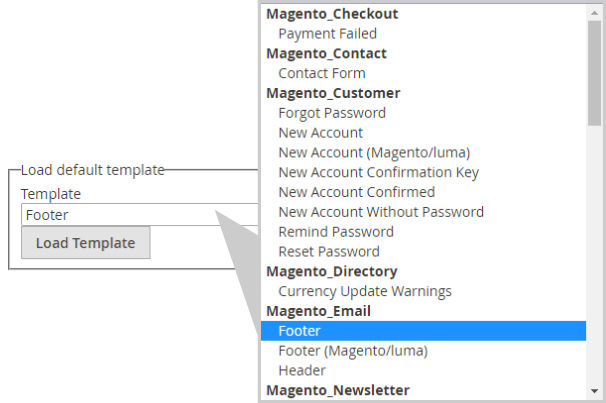
Step 1: Load the Default Template
First, you have to select and load the templates:
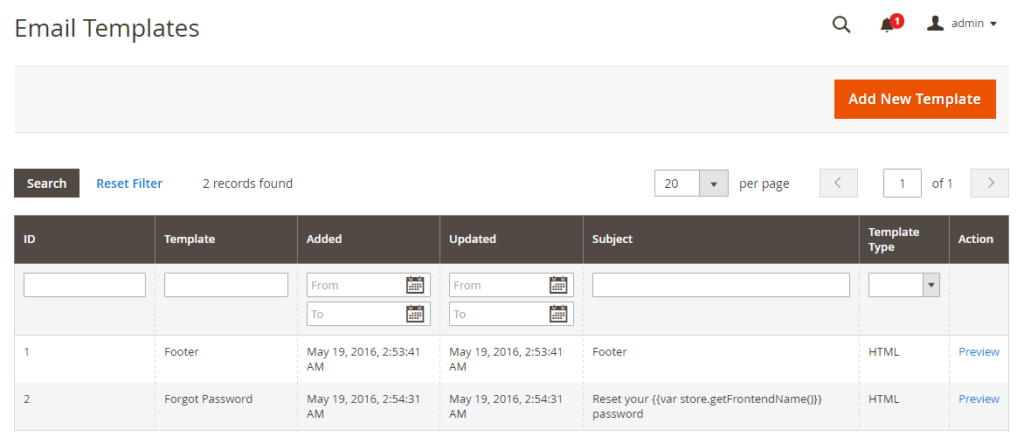
- On the Admin Panel,
Marketing > Communications > Email Templates. - Click on
Add New Template,- Choose the types of the Template: Header, Footer, or Message Templates.
- Click on
Load Template, the corresponding format will appear.
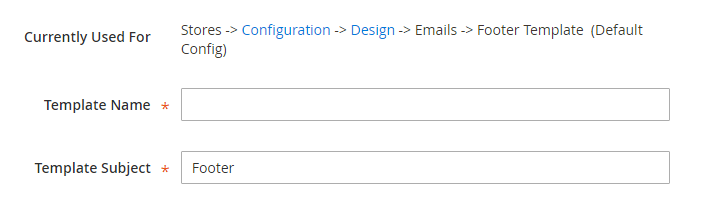
Step 2: Fill out the Template Information
In this step, you can add information for the Template, such as Name, Subject, Content, Variables, and Styles.
- Name for the new template in the
Template Namefield. - Insert the
Template Subjectfor the organization of the templates. The list of templates can be sorted and filtered by the Subject column.
- Customize the HTML as you need in the
Template Contentbox. - Click on
Insert Variableto insert a variable in theTemplate Contentbox.

With the inserted variable, you can custom it directly into the template.
- If you want to declare any CSS, enter the styles in the
Template Stylesbox.
Step 3: Preview the Template
After making changes, let’s take a look at how the changes look like in reality via the Template Preview:
- To ensure that the template is applied correctly as you expect, click on
Preview Templateto adjust if needed. Save Templateto complete.
Each completed new template is auto-updated in the list of available Email templates.
Step 4: Apply the new Template
This is the last step to launch the new email template. Complete these settings and you will be ready to go:
- Footer/ Header Template
- Go to Magento Admin, follow the path:
Store > Configurations > General > Design, openEmailsection.
- Go to Magento Admin, follow the path:
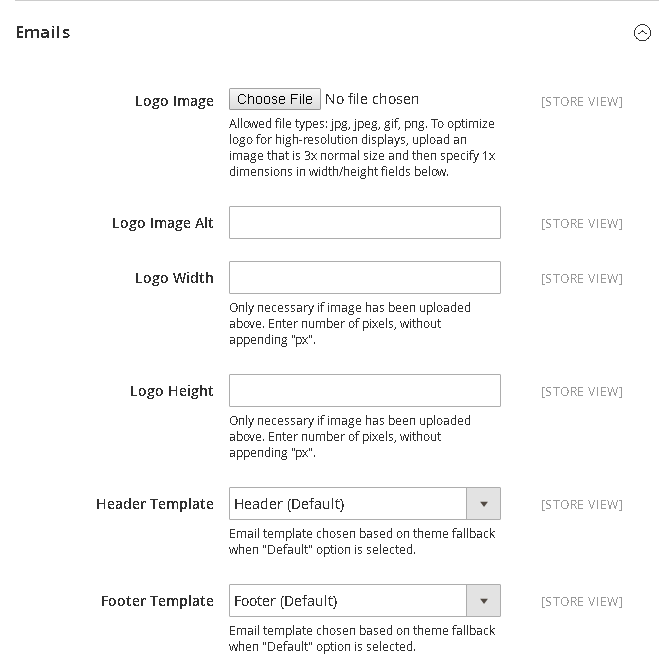
- Set name for new Footer/Header Template
Save Configto complete.- Message Template
- Go to Magento Admin, follow the path:
Store > Configuration > Customers > Customer Configuration - Based on where the template is placed to open the relevant option, for example, the template belongs to
Create New Account Options:

- Set the new template for
Welcome Email. Save Configto complete
Transactional Email with better results: Marketing Automation solution
Creating transactional emails in Magento 2 may seem confusing to you, or do you need more than what the platform offers? Don’t worry, we’ve got everything handled for you by the Marketing Automation solution by AVADA. Let’s check out what you can gain using it:
- Save time with ready-made email templates for all needs
- Optimize the email sending process with automatic email workflows
- Create effective marketing campaigns thanks to appealing and shoppable branded emails
- Retain customers via segmented email campaigns
Reduce time spent to customize emails and optimize transactional email usage, what a deal, isn’t it?
The bottom line
Sending transactional emails to customers is a necessary action to maintain the communication and show the professional image. This tutorial hopefully gives you knowledge of how to customize email templates of transactional emails for your store. However, we understand that it may be troublesome to customize it on your own in the default Magento 2. Hence, why don’t you try this Email Marketing solution, where the templates are ready made and customization is easy and quick? You can contact us for more details, or comment in the box below for further discussions.