How to create Simple Products in Magento 2
A simple product, the most popular product type in Magento, is the foundation of Grouped Products, Bundle Products, Downloadable Products, Configurable Products and Virtual Products, hence it is used the most frequently on Magento stores. In fact, Magento store owners can sell the Simple Product separately or sell it as a part of the grouped, bundle or configurable product.
The simple product will stand alone on the storefront without any selectable variations. In case of a simple product with many custom options, it is considered as a mixture product.
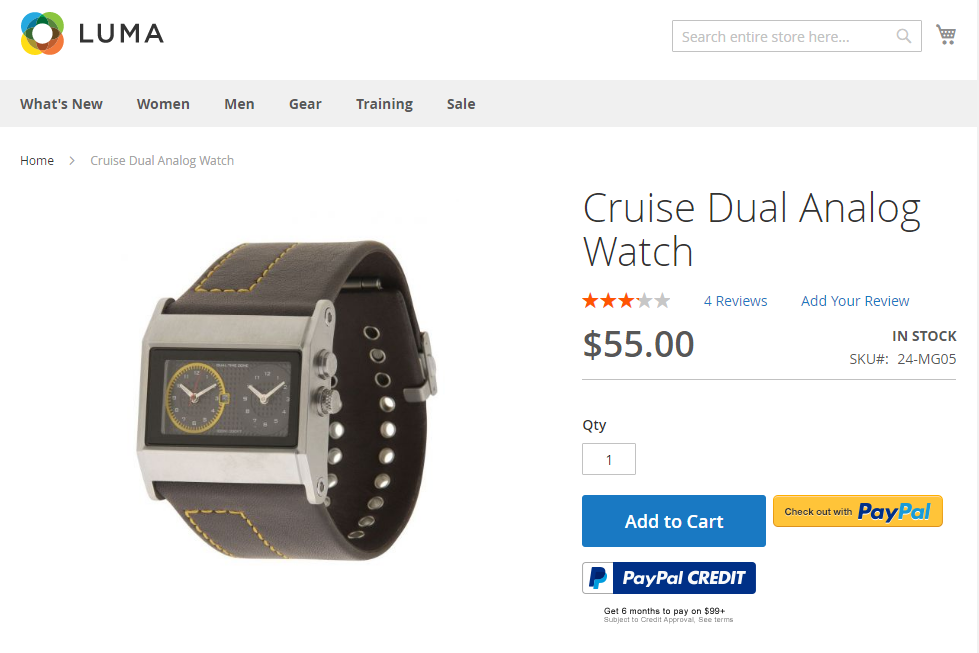
Creating a simple product is necessary to build your Magento store. Pay your attention to the 6-step guides to configure a simple product by the default product template with basic settings. After finishing the basics, it is possible to complete the advanced settings if you need.
6 Steps to create Simple Product in Magento 2:
To create Simple Product in Magento 2, please take the following steps:
Step 1: Choose the Product Type
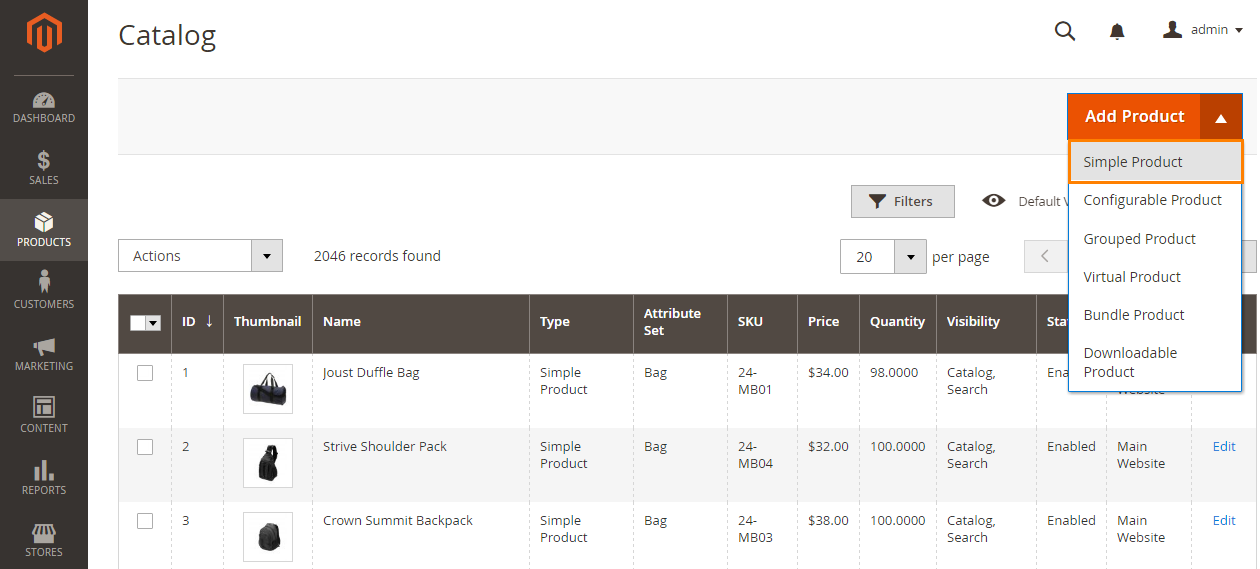
- On the Admin sidebar, click Products. Then under Inventory, select Catalog.
- In the upper-right corner on the Add Product menu, select Simple Product.
Step 2: Choose the Product Template (Optional)
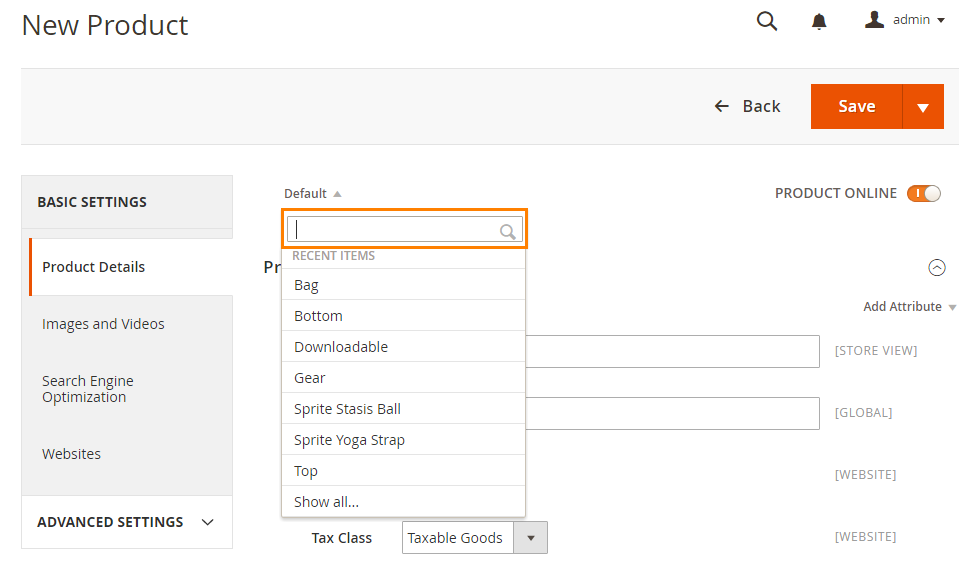
This step is to configure if you want to display your product in a certain template, so it is only optional. To choose the product template, do one of the following:
- In the Search box, enter the name of the template.
- In the list, choose the template that you want to use.
The form is updated to reflect the template.
Step 3: Complete the Required Fields
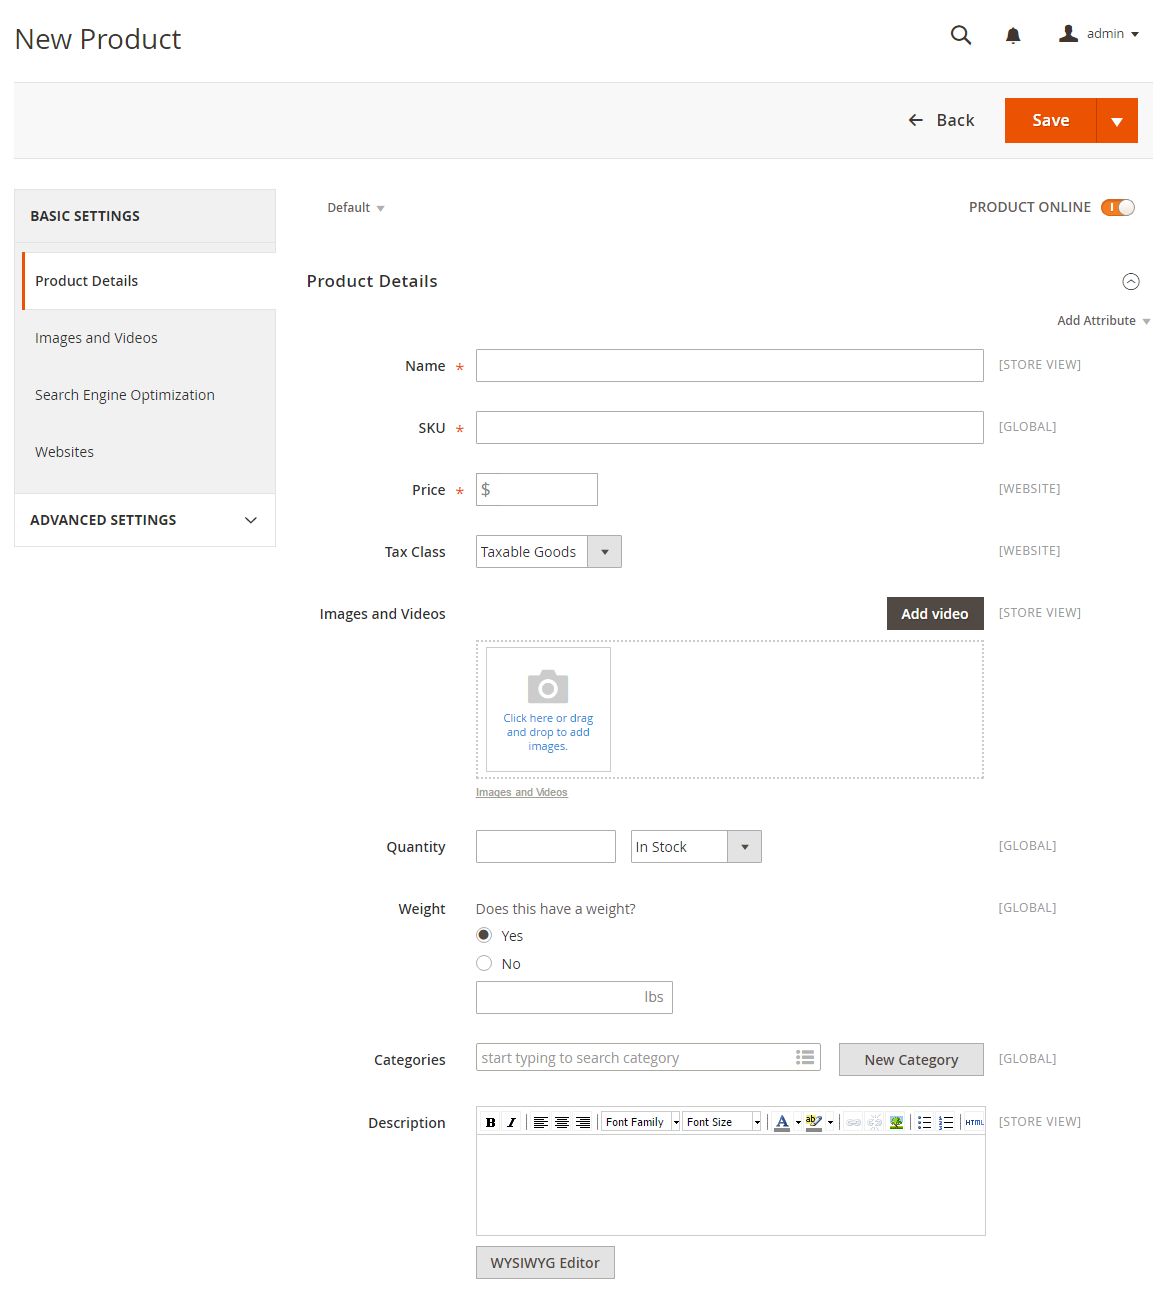
Next, you will fill in essential details of the product, such as product name, SKUs, and price.
- In the Product Details section. Do the following:
- Enter the product Name.
- You can either use the default SKU that is based on the product name, or enter another.
- Enter the product Price.
- Because the product is not yet ready to publish, set the Product Online switch to the “Off” position.
- Click Save, and continue with the next step. You can save the product settings after completing all the required fields.
Step 4: Complete the Remaining Product Details
Next, other fundamental information of product needs filling includes Tax Class, Quantity, Weight, Category, Description and Image.
- Set Tax Class to one of the following:
- None
- Taxable Goods
- If you’re ready to add a product image, do one of the following:
- Drag an image from your desktop, and drop it on the camera tile in the Images and Videos box.
- In the Images box, click the camera tile, and navigate to the image file on your computer. Then, select the image, and click Open. A placeholder appears until a product image is uploaded.
- Enter the Quantity of the product that is currently in stock.
- Enter the product Weight.
- To assign the product to a Category, do one of the following:
- Start typing to find a match. Then, choose the Category.
- Click Show List to see the category tree. Then, drill down and click on each category that you want to assign to the product.
- Click New Category. Enter the Category Name and choose the Parent Category to determine its position in the menu structure. Then, click Create Category.

- Enter the product Description directly into the text box, and format as needed. Then, click Submit. You can also use the WYSIWYG Editor, for additional control.
Step 5: Publish the Product
Now you will publish those configurations:
- If you are ready to publish the product in the catalog, set the Product Online switch to the “On” position.
- When complete, on the Save menu, select Save & Close.

Step 6: View the Product in Your Store
This step allows you to preview how your product looks in customers’ perspective.
In the upper-right corner on the Admin menu, select Customer View

THINGS TO REMEMBER
- Simple products can be included in configurable,bundle, and grouped product types.
- A simple product can have custom options with a variety of input controls, which makes it possible to sell many product variations from a single SKU.
The bottom line
Creating Simple Products in Magento 2 is the fundamental step of every online store, as it is the base of other types of products. Follow the above 6 steps and you can do it with ease. Other posts in the series of Create Products can be found below. In case you have any questions, please message us or kindly leave a comment.



Please complete your information below to login.