How to create Downloadable Products in Magento 2
A downloadable product is a type of product that allows shoppers to get it as a file, such as an eBook, music, video, software application, or update. You can put an album on sale and sell each song individually. In addition, you can use a downloadable product to deliver an electronic version of your product catalog. It is very easy to create a downloadable product for your Magento 2 store.
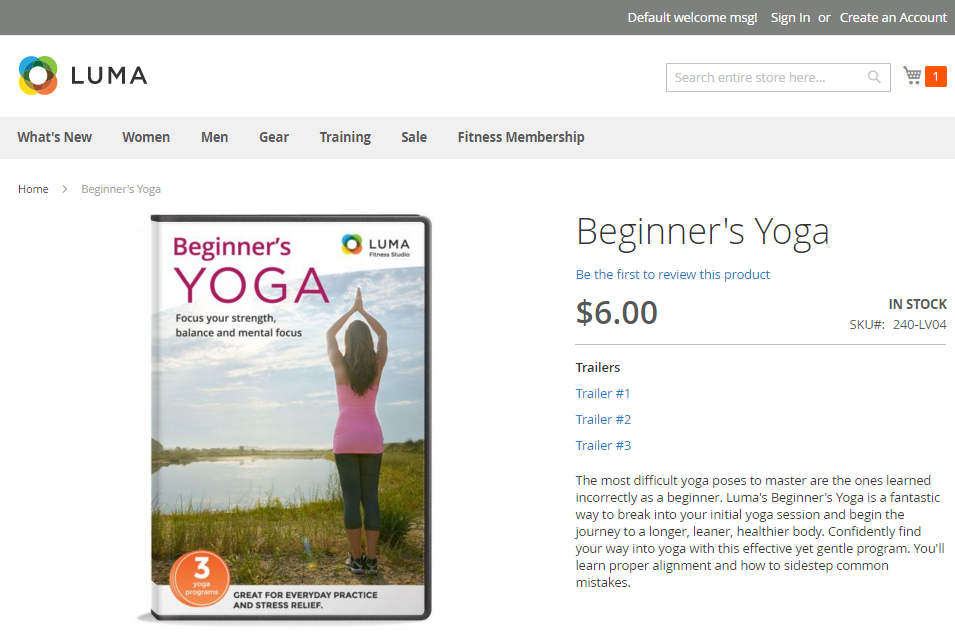
In the settings of the downloadable product, you can require customers to get link only when they have already logged in, or you will send the download link via email and allow them to share with anyone needing. To learn more details about the process of creating a downloadable product, pay your attention to the following instruction with the basic fields. After you complete the required settings and save the product, you can add images and complete the remaining product information as needed.
7 Steps to create Downloadable Product in Magento 2
To create Downloadable Product in Magento 2, take the following steps:
Step 1: Select the Product Type
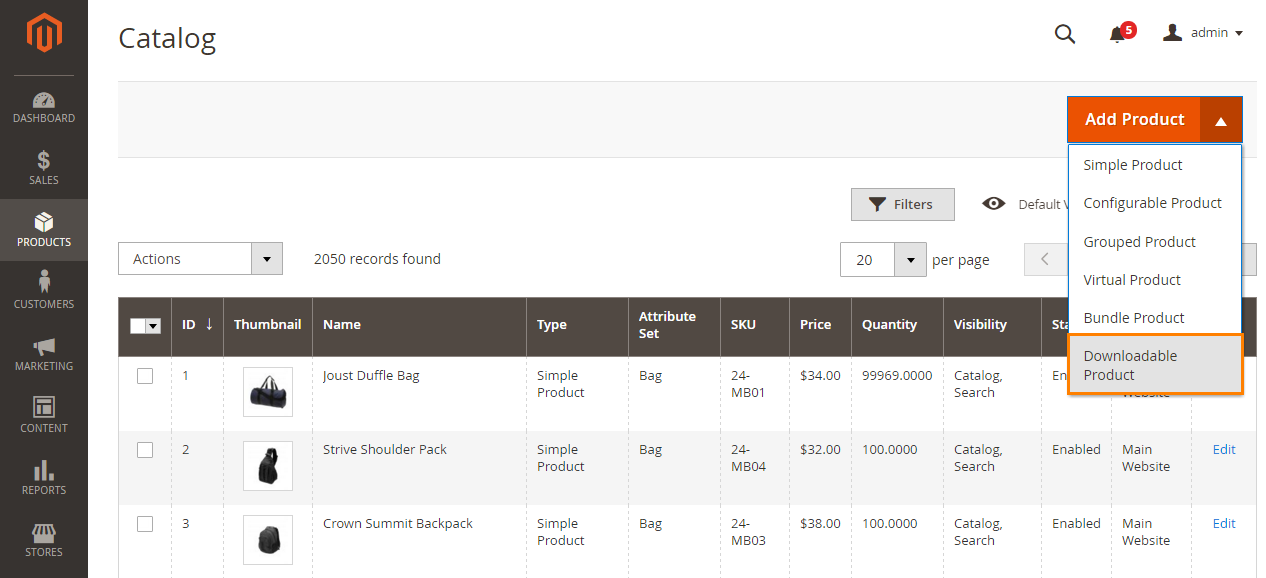
- On the Admin sidebar, click on Products > Inventory > Catalog.
- In the upper-right corner of the Add Product menu, select Downloadable Product.
Step 2: Select the Product Template (Optional)
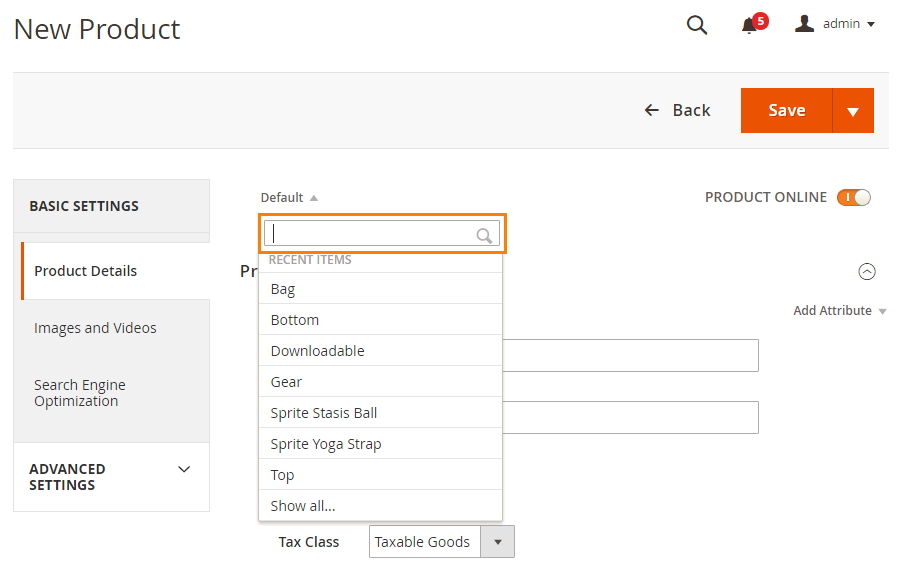
There is the same data called Downloadable that is a special field for the downloadable product. Follow one of these two ways to select a product template:
- In the Search box, enter needed name of the template.
- In the list, select one of the templates you want to use.
The corresonding form will be shown to configure.
Step 3: Fill out the Required Fields
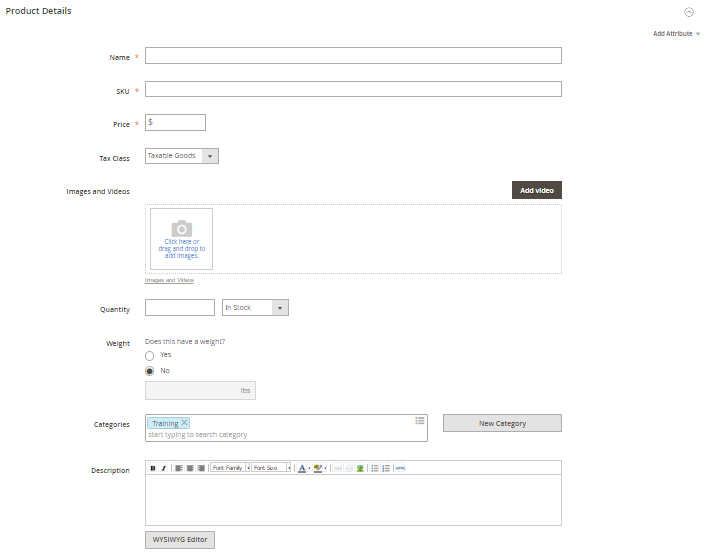
- In the Product Detail section, need to do:
- Enter the Name.
- Use the default SKU for the product, or offer another value.
- Enter the Price.
- By now the product has not yet been ready to publish, let switch to the Off for Product Online.
- Click on Save to finish this step.
Step 4: Fill out the Remaining Product Details
- Set Tax Class to None or Taxable Goods. To learn about requirements for the taxation of digital goods and services, see the white paper, Identification & Taxability of Digital Products on the Avalara site
- To add an image for the product group, follow one of two options:
- Drag and drop an image from your desktop on the Camera tile in the Images and Videos box.
- In the Images and Video box, click on Camera title and feel free to choose the desired image from the file on your computer. A placeholder appears until a product image is uploaded.
- Enter the Quantity of the product.
- Skip the Weight field, and mark the Virtual / Downloadable checkbox, if necessary.
- To assign the product to a Category, follow one of the options:
- Type in the Search box to find and select a match.
- Click on the Show List icon to see the category tree, then click on any available category you want to assign to the product.
- Create a new category by entering the Category Name and assign to the Parent Category, then click on Create Category.

- Write some product description if you need. Then, click on Submit. You can also use the WYSIWYG Editor for additional control.
Step 5: Fill out the Downloadable Information
The Downloadable Information is divided into two sections. The first section is link for the download, and the second section describes each sample file. The default value for many of these options can be set in the configuration.
5.1. Link
- In the Links section, enter the Title heading for the download links you want to use.
- Set Links can be purchased separately to offer single or multiple download link.
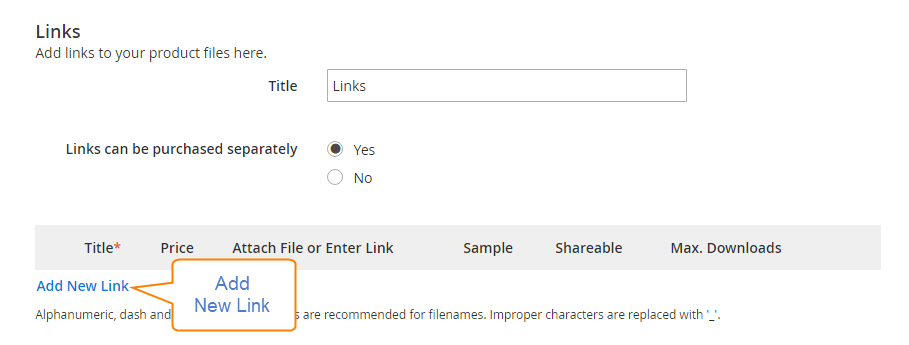
- Click Add New Link, and then:
- Enter the Title and Price of the download.
- Choose distribution methods as you need: Attach File (File) or Enter Link (URL).
- Choose Yes for the Sharable if you want customers to login to their account before accessing the download link. If No, the customers will get a link via their email and enable them to share with others.
- Do one of the following:
- To limit downloads per customer, enter the number of Max Downloads.
- To allow unlimited downloads, mark the Unlimited checkbox.

- Click Add New Link again and repeat these steps if need to add others.
5.2. Samples
- In the Samples section, enter the Title heading for the samples as you need to use.
- Click on Add New Link to fill the sample information.
- Enter the Title of the individual sample.
- Choose distribution methods as you need: Attach File (File) or Enter Link (URL). Downloadable product file names can include letters and numbers. You can use either a dash or underscore character to represent a space between words. Any invalid characters in the file name are replaced with an underscore.
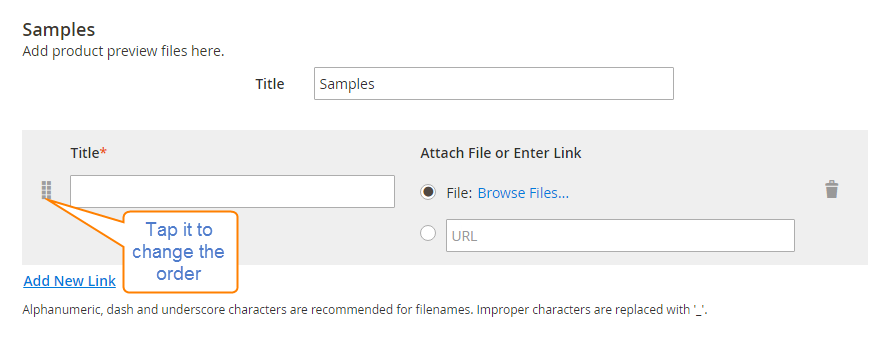
- Click Add New Link again and repeat these steps if need to add others.
- Change the order of the samples by dragging to a new position with the sort icon.
Step 6: Save the Product
- Set the Product Online switch to the On position whenever you are ready to publish the product in the catalog.
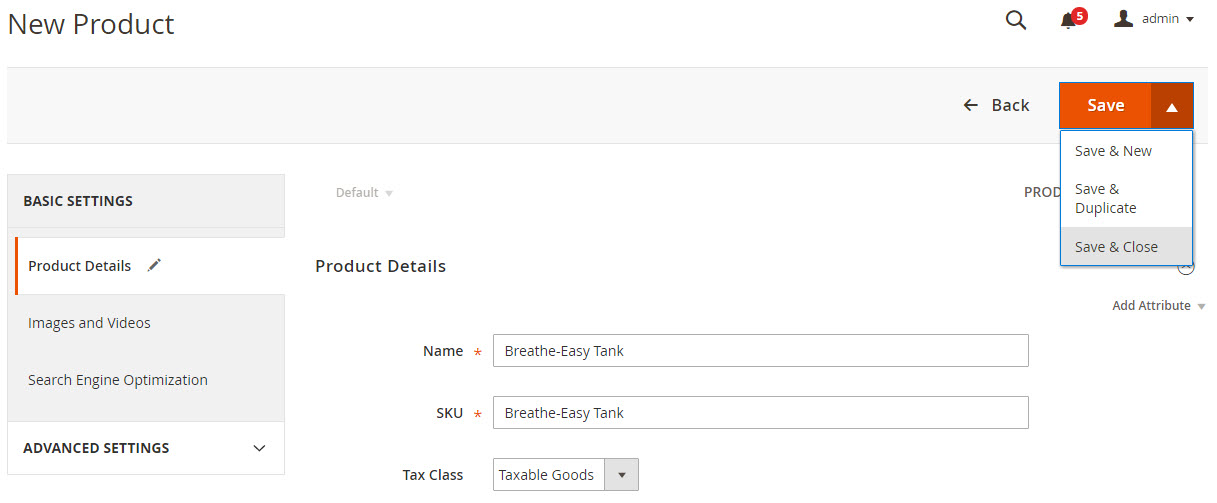
- Then Save & Close on the Save menu.
Step 7: View the Product in Your Store
On the Admin menu, choose Customer View.

The bottom line
Downloadable Products are well supported by the default Magento 2 when you can create download links and even free samples with ease. Please follow the above steps to create them, and feel free to notify us of any problems you have. Also, more tutorials on other Product types Configuration can be found below.


Please complete your information below to login.