In this article, we will explore how to add a link to the Magento 2 Admin Menu, which appears on the left side of the Admin Menu pages.
First, we will examine the structure of the admin menu and the actions associated with each menu item. The menu structure is organized by levels. The level-0 menu items are displayed in the left sidebar, while higher-level items are grouped and revealed when you click on a level-0 menu.
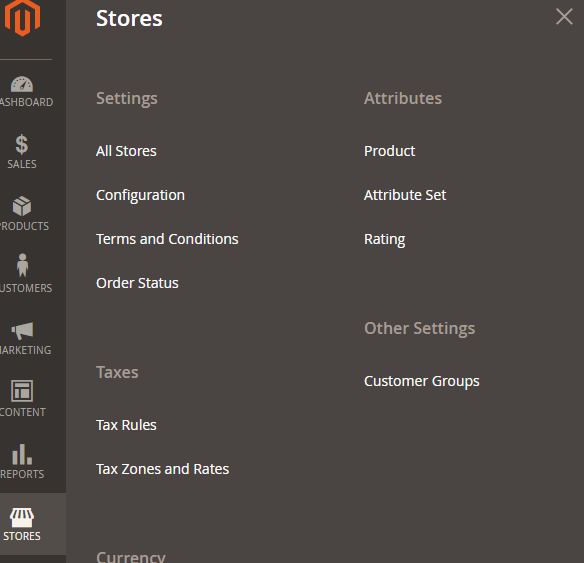
For example, the "Stores" menu is a level-0 item that appears on the left sidebar. When clicked, it expands to show sub-menus such as "Settings", "Attributes", and "Taxes". Additionally, these sub-menus can have their own sub-items (for instance "Settings" includes "All Stores", "Configuration","Terms and Conditions" and "Order Status").
Similar to the frontend, the format for the admin menu is {router_name}_{controller_folder}_{action_name}. However, in the admin menu, there is an admin router name (which can be customized) that indicates this is a Backend area.
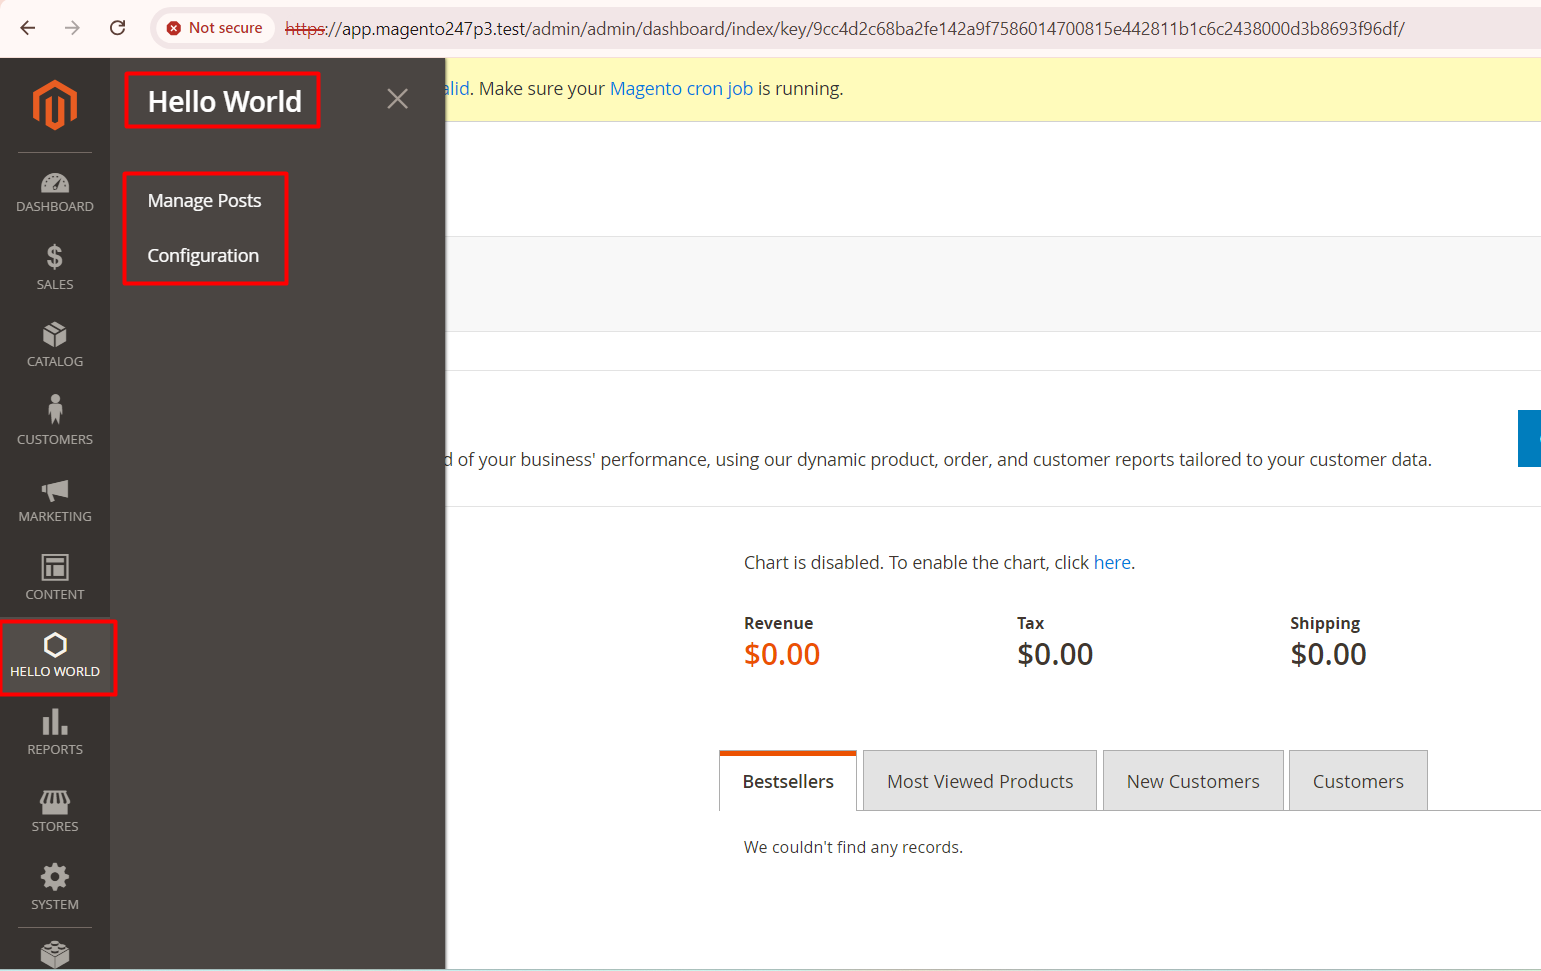
So how is the menu created? We will use the simple "Hello World" module created in the previous topic to add a menu.
In Magento 2, we use menu.xml to add this menu. Let’s create it:
For Create Admin Menu in Magento 2
- Step 1: Create menu.xml
- Step 2: Add Admin menu item
- Step 3: Flush Magento cache
Step 1: Create menu.xml
Create admin menu file called: menu.xml file app/code/Mavenbird/HelloWorld/etc/adminhtml/menu.xml
with the following content:
Step 2: Add admin menu item
In this example, we will create a level-0 menu named “Hello World” and two sub-menus named “Manage Posts” and “Configuration.” The menu.xml file will define a collection of 'add' nodes that will add a menu item to the Magento backend. Let's take a look at its structure:
Let’s explain some attributes:
The id attribute is the identifier for this node. It’s a unique string and should follow the format: {Vendor_ModuleName}::{menu_description}.
The title attribute is the text displayed on the menu bar. The module attribute defines the module to which this menu belongs. The sortOrder attribute determines the position of the menu, a lower value will display it at the top of the menu.
The parent attribute is the ID of another menu node, indicating that this menu is a child of that node. In this example, with parent="Mavenbird_HelloWorld::helloworld", we know that the “Manage Posts” menu is a child of the “Hello World” menu, appearing within it.
The action attribute defines the URL of the page that this menu links to. The URL follows the format {router_name}{controller_folder}{action_name}.In this example, the menu links to the HelloWorld module, the Post controller, and the Index action.
The resource attribute is used to define the ACL rule that the admin user must have in order to see and access this menu. More details about ACL will be covered in another topic.
You can also create more child menus, and they will display similarly to the Store menu above.
Step 3: Flush Magento cache
Make sure it admin menu items are displayed on Magento 2 admin, you should try to flush Magento 2 cache.
Run the following command line:
php bin/magento cache:clean
Now to go Magento 2 Admin and see result: