
Magento 2 is a robust eCommerce platform that supports multi-language functionality. Configuring multiple languages allows businesses to cater to a global audience effectively. In this guide, we will walk you through step-by-step instructions to set up multiple language stores in Magento 2.
Step 1: Create a New Store View
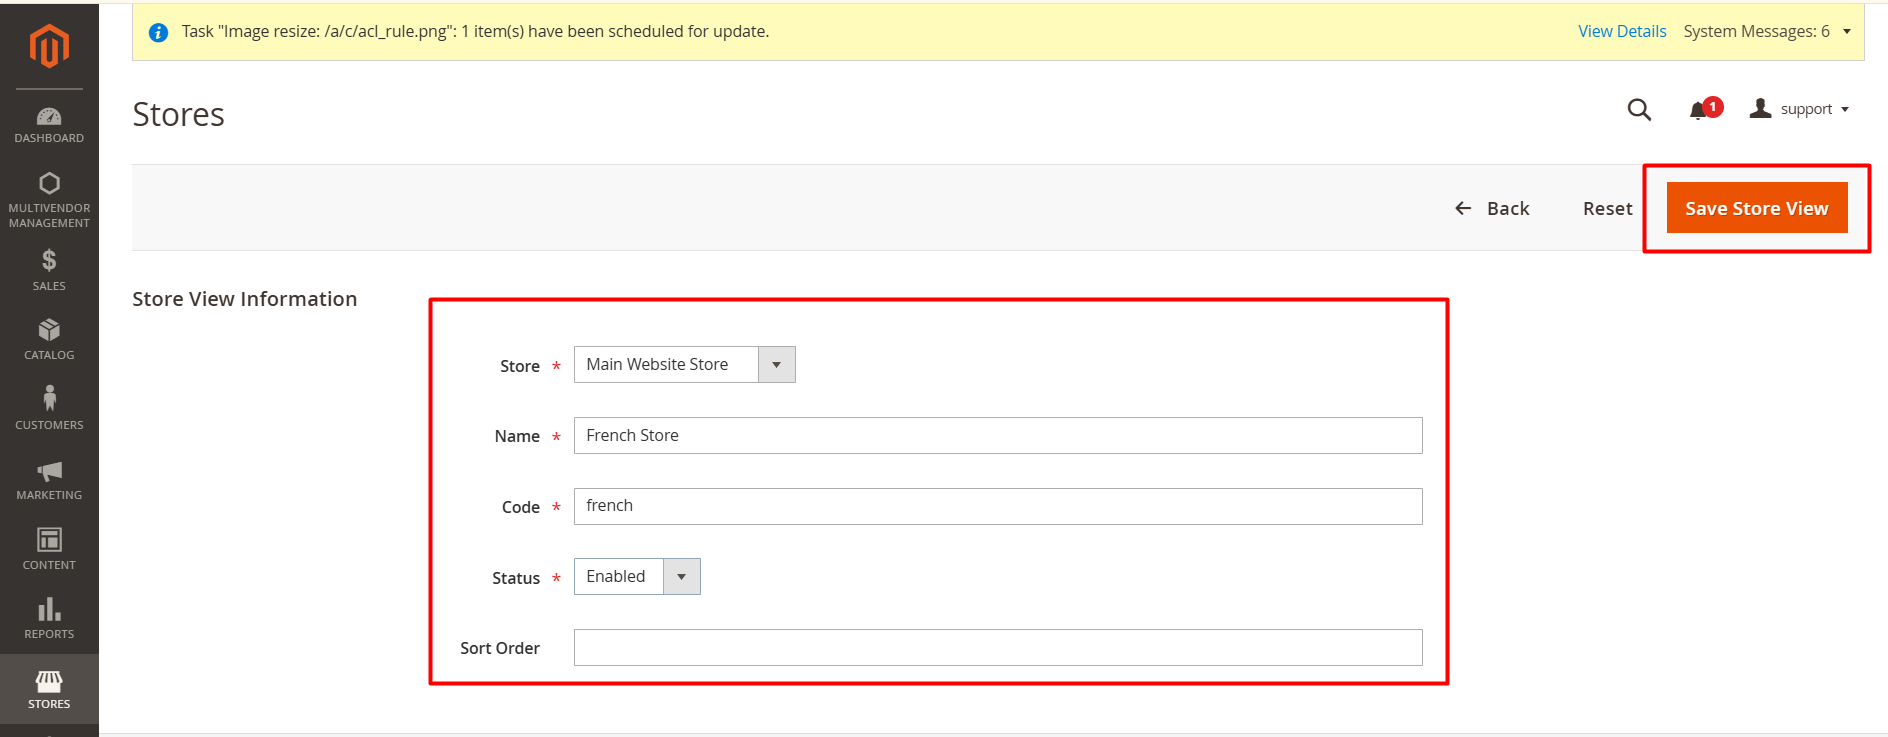
To support multiple languages, you need to create a store view for each language. Follow these steps:
- Log in to the Magento 2 Admin Panel.
- Navigate to Stores > Settings > All Stores.
- Click on the Create Store View button.
- Fill in the following details:
- Store: Select the main store to which this view belongs.
- Name: Enter the name of the store view (e.g., "French Store").
- Code: Enter a unique identifier for the store view (e.g., "french").
- Status: Set to Enabled.
- Sort Order: Define the order in which this view will appear in the frontend (optional).
- Click Save Store View.
Step 2: Configure Locale Settings
After creating the store view, configure its locale settings to reflect the desired language:
- Go to Stores > Settings > Configuration.
- In the left-hand panel, select General > Locale Options.
- From the Store View dropdown, select the store view you created (e.g., "French Store").
- Uncheck the Use Website checkbox next to Locale.
- Choose the appropriate language for the store view (e.g., French - France).
- Click Save Config.

Step 3: Translate Static Content
Magento 2 uses static content like buttons, labels, and messages that can be translated into your chosen language. To do this:
- Log in to your server via SSH or terminal.
- Run the following command to deploy static content for the new language:
php bin/magento setup:static-content:deploy fr_FR
- Replace fr_FR with the locale code of your chosen language.
- Clear the cache by running:
php bin/magento cache:flush
This will generate the necessary translation files for the selected locale.
Step 4: Add Translations for Custom Text
For custom text on your website, you can create a CSV file to manage translations:
- Create a file named translate.csv in the folder app/design/frontend/{Vendor}/{Theme}/i18n.
- Add translations in the format:
"Original Text","Translated Text"
- For example:
"Add to Cart","Ajouter au Panier"
- Deploy the theme again using:
php bin/magento setup:static-content:deploy
Step 5: Configure the Language Switcher
Magento 2 automatically adds a language switcher on the frontend if multiple store views are enabled:
- Go to the frontend of your Magento 2 store.
- Ensure the language switcher is visible in the header or footer area.
- Select a language to verify the translation works as expected.

Step 6: Test and Verify
Once the configuration is complete, test the following:
- Switch between languages using the language switcher.
- Check if all static content and custom text are translated correctly.
- Verify product pages, category pages, and checkout pages to ensure proper functionality.
Clear the cache if changes are not reflected immediately.
Conclusion
Configuring a multi-language website in Magento 2 is essential for businesses targeting international customers. By following these steps, you can seamlessly manage multiple languages on your Magento 2 store. Ensure to test thoroughly to provide a localized and user-friendly shopping experience.