How to Configure Content Delivery Network (CDN) in Magento 2
Configure CDN Magento 2 - Content Delivery Network (CDN) is one of the advanced solutions to enhance your site loading performance. The further the customer is from your main server, the longer they have to wait for your site to load. As e-commerce is growing fast and customers have less time and patience, your web loading time is an important factor to grab their attention, hence it greatly affects your SEO results. Unlike full-page cache, Content Delivery Network (CDN) is not fully integrated into Magento 2 Store, so you need to choose and configure a CDN for own.
Therefore, in this post, I am going to cover installing a CDN on Magento to help you achieve an amazing speed on the site.
Steps to Configure a Content Delivery Network in Magento 2
- On the Admin panel, click Stores. In the Settings section, select Configuration.
- Select Web under General in the panel on the left
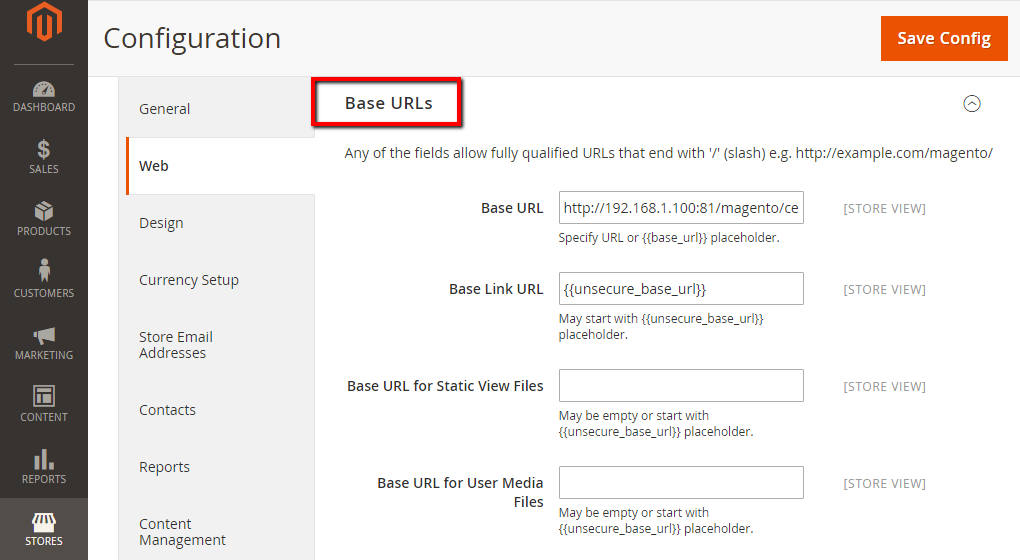
- Open the Base URLs section, and continue with following:

- In the Base URL for Static View Files field, enter the URL of the location on the CDN where static view files are stored
- In the Base URL for User Media Files field, enter the URL of the JavaScript files on the CDN
- When complete, click Save Config.
Note: All these fields can be left blank, or they can start with the placeholder: {{unsecure_base_ url}}
Tips and Recommendations of CDN for your store
Things to consider when you make CDN provider choices:
- The number of and locations of presence you have
- Failure rates
- Agreement of service level
- Additional services
- Cache and retention policy
- Image and Video Streaming support
And here are our recommendations of Cloud CDN:
Final words
Using Content Delivery Network can optimize your website performance, as it speeds up the loading, supports SEO, and enables a significant change in content access for afar customers. Here are the steps and tips to follow in order to configure CDN for your store. You can also check these site optimization solutions from us.


Please complete your information below to login.