Shopify is one of the top e-commerce platforms, allowing you to build online stores (e-commerce websites) without needing any coding skills. It provides an intuitive interface with customizable options to showcase your products, process payments, and manage orders efficiently.
The platform offers flexibility, simplicity, and a robust order management system, making the process of running an online store more streamlined.
How to Set Up a Shopify Store – A Step-by-Step Guide
To begin, you’ll need to create a Shopify account and provide your business details. After that, you can start adding products and tailoring the look and feel of your store to suit your brand.
Take advantage of Shopify's free trial and get started for just $1 for the first month of selling.
Step 1: Set Up Your Shopify Account
Visit the Shopify website and click the Start Free Trial button to create your account.

Choose your preferred method for signing up, whether it’s using an email address, Google, Apple, or Facebook, and complete the account setup process.
Next, you'll be prompted to answer a few questions regarding your business, such as the type of business and the products you plan to sell.
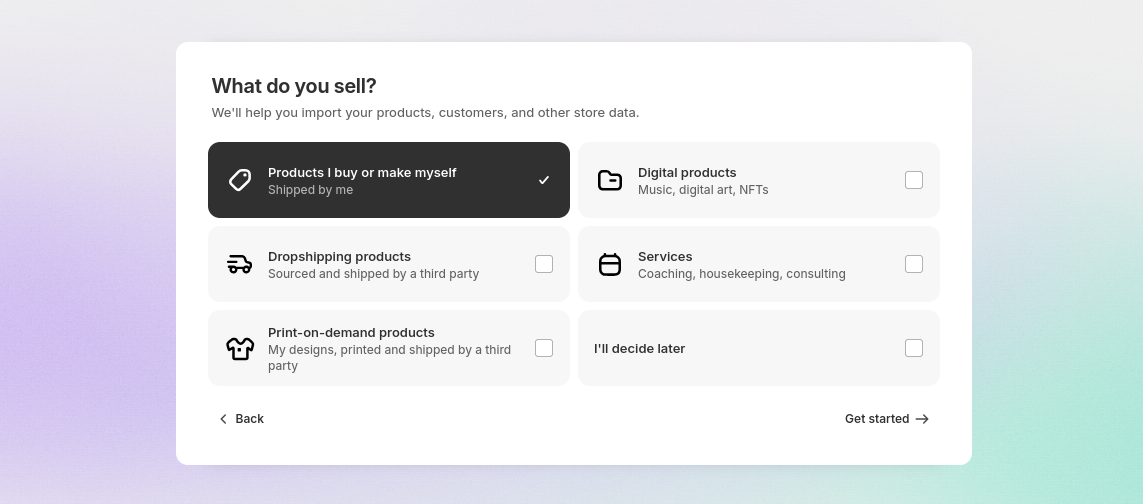
Choose the plan that best suits your business needs:
- Basic Shopify
- Shopify
- Advanced Shopify
You can start with any of these plans for just $1 per month if you sign up through this Shopify trial link.
Enter your payment details to begin with your chosen plan. Alternatively, you can skip this step and select a plan later.
Once completed, a Shopify store will be created in your account, and you can start managing it from the admin panel.
Step 2: Set Store & Brand Details
After setup, you’ll be redirected to the admin dashboard, where you can manage your store. The dashboard includes tabs for managing orders, products, customers, and more.
Note: At this stage, your online store is password-protected, meaning customers cannot access it without a password. You can find and modify this setting in the preferences tab.
To update basic store details, such as your store’s name and address, click on the Settings option at the bottom-left corner of the dashboard.
In the Store details section, you can set the store’s name, phone number, and email address.
Within this section, you can also configure additional settings for your store, such as the display currency, unit system, time zone, and more.
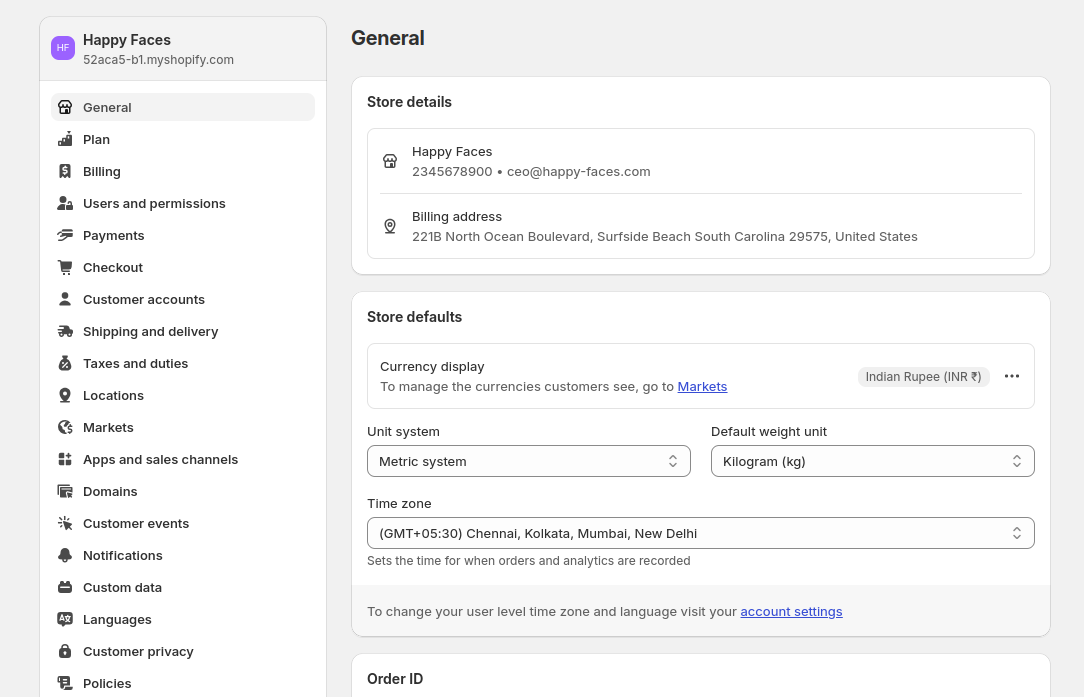
Adjust the settings according to your preferences and save the changes.
In the General settings section, navigate to Brand to configure your store’s branding details. Here, you can:
- Upload your store’s logo
- Set color schemes
- Upload a cover image
- Add your business slogan
- Provide a short description of your store
- Insert links to your social media profiles

These branding details ensure that your store maintains consistency, regardless of the theme you choose.
Once you’ve made your changes, click the Save button.
Step 3: Customize Your Theme
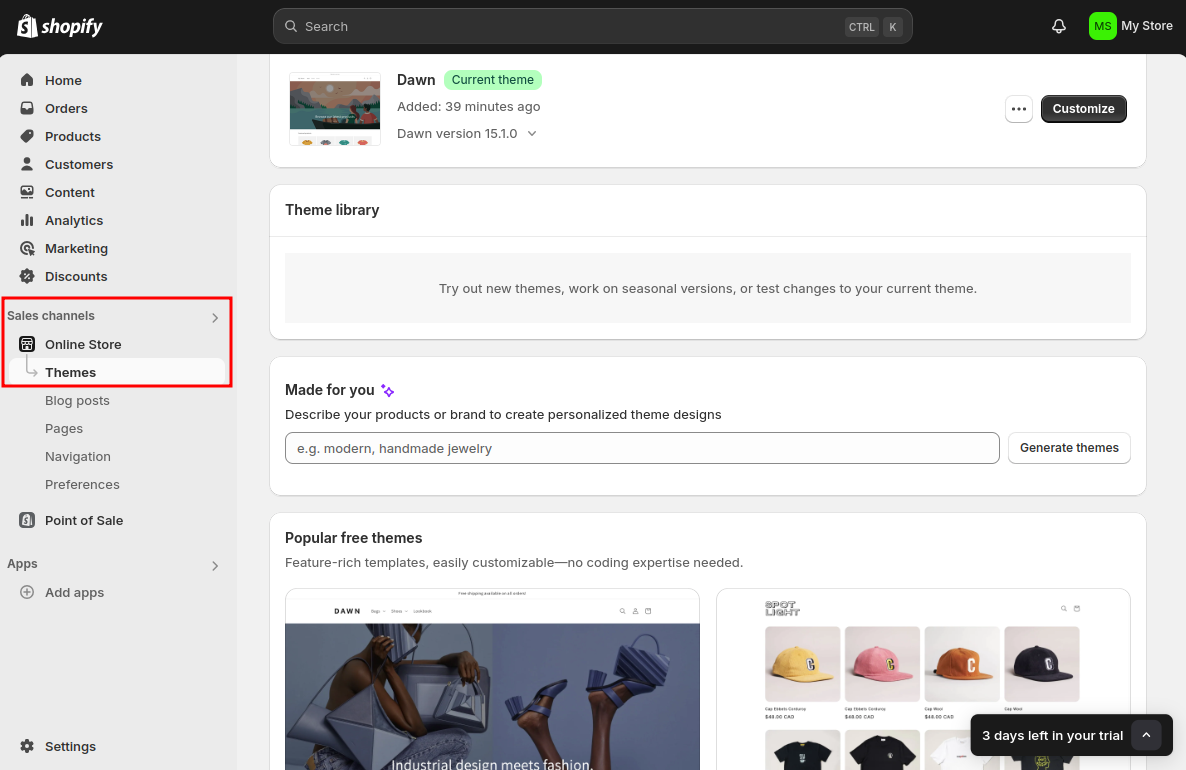
Your Shopify setup starts with the default Dawn theme, but you can easily change and customize it.
In the left-hand menu, navigate to Sales Channels > Online Store > Themes.
Here, you’ll see your store’s current theme along with options to edit it. You can also explore the Shopify theme library to find and apply a theme that fits your brand.
You can modify the layout, content, and overall look of each page in the theme customization. The Shopify theme editor allows you to add and customize various sections of your store.
For more personalization, you can explore custom sections for Shopify to further enhance your store’s appearance and functionality.
Once you've made the desired changes, click Publish or Save to apply the updates to your store.
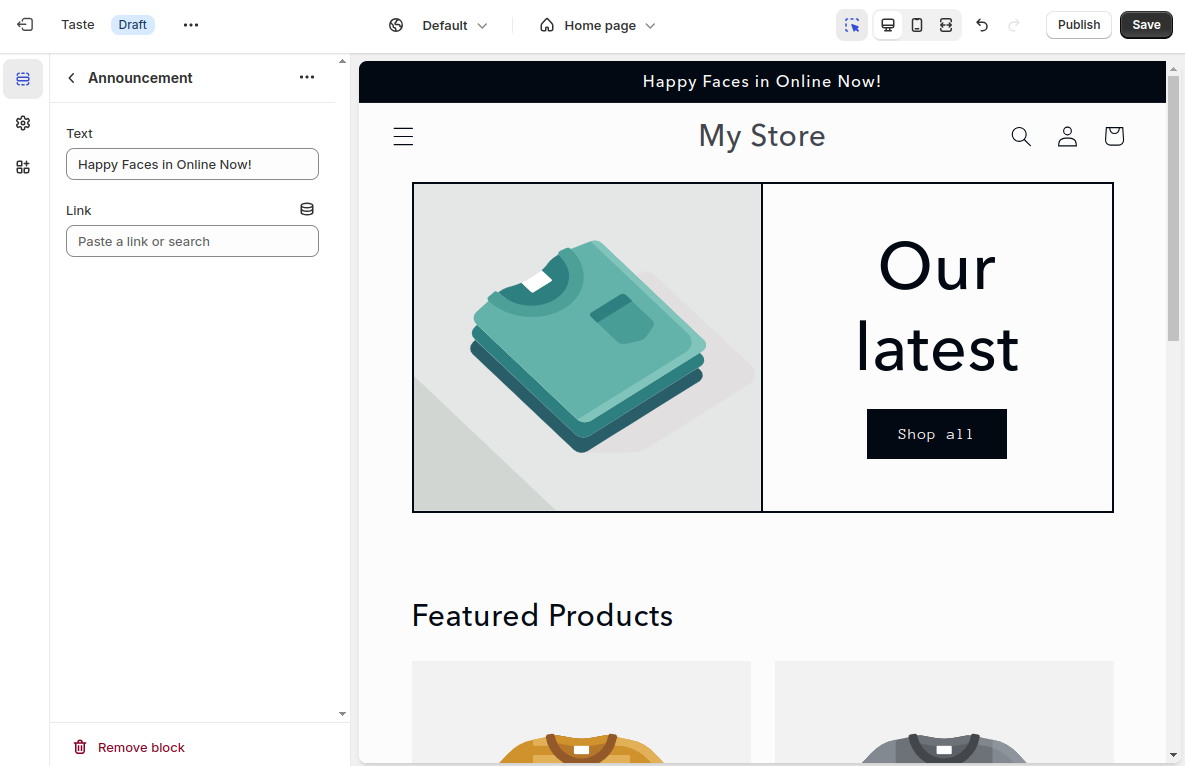
Note: You can have more than one theme in your store. However, only the active or published theme will be shown to customers on the front end. This allows you to customize the theme in draft mode before launching it.
You can always edit any active or draft theme using the Customize button.
If you need advanced customizations, you might need to modify the theme.liquid code. Our experts are here to assist you with that
Step 4: Add Products & Collections
In Shopify, you can either add products manually or import them via a CSV file.
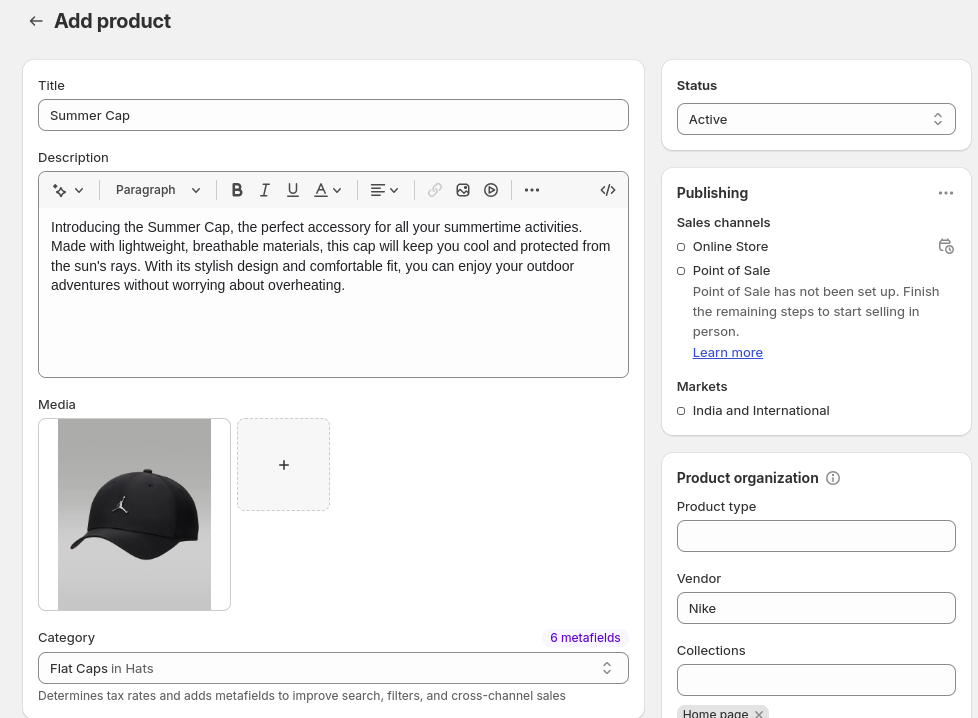
To add products, navigate to Shopify Dashboard > Products and click Add Product.
This will open the product page, where you can add the Title, Description, Media, Brand, and other details. You can also assign the product to collections (categories) or do this later after creating them.
In the Pricing section, you can set the following:
- Price – This is the actual price of the product that customers will pay.
- Compare-at Price – This price is displayed with a strikethrough next to the product price (usually a higher price).
For example, if we set the price to Rs.249 and the compare-at price to Rs.299, it will appear as Rs.249 (Rs.299) on the product page.
You can also add the cost price for the product (which will be used for profit calculation in the backend), as well as the product quantity and weight.
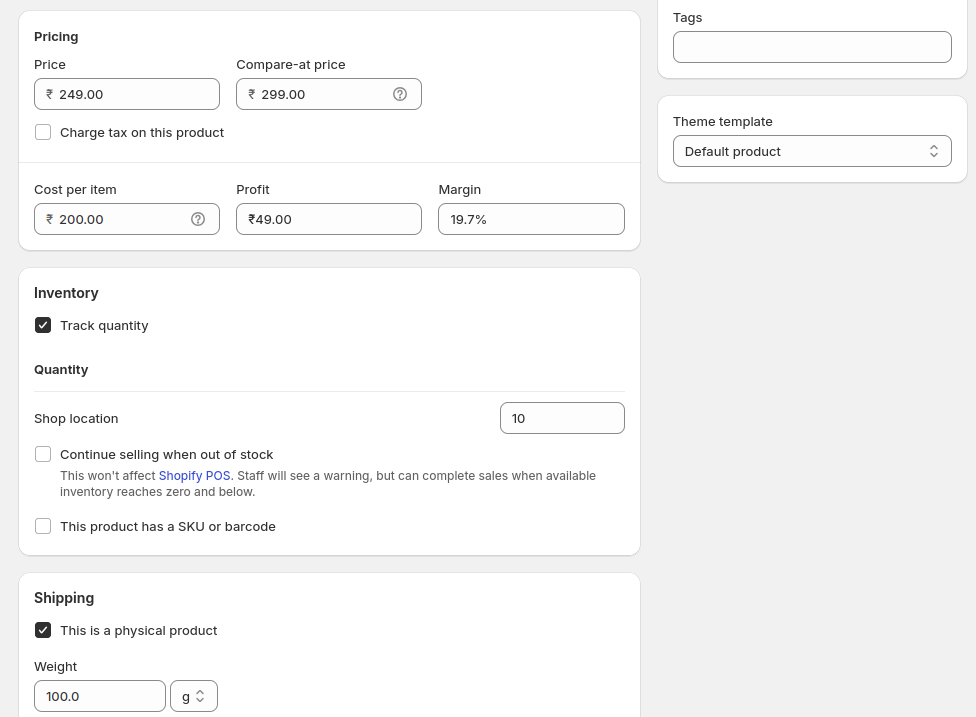
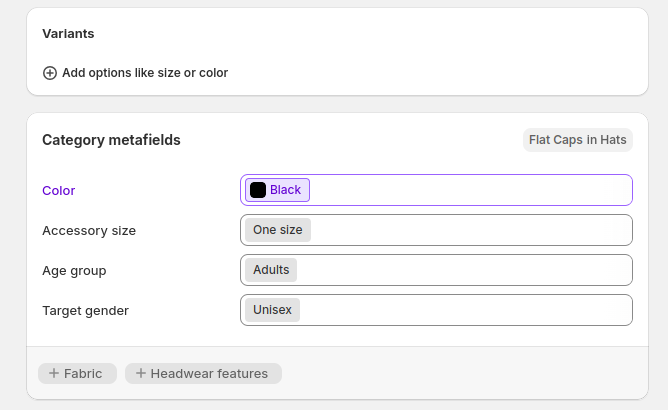
If the product has variants, you can add them and enter details for each option.
Shopify will also suggest meta fields (additional attributes) for the product based on the chosen category. For instance, for the suncap product, you may find fields such as color, size, age group, and gender.
You can customize these details according to the products you are selling.
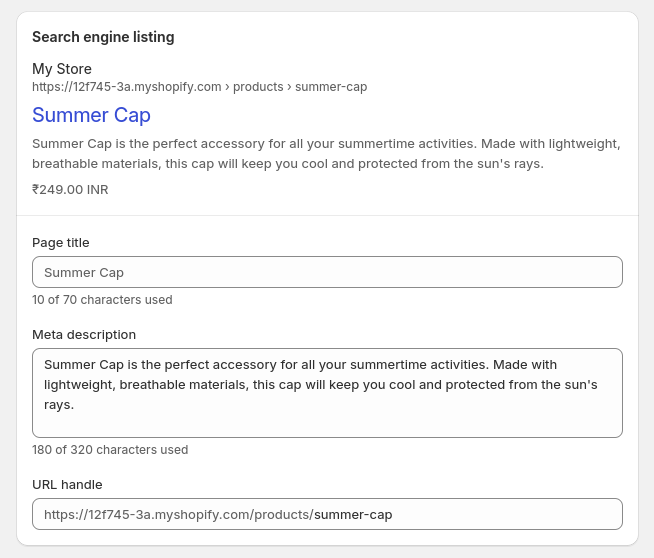
Next, enter the product details for search engine optimization.
Here, you can control the page title, meta description, and URL, which are displayed on search engines. You’ll also get a preview of the product page snippet as you enter these details. Here are some tips for writing optimized SEO details:
- Try to cover the primary keyword in the title, meta description, and URL.
- Keep the URL short and user-friendly.
- Avoid including stopwords like “the”, “and”, “or” in the URL.
- Write the title under 60 characters and the meta description under 158 characters.
- Include actionable words like “Buy Now” in the meta description.
If you prefer not to do it yourself, you can use the AI content app for Shopify to generate product descriptions, titles, and meta descriptions. It’s free to get started.
Finally, save the product.
You can change the visibility of the product in the store by adjusting its status: Active (displayed in the store) or Draft (not displayed in the store).
In Shopify, product categories are referred to as Collections.
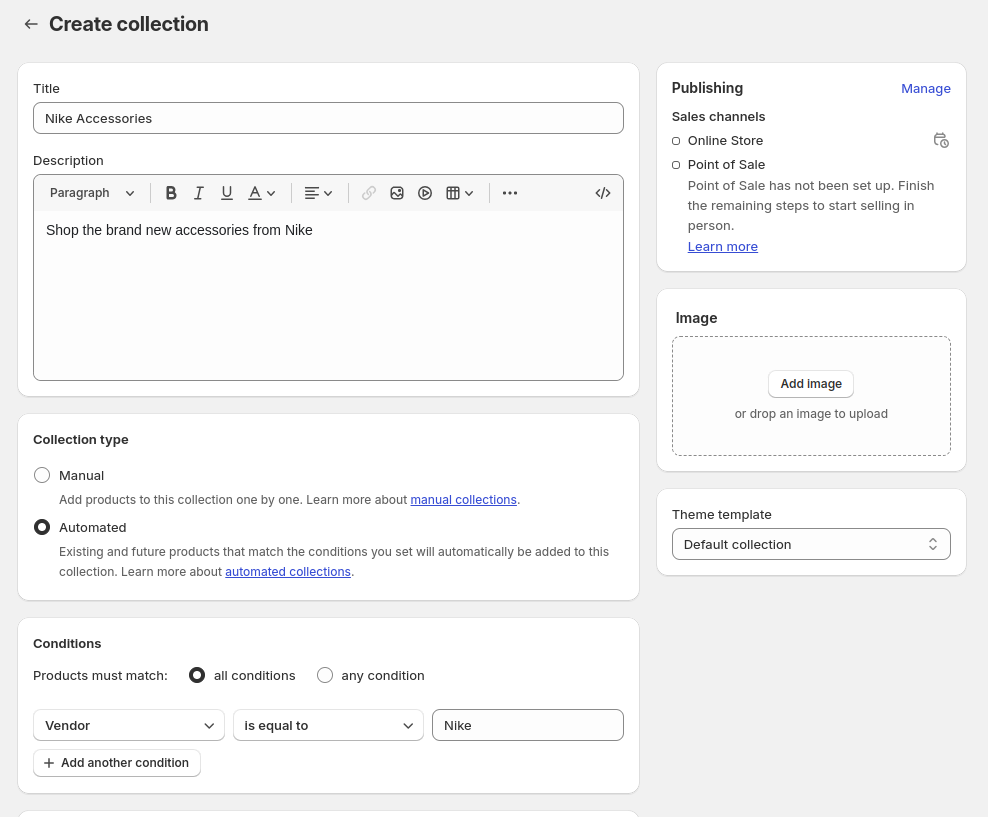
To create and manage product collections, go to the Collections tab in the left menu. Here, you can create two types of collections:
- Manual – Assign products to the collections manually.
- Automated – Automatically assign products to the collections based on specific conditions.
For example, we have created an automated collection for Nike Accessories that adds products with Nike as a vendor. You can also include details like a description and an image.
Create all the required collections in the store as per your requirements and organize the product listings.
Step 5: Create Pages
In addition to products and categories, you may want to add other pages in your store. For example, the About Us page, contacts page, and privacy policy.
You can add and manage these pages from the Online Store > Pages section in the admin panel.
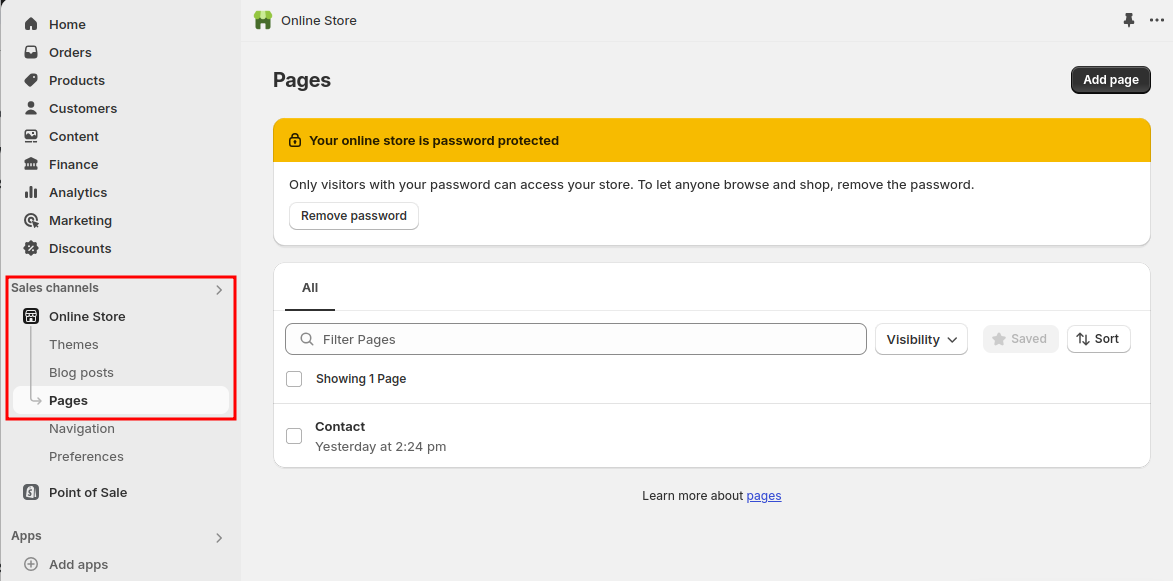
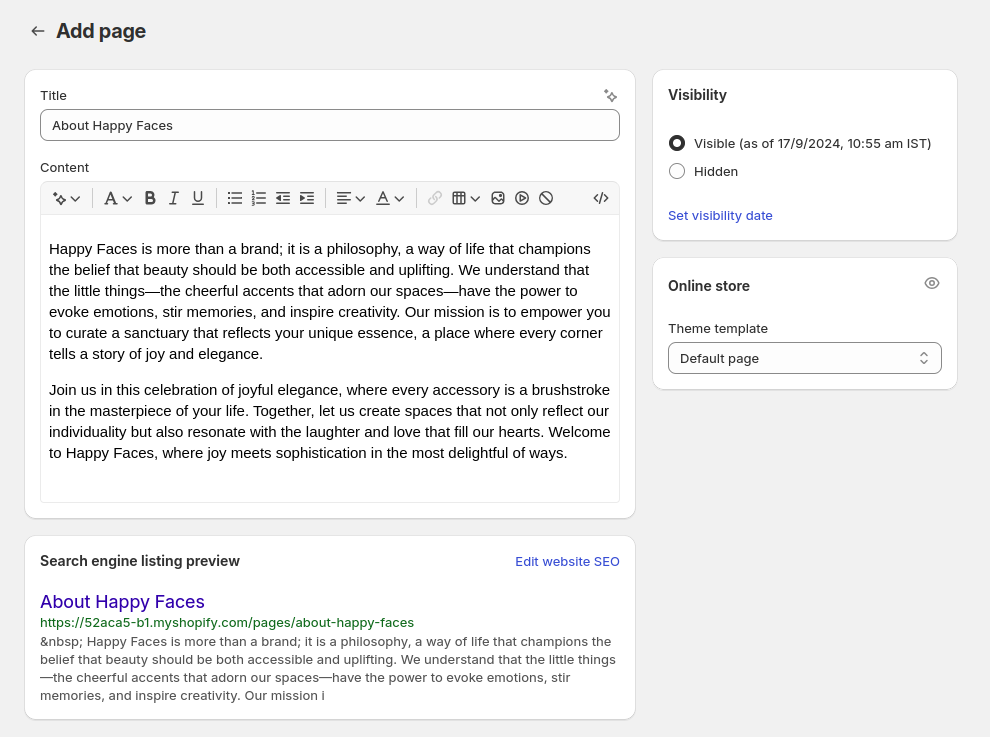
You can add the page title and description and set SEO details like page title, meta description, and URL. In case you’ve created templates for the pages, you can also choose the template you want to apply.
Create all pages required to create a Shopify store and a good experience for customers.
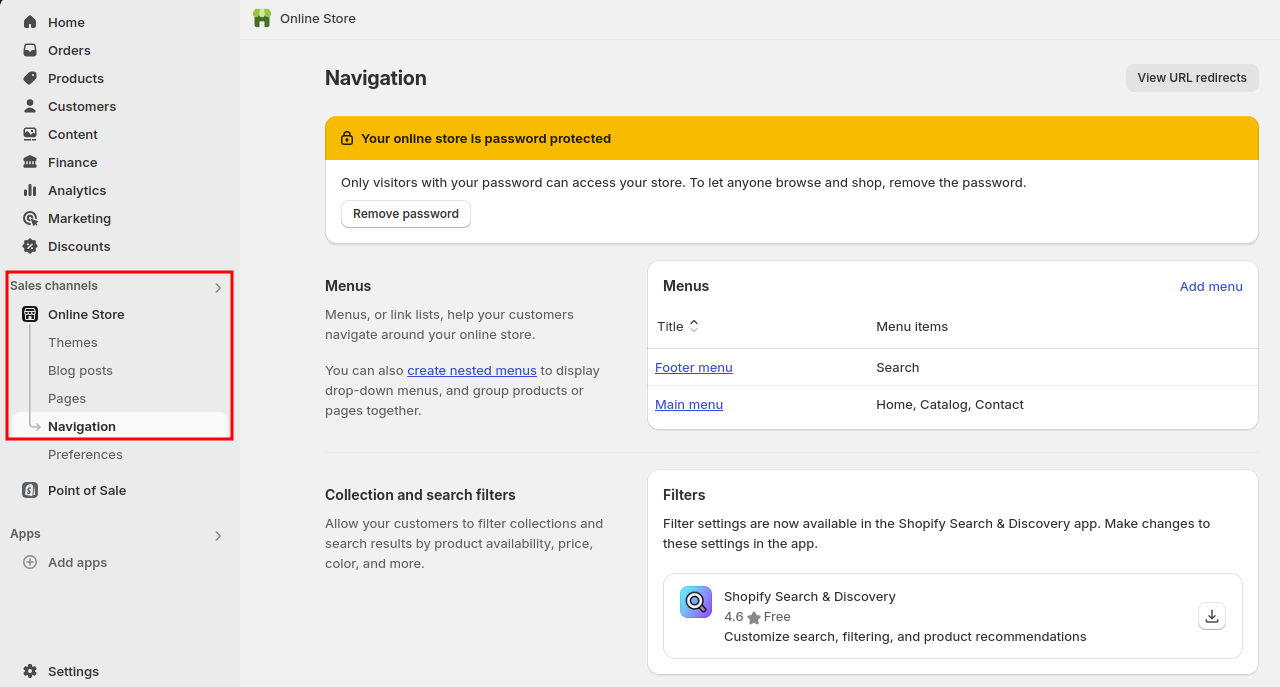
Step 6: Customize Navigation Menu
By default, the Shopify menu bar may contain a few links like home, catalog, and contact. You may want to customize the top menu bar to include links to product collections and other important pages.
Go to Sales Channels > Online Store > Navigation, where you can find the menus added to the store and also create new ones.
In this example, we have the Main menu that appears in the header of the website.
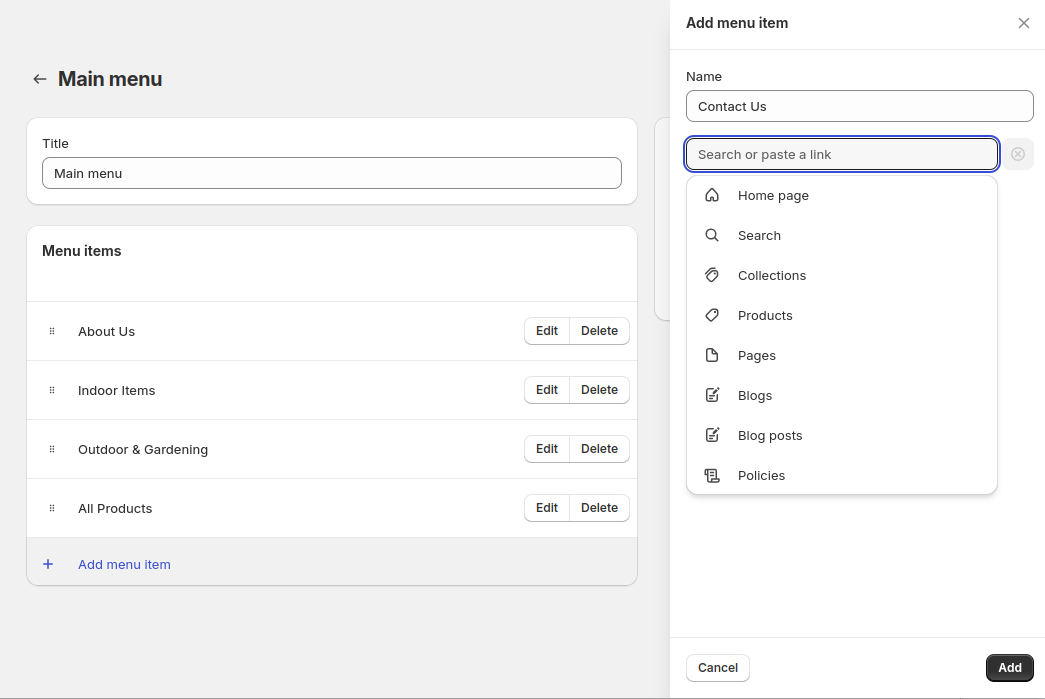
You can edit the menu and modify each element as per your preferences.
For example, you can add links to:
- Collections
- Products
- Blog Posts
- Pages
- Policies
Once you’re done customizing the menu bar, click Save.
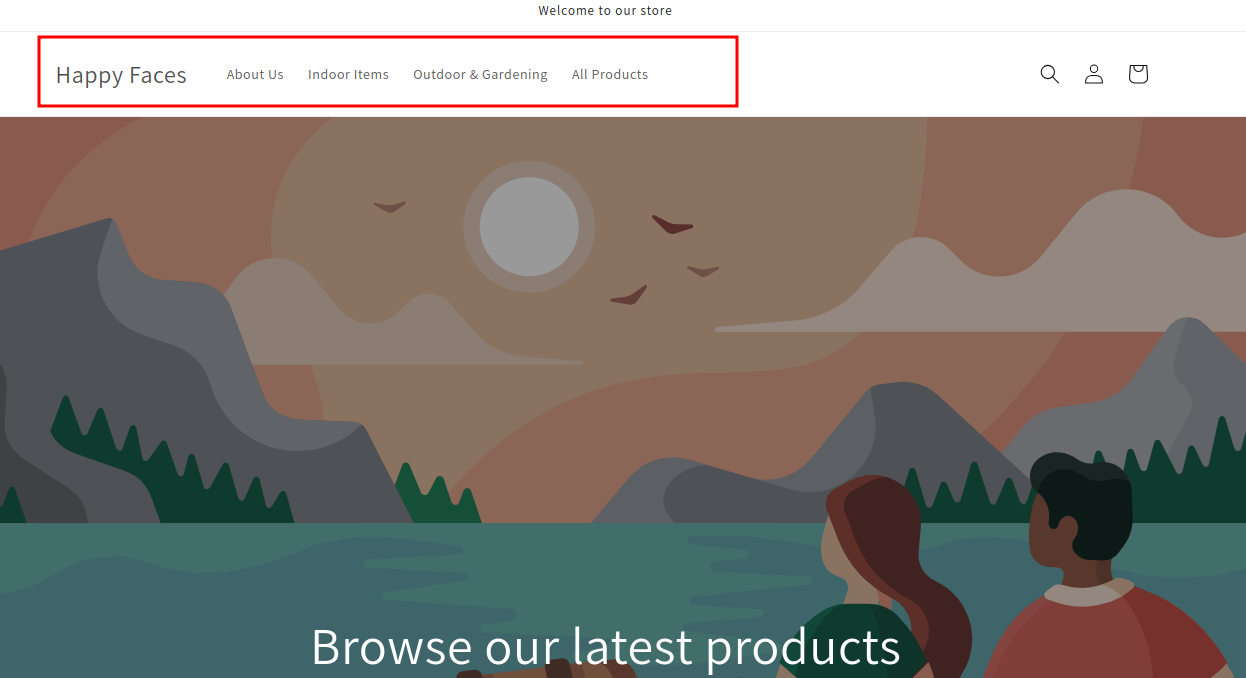
Here’s what the modified menu bar looks like on the front end.
You can change the position and appearance of the menu bar from the Online Store > Themes > Customize settings.
Step 7: Set up Payment Methods
To accept payments from customers, your store must have a payment gateway.
Go to Payment Settings, where you can set up payment methods for the store. You can choose the default Shopify Payments option if it’s available or other payment methods like PayPal.
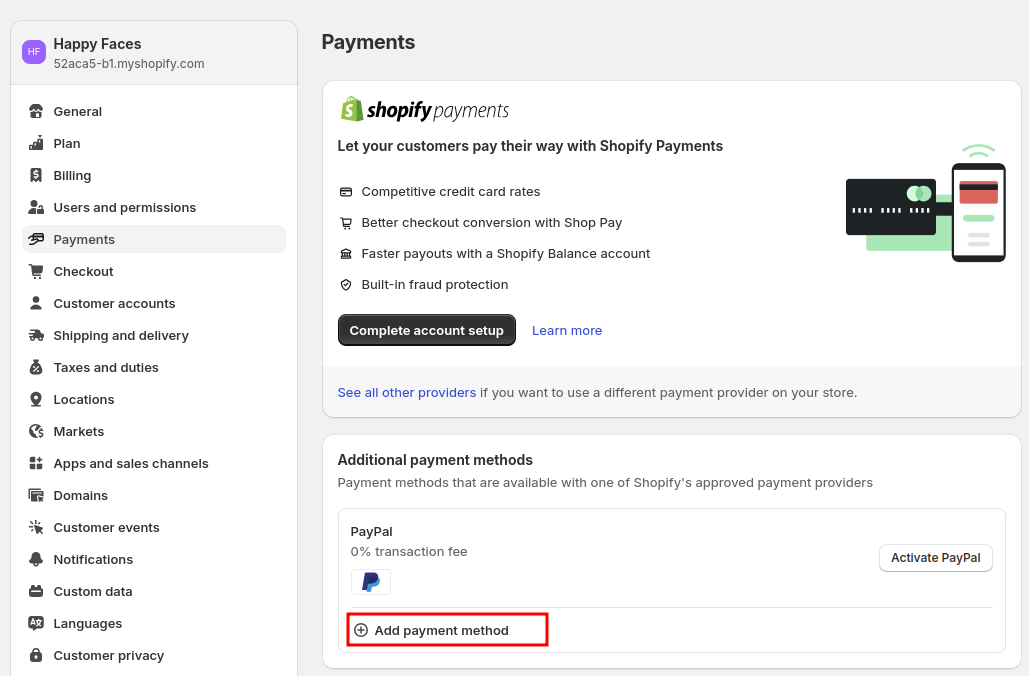
You can also search for available options by payment methods (like Credit Cards) or provider name. For example, let’s say we want to add the UPI Payment method in the store, we can choose from any of these service providers.

It’s important to consider the payment provider’s transaction fees and settlement policies before choosing them.
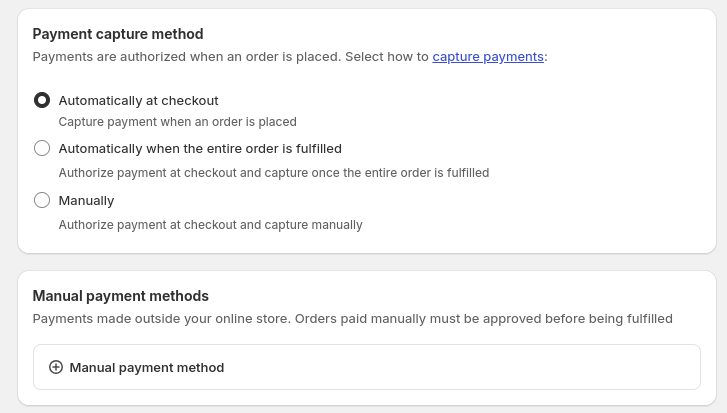
You can also set the default capture method for the payments from the following:
- Automatically at checkout – The amount is deducted when the customer places the order
- Automatically when the entire order is fulfilled – The amount is deducted when the order is marked fulfilled in Shopify
- Manually – You have to manually deduct the amount from the customer’s payment method
In addition to online payment methods, you can also add manual methods like Cash On Delivery and Cheque to accept offline payments.
Step 8: Configure Shipping & Taxes
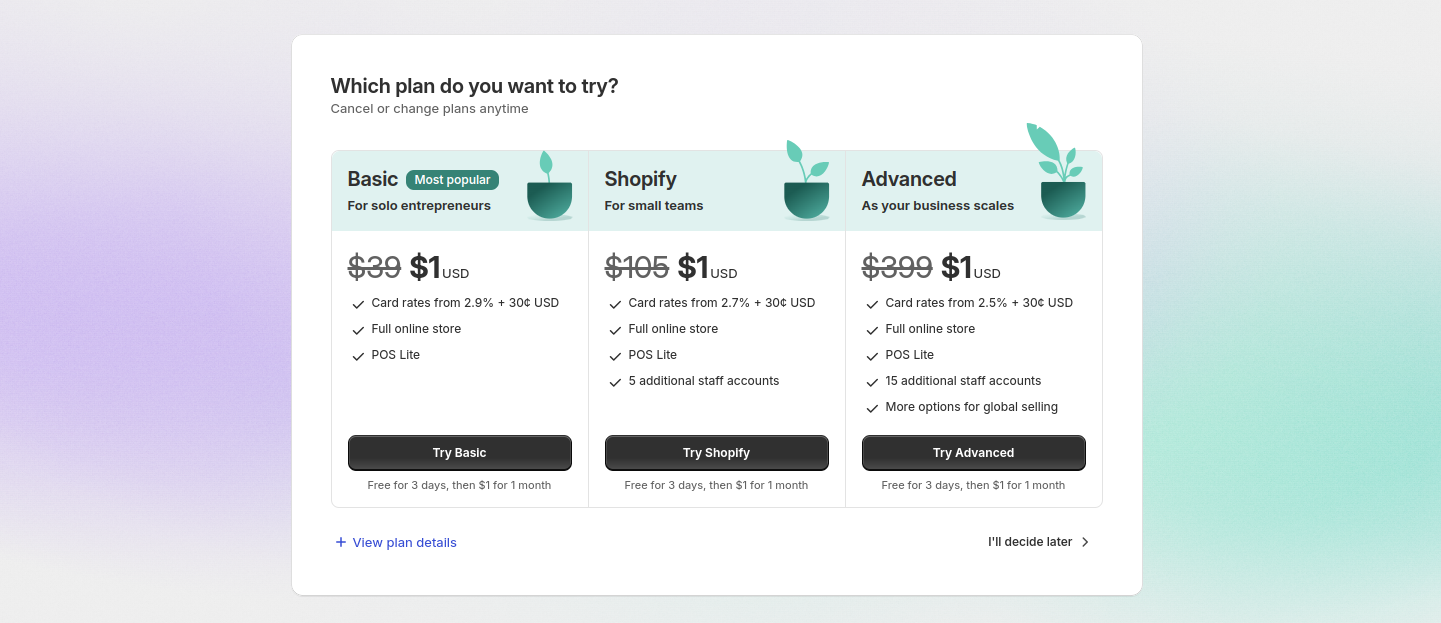
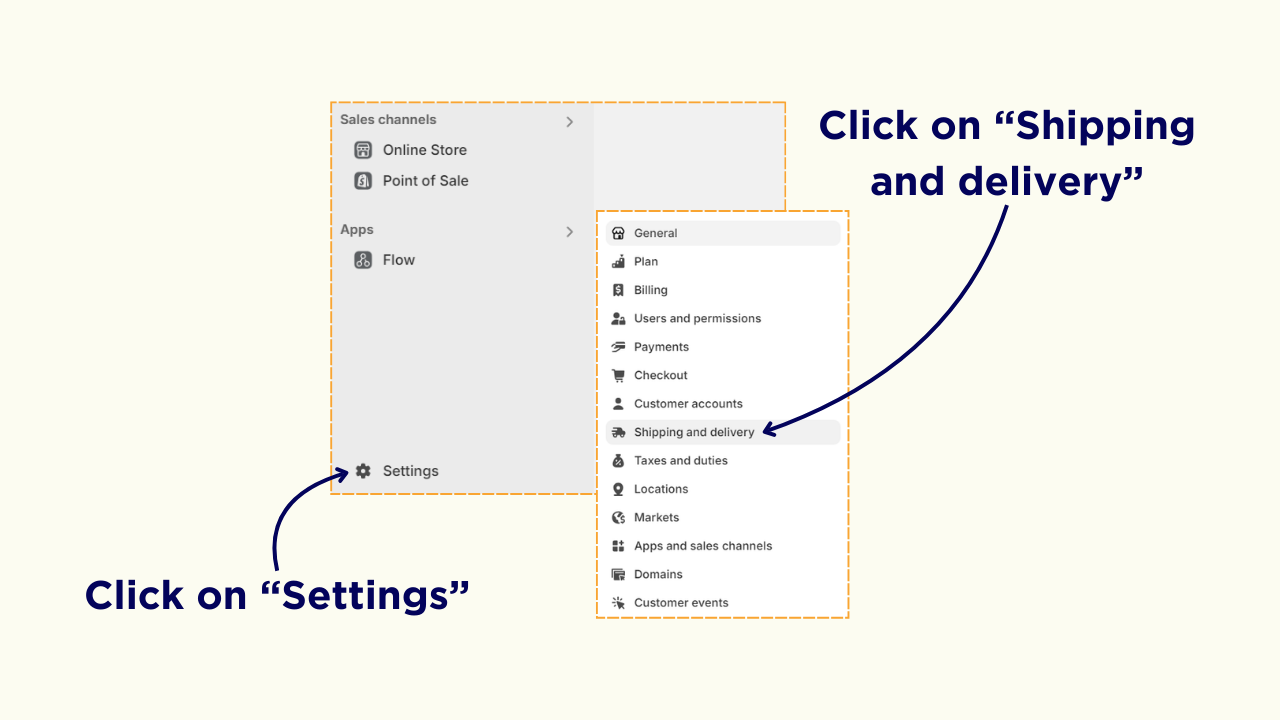
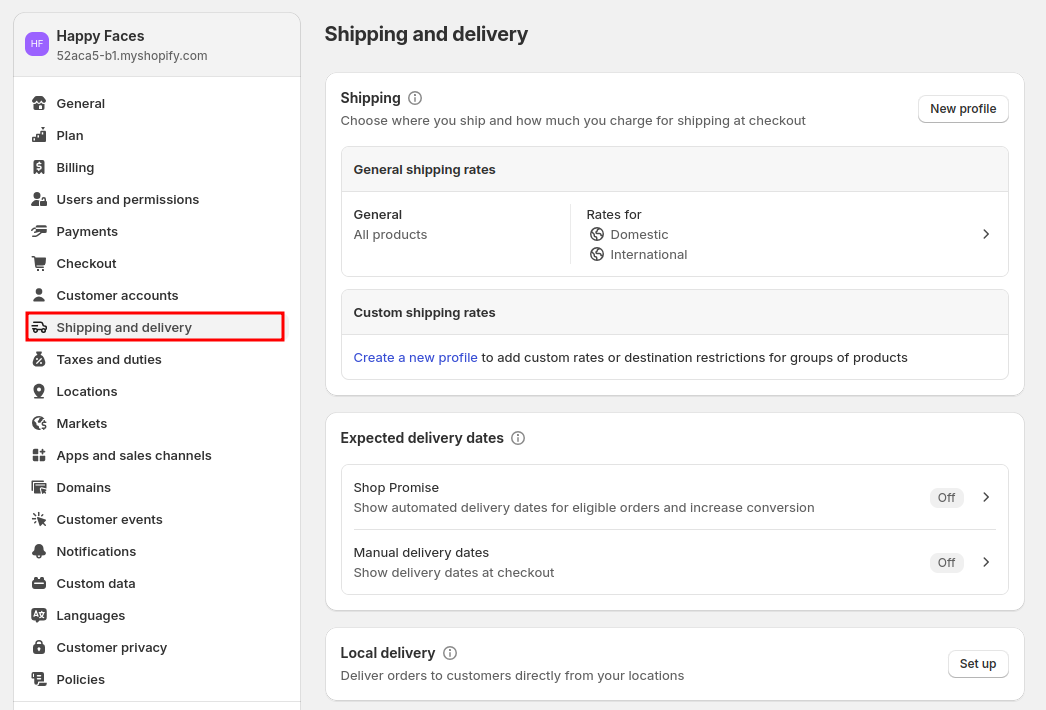
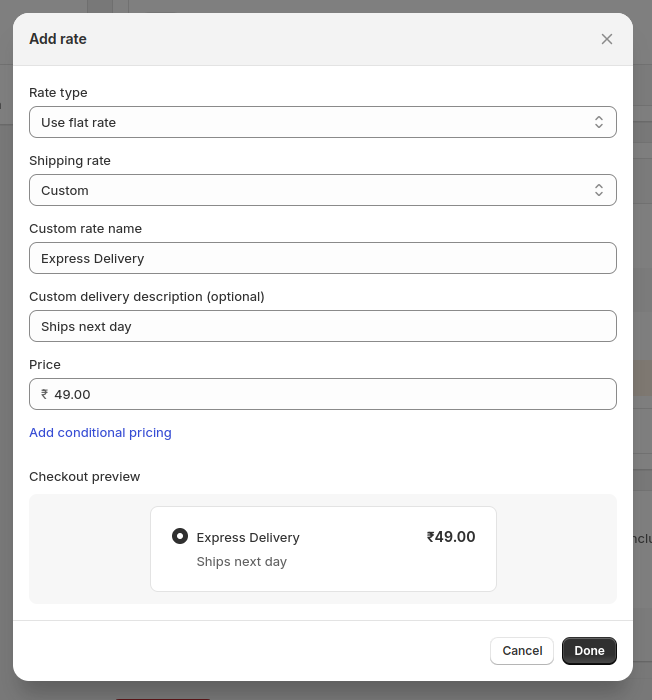
In Shopify admin > Settings > Shipping and Delivery, you can add shipping methods in the store and configure their rates.
Here, you can find shipping options like:
- Set domestic and international shipping rates
- Create shipping profiles for custom rates
- Set expected delivery dates for orders
Create a new shipping profile, choose the shipment source and applicable destinations, and choose the rates. In this example, we add flat-rate shipping to all products in the store. However, you can also dynamically calculate shipping based on products or use apps for shipping rates.
You must set up rates for all the markets you sell as per your shipping strategy.
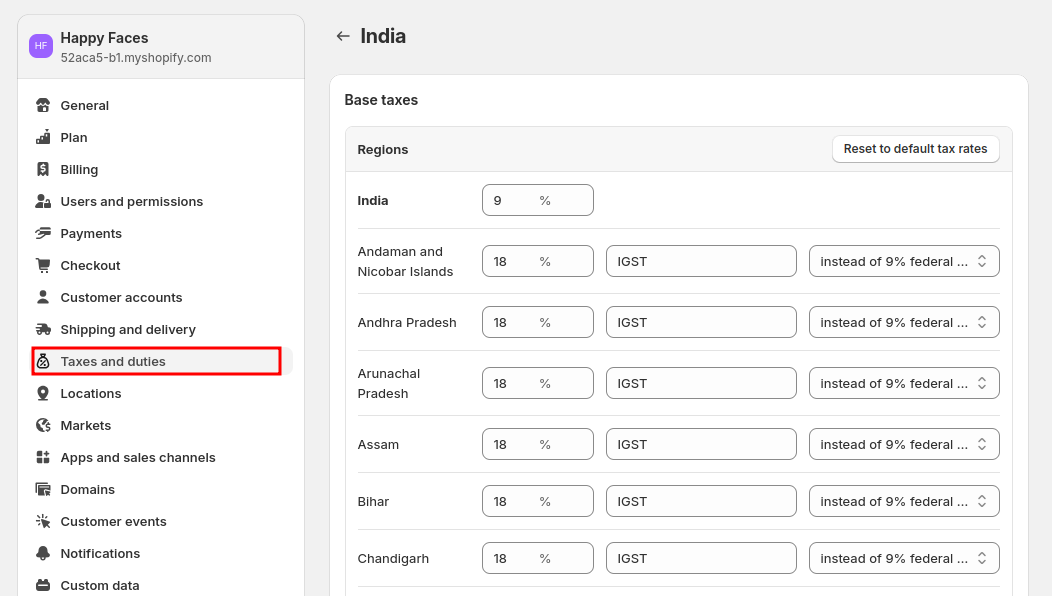
If you’re selling taxable goods, you can set up the duty rates and find tax settings for different regions from the Settings > Taxes and duties section.
The additional fees like shipping and taxes will be added to the sub-total to the cart during checkout.
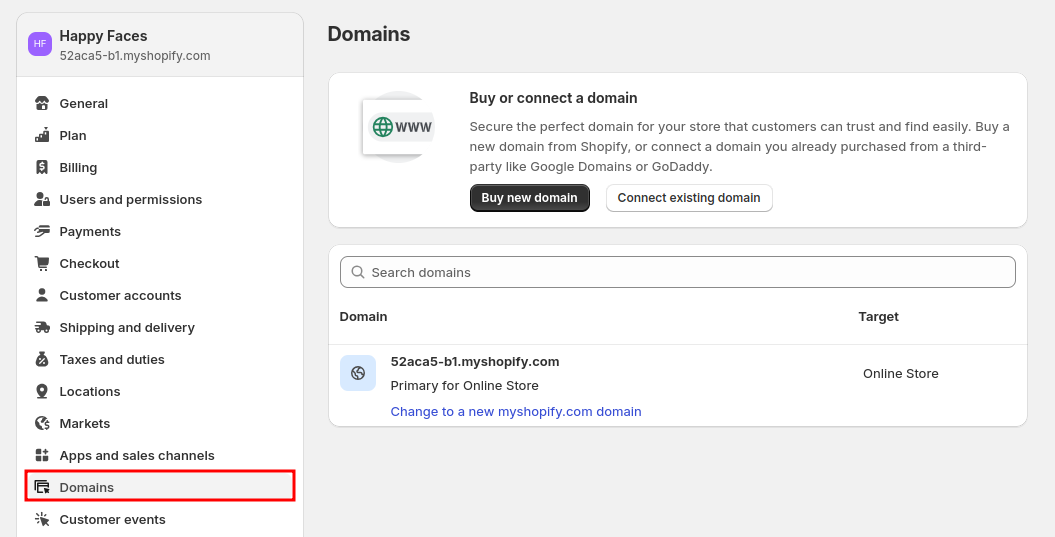
Step 9: Connect Domain
The Shopify domain is the address (e.g. mavenbird.com) using which people can view your store. By default, the Shopify store comes with a free sub-domain, which is something like your-store-name.myshopify.com, which may not be suitable for branding.
You can connect your custom domain (if you’ve one) or buy a new one from Shopify. It costs some extra domain registration fees annually.
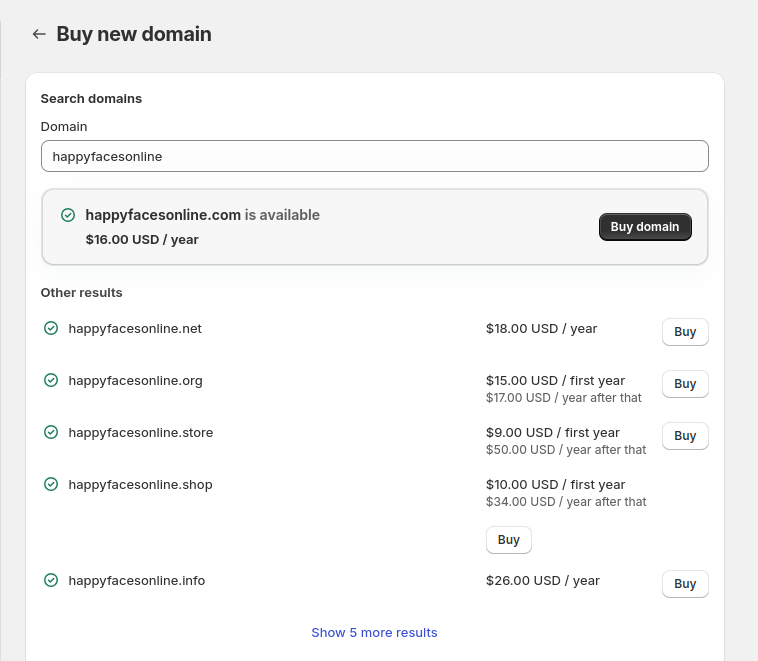
Look up the domain for your store and you’ll be able to see the available options.
In our personal opinion, domains that end with .com should be preferred.
Step 10: Final Launch
Once everything looks good, it’s time to launch the website and allow potential customers to access it. Go to your Shopify admin > Preferences tab and remove the password protection from the store.
Here are the further steps:
- Set up Google Search Console property and submit a sitemap so that Google can find the pages
- Connect your Google Analytics with the store to monitor and analyze its performance
- Try placing a test order and go through the checkout process to ensure it’s working fine
- Let your customers know about the new store through social media posts
- Build a marketing strategy to attract existing customers to the store
In case you need any help setting up a Shopify store and customizing it, you can hire our expert developers at an hourly or fixed rate. Our experts can help you customize the design, implement new features, improve SEO, and make your store user-friendly.
Important Things to Consider After You Create a Shopify Store
Getting your business online with Shopify is great. But, it’s not enough to launch a store and wait for the customers to come in and place orders. Remember, there are millions of Shopify stores (like yours) online and the chances of your website getting lost are very high!
You need a solid marketing strategy, good products, and a customer-centric approach. Some areas you can focus on are:
- Increasing organic traffic
- Improving conversion rates
- Monitoring customer retention rates
One good plan is to focus on the products and business while collaborating with experts to take care of your store. Mavenbird offers expert services to help you achieve your business goals faster with over a decade of e-commerce expertise.